How to Make an Organic Emulsion for Skin Care
If you have ever made a vinaigrette or mayonnaise, you already know how to make an emulsion. An emulsion is a creamy mixture of oil and water with an emulsifier to keep droplets of one suspended in the other. In a vinaigrette, the emulsifier is mustard. In mayonnaise, the emulsifier is egg yolk. In natural creams and lotions, the emulsifier is often beeswax or lecithin. You can use organic oils and distilled water to make an organic emulsion, adding herbal essential oils for their fragrance and healing properties 12.
Wash the pan, blender and other tools in hot, soapy water, then rinse thoroughly in hot water and allow them to air dry on clean towels. Cleanliness is very important to prevent contaminating your organic emulsion with bacteria, viruses or fungi.
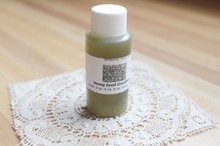
How to Make Face Cream Using Rosehip Oil
Learn More
Measure oils and beeswax, and combine in the stainless steel saucepan. Stir over low heat until the beeswax has melted and the oils are combined thoroughly. Allow the oils and beeswax to cool for 15 minutes so that you are working with warm, not hot, oils. Combine the aloe vera, water and essential oil in a measuring cup.
Pour the warm oil mixture in your blender, put the lid on and start blending. Through the opening in the top, slowly pour the water and aloe vera mixture into the oils. Keep blending until the mixture has emulsified and is cool.
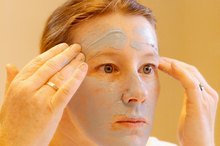
How to Get Rid of Deep Clogged Pores
Learn More
Scrape the emulsion into the container you have ready, and store in the refrigerator as there are no preservatives in this recipe. Use whenever you need a face cream, night cream or soothing hand lotion.
Tips
You can add up to 1/3 cup more water to make a lotion rather than a cream.
Use your favorite essential oils in place of chamomile or geranium. Use a tablespoon or two of organic vegetable glycerin in place of some of the water. Glycerin is a humectant that draws water out of the air to your skin.
Warnings
If you have never applied some of these ingredients to your skin before, do a patch test 24 hours before using your organic emulsion. Put a dab of the ingredient you aren't sure about on your arm and place a bandage over it. Wait 24 hours to see if there are any adverse reactions.
Avoid contaminating your cream or any face cream. Use a washable cosmetic spatula to remove cream from the jar, rather than dipping it out with your fingers.
Related Articles
How to Make Face Cream Using Rosehip Oil
Learn More
How to Get Rid of Deep Clogged Pores
Learn More
How to Apply Hempseed Oil to Hair
Learn More
How to Use Glycerin on the Face
Learn More
How to Treat Cracked Skin on the Hands
Learn More
Is It Possible to Tighten the Skin With Mustard Oil?
Learn More
How to Make Bee Pollen Face Cream
Learn More
How to Make a Rosemary & Olive Oil Infusion
Learn More
How to Use Ginger Topically For Fat Burning
Learn More
How to Make Natural Massage Gel
Learn More
References
- "Natural Beauty Recipe Book: How to Make Your Own Organic Cosmetics and Beauty Products;" Farrer-Halls, G.; 2006
- "Organic Body Care Recipes: 175 Homeade Herbal Formulas for Glowing Skin & a Vibrant Self;" Tourles, S.; 2007
- "Making Herbal Hand Creams and Salves;" Weinberg, NP; 2000
Resources
- "Making Aromatherapy Creams and Lotions;" Donna Maria; 2000
Warnings
- If you have never applied some of these ingredients to your skin before, do a patch test 24 hours before using your organic emulsion. Put a dab of the ingredient you aren't sure about on your arm and place a bandage over it. Wait 24 hours to see if there are any adverse reactions.
- Avoid contaminating your cream or any face cream. Use a washable cosmetic spatula to remove cream from the jar, rather than dipping it out with your fingers.
Writer Bio
Ramona French owned a massage school and taught massage for 28 years. In that time she wrote textbooks on Swedish, acupressure, deep tissue and lymph drainage massage. She is the author of "Introduction to Lymph Drainage Massage" and "Milady's Guide to Lymph Drainage Massage." Her book, "The Complete Guide to Lymph Drainage Massage," published by Milady, was released in October 2011.