Geo-grafika/iStock/Getty Images
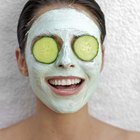
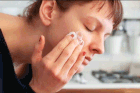
There are few things more embarrassing and damaging to a person's self image than acne. There are also few things more frustrating than spending a small fortune on chemical-laden products that don't seem to work. One alternative is making your own face masks for acne with natural ingredients you probably have at home. Some of these are so easy and inexpensive, there is really no reason not to try them.
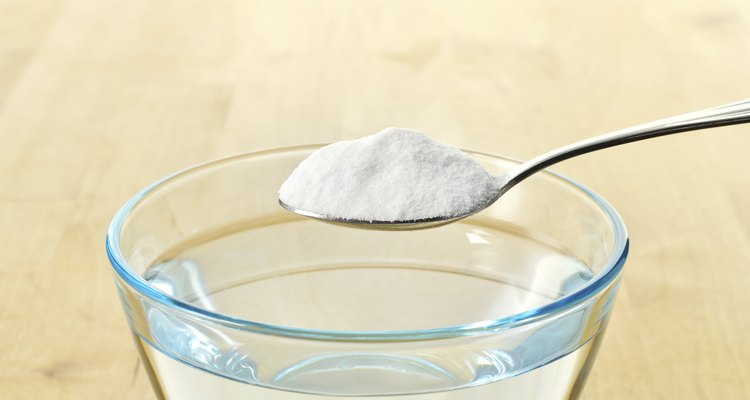
Baking Soda and Water
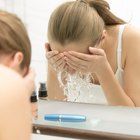
This is probably the most simple yet effective homemade mask for acne. Make a paste by adding water to baking soda until it is the consistency of thin dough and apply it to your freshly cleansed face. After the mask has dried, rinse it off with warm water. This mask is gentle enough to use several times a week.
Egg Whites and Lemon Juice
Separate the yolk from the white part of an egg using an egg separator. Beat the egg white, and the juice from 1/2 a lemon, until fluffy peaks form. Open your pores slightly by rinsing your face with warm water first, then apply the egg whites. Allow the mask to dry for about 30 minutes, then rinse off with warm water.
Aspirin
Crush six uncoated aspirin tablets in a clean coffee grinder or food processor, or just smash them between layers of waxed paper with a mallet or rolling pin until you create a fine powder. Combine the aspirin with 1 tablespoon of hydrogen peroxide to form a paste. Apply this paste to your face and leave it on for 15 to 20 minutes before rinsing thoroughly.
Oatmeal
Oatmeal baths have been used to treat a variety of skin conditions such as poison ivy for many years. You can also use an oatmeal mask to treat acne. Prepare plain, not-instant oatmeal according to package directions. Let it cool to a warm room temperature, and then apply it to your face. It will take about 15 minutes to dry, after which you can rinse it off with warm water. This mask can be used as often as twice a day until you start to see improvement in your acne.
Carrot Paste
Carrots are rich in Vitamin A, a vitamin known for its ability to help reduce the redness and scarring caused by acne. Clean and shred an adequate amount of carrots--one large carrot should be enough for one application--and use a food processor to turn it into a sticky paste. If the paste is not thick enough to stay on, add flour to thicken it. Apply it to your face and leave it on for 10 minutes. Use this treatment every couple of days. Carrot juice applied to the face will produce similar benefits to the mask.
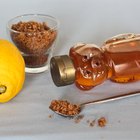
Tomato, Honey and Camphor Lotion
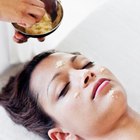
Mix 1/2 tsp. camphor lotion and 1 tsp. each of tomato juice and honey to form a sticky paste. Apply the paste to your face and let it stay on for 15 minutes. Rinse it off, first with lukewarm water and then cold water to tighten your pores.
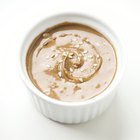
Homemade Charcoal Mask
Activated charcoal masks are frequently marketed by large cosmetics lines. You can easily make yours at home without the expensive price tag. Crush a few charcoal tablets, available at most drug or health food stores, until you have about 1 tsp. charcoal powder. Mix this with 1 tsp. aloe vera gel or juice, 5 drops tea tree oil, 1 tsp. purified water and a pinch of sea salt. You can make a large batch and store it in the refrigerator for up to 5 days.
Related Articles

Can Any Home Remedies Get Rid of Acne ...

Calories in Banana Pancakes

How to Remove Scars With Nutmeg
Instructions for Using Mandelic Acid
How to Cook Arrowtooth Fish

How to Use Honey & Cinnamon to Treat ...
How to Make a Banana, Honey & Yogurt ...
How to Use Cucumber Juice as a ...
Tahini & Acne
Nutmeg and Turmeric for Acne Scars
Homemade Ways to Look Tan
How to Make Tomato Bruschetta

Things to Make With Instant Potato Mix
Yogurt Face Mask for Acne
How to Exfoliate Acne Scars
How to Get Rid of Blackheads With ...
How to Make Body Scrub With Olive Oil & ...
How to Use a Toner on the Face
Homemade Facials to Clear Blemishes

How to Make Fresh Strawberry Frosting ...
References
- Glamour: What’s Your Favorite Homemade Face Mask Recipe?
- "The Green Beauty Guide: Your Essential Resource to Organic and Natural Skin Care, Hair Care, Makeup, and Fragrances"; Julie Gabriel
Writer Bio
Laura W. Smith has worked as a freelance writer since 2007, producing content for various online publications. She has worked as a women's fitness trainer for three years and specializes in health and fitness topics. Smith holds a bachelor's degree in music education from Baptist Bible College and has studied journalism at Wayland Baptist University.
Photo Credits
Geo-grafika/iStock/Getty Images