
How to Attach a Basketball Backboard to a Wall
Basketball hoops are usually attached to a metal pole or an apparatus that ensures the pole won't flip over. However, it is possible to mount a basketball backboard to a wall on the outside of your house or on the wall above your garage. Backboards are made of various materials. Some are made of glass, while others are made of fiberglass, aluminum or acrylic. Higher quality backboards require more advanced devices to connect them to the wall, while lesser quality backboards can simply be mounted easily.
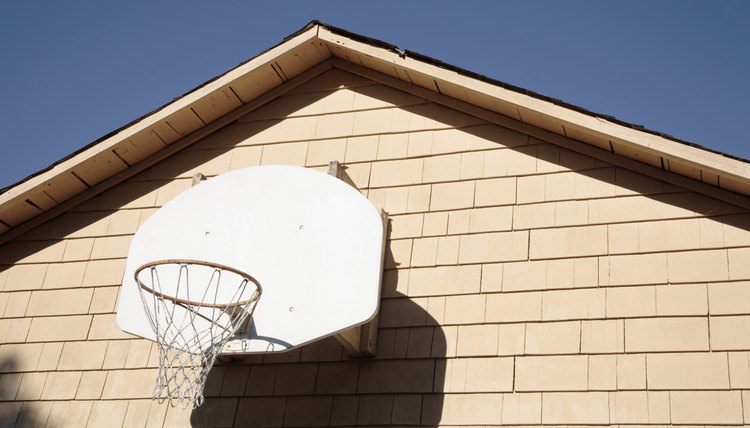
Determine where you would like to place the backboard. Wherever you choose to attach it, the wall must be completely straight, void of any angles or slopes. The best surface for the ground, in order to dribble the basketball effectively, is concrete or asphalt.
Purchase the basketball hoop, net and backboard. Instructions for how to install the equipment should come with your purchase. Regardless, the process is very similar for any backboard.
Attach the mounting bracket to the wall. You can do this using screws and a power drill. If you do not have a power drill, a screwdriver may be used. If the backboard you bought did not come with a mounting board, purchase one from any sporting goods store.
Attach the basketball hoop to the backboard. There will be pre-drilled holes in the backboard for where to place the hoop. Use screws and a drill to attach the hoop.
Attach the backboard to the mounting bracket or the wall. If you are using a mounting bracket, attach the board using bolts, nuts and washers. You will need a wrench to attach this. Tighten every bolt securely to ensure that the backboard will not move at all. If you are attaching it directly to a wall, use the pre-drilled holes in the backboard to drill it into the wall. Screws must be inserted into the holes and tightened using a drill. A screwdriver may be substituted for a drill.
Attach the net to the basketball hoop. The strings will fit through the metal loops under the rim. Do not skip any loops or you will have to start the process over.
Tips
Have a second person help you install the backboard or spot you, in case the backboard falls.
References
Writer Bio
Alan Bass has been writing since 2008. His work focusing on sports topics has appeared in the "Hockey News" and online at Inside Hockey and HockeyBuzz. He received a presidential award from Muhlenberg College for academic and community achievements, in addition to a bachelor's degree in psychology and business. In 2011, he published a book titled "The Great Expansion: The Ultimate Risk That Changed the NHL Forever."