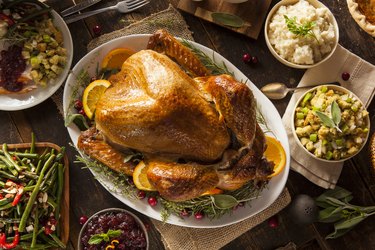
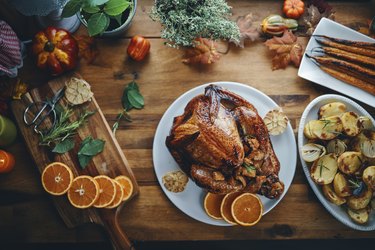
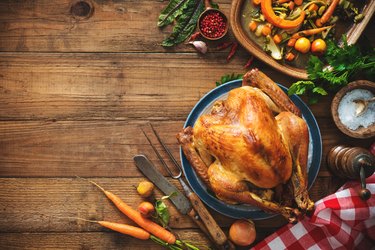
Faced with a turkey that needs roasting, many home cooks turn to a not-so-secret weapon: an oven-safe cooking bag. Using one yields a moist, juicy bird — and not to mention, cuts down on cleanup.
But cooking turkey in an oven bag is not without its drawbacks. For instance, you won't get the show-stopping brown skin. And getting a raw turkey in an oven bag, and later, removing a cooked one, can get unwieldy.
Video of the Day
Video of the Day
Another option to the oven bag: braising the turkey — in other words, roasting in a steamy, enclosed environment. Braising is a good option when cooking a large, potentially tough turkey.
Oven Bag Substitutes
The big benefit of the oven bag method is that the turkey can cook in its own liquids in a moist environment — this helps combat the dreaded result of dried-out meat.
But an oven bag isn't the only way to achieve this moist, contained environment. Here are two alternatives:
- A pan with a lid: Like an oven bag, braising the bird this way is a moist-heat cooking method, according to the University of Illinois Extension. The potential downside to this method: Finding the right pan. A Dutch oven or a roaster with a lid will do the trick, but you'll need to check that the lid fits on securely when the bird is in place.
- Aluminum foil: If the lid doesn't fit securely, you can cover the roasting pan with aluminum foil or wrap the turkey loosely in aluminum foil. This may be a bit of a clumsy process (and will require a lot of foil) but using an oven bag or braising the bird in a covered pan allows it to steam, leading to moist turkey, according to the University of Illinois Extension. The turkey is covered with foil, so you can cook at a higher heat, which can cut down on your cooking time, per the USDA.
How to Braise a Turkey in a Roasting Pan
Hold onto the liquid at the bottom of the pan once your turkey is completely cooked — it can be used to create a flavorful gravy.
Things You'll Need
Turkey, thawed, with the giblets removed
Medium onion
4 ribs of celery
4 carrots
Garlic (optional)
Bacon (optional)
Herbs (optional)
3/4 stick butter
Frying pan
Large roasting pan with a tight lid
Stuffing (optional)
1 qt. chicken or turkey broth
Cooking spoon or baster
Food thermometer
Step 1: Preheat the oven to 350 degrees Fahrenheit.
Step 2: Chop the vegetables (onion, celery and carrot) coarsely.
Step 3: Melt the butter in a frying pan, and then add the vegetables.
Step 4: Sauté the vegetables until they begin to brown. Add seasoning to taste. You can sauté the vegetables with garlic, bacon or herbs, for instance.
Step 5: Put the vegetables and butter in the bottom of the roasting pan.
Step 6: Place the turkey on top of the vegetables.
Step 7: Stuff the turkey if you'd like to do so.
Step 8: Add broth — it should not be higher than halfway up the turkey so adjust the amount as needed.
Step 9: Cover the pan with the lid and put it in the oven.
Tip
If your turkey doesn't fit inside the roaster with the lid closed, don't leave the lid ajar. Instead, cut the turkey into pieces so it fits better, or split the turkey pieces and the other ingredients between two covered roasting pans.
Step 10: After your turkey has been in the oven for 2 hours, check in on it every 30 minutes. Insert the thermometer into the thickest part of the thigh and thickest part of the breast to see its internal temperature.
After you check the temperature each time, use a cooking spoon or baster to transfer broth from the bottom of the pan over the top of the turkey.
Step 11: Remove the lid of the roasting pan for the last 30 minutes of cooking if you like brown, crispy skin. Before removing the turkey from the oven check the temperature of the thigh, the breast and the thickest part of the wing. They should all be at least 165 degrees Fahrenheit, per the USDA. If you added stuffing, its temperature must hit 165 degrees Fahrenheit as well.
Use the chart below to get a sense of how long it will take the turkey to cook.
Step 12: Remove the turkey from the pan to rest on a cooling rack at least 20 minutes before carving.
Turkey Cooking Times
Turkey Weight | Cooking Time (Unstuffed) | Cooking Time (Stuffed) |
|---|---|---|
8-12 pounds | 2 hrs. 45 mins. - 3 hrs. | 3 - 3 hrs. 30 mins. |
12-14 pounds | 3 - 3 hrs. 45 mins. | 3 hrs. 30 mins - 4 hrs. |
14-18 pounds | 3 hrs. 45 mins. - 4 hrs. 15 mins. | 4 - 4 hrs. 15 mins. |
18-20 pounds | 4 hrs. 15 mins - 4 hrs. 30 mins. | 4 hrs. 15 mins. - 4 hrs. 45 mins. |
20-24 pounds | 4 hrs. 30 mins - 5 hrs. | 4 hrs. 45 mins - 5 hrs. 15 mins. |
Tip
Cooking a turkey takes about 2 hours and 45 minutes to a bit over 5 hours. Time varies based on your oven (along with how often you open the oven door) and the size of the turkey — a larger bird will take longer to cook.
How to Braise Turkey Using Aluminum Foil
This method results in less steam than using an oven bag, Devan Cameron, a sous chef and owner of Braised & Deglazed, tells LIVESTRONG.com.
"[That] means the turkey can brown a lot easier than when cooking in a bag," he adds. For Cameron, using aluminum foil is easier to control than using a pan.
Things You'll Need
Turkey, thawed, with the giblets removed
Vegetable oil or butter
Stuffing (optional)
Heavy-duty aluminum foil
Shallow roasting pan
Food thermometer
Step 1: Preheat the oven to 450 degrees Fahrenheit.
Step 2: Brush the outside of the turkey with oil or butter.
Step 3: If you wish, loosely stuff the turkey. Generally, experts recommend against stuffing turkeys as it increases the cook time of the bird. But, it is safe to stuff a turkey when you're using this cooking method, per the USDA.
Step 4: Rip off a sheet of aluminum foil that's around three times longer than the turkey, per the University of Illinois Extension.
Step 5: Place the turkey in the center of this foil, with its breast up. Turn up the ends of the foil, so that they overlap. Turn up the short sides of the foil to help contain the turkey's juices. Do not make an airtight package — there should be some gaps.
Step 6: Place the foil-wrapped turkey in a roasting pan.
Step 7: Roast the bird. Because you're using a high heat, the turkey will cook faster. Use this chart from the USDA to estimate the cooking time of your bird based on its size.
Turkey Cooking Times
Turkey Weight | Cook Time (Unstuffed) | Cooking Time (Stuffed) |
|---|---|---|
8-12 pounds | 1 hr. 30 mins. - 2 hrs. 15 mins. | 2 - 2 hrs. 45 mins. |
12-16 pounds | 2 hrs. 15 mins. - 2 hrs. 45 mins. | 2 hrs. 45 mins. - 3 hrs. 15 mins. |
16-20 pounds | 2 hrs. 45 mins. - 3 hrs. 15 mins. | 3 hrs 15 mins. - 3 hrs. 45 mins. |
20-24 pounds | 3 hrs. 15 mins. - 3 hrs. 45 mins. | 3 hrs. 45 mins. - 4 hrs. 15 mins. |
It will be done when the internal temperature at the thickest part of the breast, thickest part of the wing and the innermost thigh are 165 degrees Fahrenheit. If the turkey has stuffing inside, make sure the stuffing reaches that same temperature.
Step 8 (optional): If you'd like the skin to brown, uncrimp the foil covering the top of the bird around 30 minutes before it's fully cooked.
Step 9: Once the turkey is done — that means it has an internal temperature of 165 degrees Fahrenheit — remove it from the oven. Let it rest at least 15 minutes before carving and serving.
10 Delicious Leftover Turkey Recipes to Make Until Your Fridge Is Empty
How to Cook a Turkey on a Gas Grill, According to a Restaurant Chef
How to Cook Two Small Turkeys in One Oven, According to a Restaurant Chef
7 Ways to Cook a Turkey Without an Oven, According to Chefs
How to Cook, Store and Reheat a Fully Cooked Whole Turkey
Pros and Cons of Cooking a Turkey With an Oven Bag
Once you've been in charge of cooking turkey dinner a few times, you might develop strong opinions on the best methods. But the reality is that every method — including cooking the turkey in an oven bag — has advantages and disadvantages.
Pros
- Easy cleanup. That's because you won't need to scrub out the roasting pan.
- Moister meat. "The turkey meat may be slightly less dry than when roasted due to the steam," Cameron says.
- More flavor. All those herbs and vegetables inside the bag may impart big flavor to the turkey, Cameron says.
- Faster cook time. Cooking in an oven bag can speed up the cooking time, according to the USDA. A 12-pound bird will take around 2 hours to cook in an oven bag; cooking the bird in a roasting pan, uncovered, would take upwards of 3 hours, per the USDA.
Cons
- Can be messy. An oven bag can be a bit unwieldy and difficult to work with, Cameron says. "The bag can burn or become damaged if it touches the hot metal sides of the oven or pan," he adds.
- Not as beautiful. "The turkey will not brown as nicely as a regular roast due to the added steam," Cameron says.
A Note on Oven-Bag Safety
The idea of placing a bird in a plastic bag in the oven can feel odd. After all, plastic and high heat is usually a terrible combination. Keep in mind you're using a special bag designed for this situation — not just any old bag from around the house. For instance, using a brown paper bag is unsafe, per the University of Illinois Extension. And an ordinary plastic shopping bag — like one from the grocery store — is also off-limits, per the USDA.
But when a bag is explicitly made for cooking in the oven, it’s a different situation: Oven-safe cooking bags are made from heat-resistant nylon and are safe to use at high temperatures, per the USDA. Oven bags are regulated by the FDA.
- University of Illinois Extension: "Braised Method - Covered Roasting Pan"
- University of Illinois Extension: "Foil Wrapped Method"
- USDA: "How do you cook a turkey by the high heat method?"
- USDA: "How to Cook a Thanksgiving Turkey"
- USDA: "How long do you cook a turkey in an oven cooking bag?"
- University of Illinois Extension: "Brown Paper Bag Method"
- USDA: "Meat and Poultry Packaging Materials"
- USDA: "What are oven cooking bags made of?"
- USDA: "Stuffing and Food Safety"