
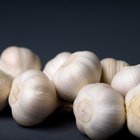
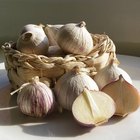
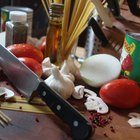
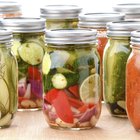
Brining garlic is a good way to preserve a large number of cloves to use at a later time if you find yourself with extra. Brined or pickled garlic still maintains its strong flavor and aroma and is suitable for use in pasta sauces, dips and salads. Whether you choose a basic salt brine or more elaborate pickling brine, the garlic will keep for some time in your fridge or pantry.
Basic Brine
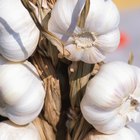
Remove all of the garlic cloves from the heads of garlic and place them on a cutting board or in a bowl.
Peel the papery skin off of each clove of garlic. Squish the garlic down against the board with the side of your knife to make peeling less challenging.
Add your garlic cloves to a Mason jar, leaving a couple of inches at the top. Use two jars if necessary.
Create a brine by mixing ¾ tbsp. of salt for every 1 cup of water. Pour the brine over the garlic cloves in the jar.
Place a lid on the jar and move it to a cool, dark place to ferment for at least two weeks.
Pickling Brine
Remove the cloves of garlic you want to pickle from the heads of garlic. Place the unpeeled cloves into a pot of boiling water to blanch for 30 seconds.
Dump the garlic cloves into ice water and then peel each clove.
Add the ingredients of your pickling brine to a saucepan and bring them to a boil. Let the brine boil for 5 minutes and then add the garlic to the pan.
Remove the pan from the heat and stir the garlic around in the mixture for 1 minute. Spoon the garlic into Mason jars, leaving about 1 inch of space at the top.
Pour the brine mixture over the garlic until it’s covered, then seal the lid in place. Add the jars to a boiling water canner for 10 minutes. Store the jars in your fridge for up to 1 year.
Related Articles
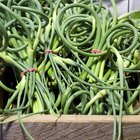
How to Freeze Garlic Scapes
How to Blanch and Peel Garlic

How to Make Pickled Shallots

How to Cook Barbecue Deer Meat in a ...

How to Pickle Brine Sausage
How to Make Garlic Chicken
How to Preserve Garlic in Olive Oil
How to Convert Sour Pickles to Sweet ...
How to Preserve Pimentos
How Many Calories Are in Garlic Chicken ...

How to Store and Freeze Sundried ...
How to Cook With Garlic Salt
How to Make Jewish Rye Bread ...
How to Make Delicious, Homemade ...
How to Blanch, Peel, & Freeze Whole ...

How to Make Guacamole Seasoning
How to Can Green Tomatoes & Peppers ...
Meals With Garlic Bread
How to Bake Garlic Bread
How to Make Tomato Bruschetta
References
Tips
- Make your pickling brine with ingredients such as white wine, vinegar, pickling salt, oregano, thyme, chili pepper, rosemary and black peppercorns.
Writer Bio
Joshua McCarron has been writing both online and offline since 1995. He has been employed as a copywriter since 2005 and in that position has written numerous blogs, online articles, websites, sales letters and news releases. McCarron graduated from York University in Toronto with a bachelor's degree in English.
Photo Credits
Jupiterimages/Photos.com/Getty Images