
How to Tone Up Quickly for Your Big Event
So you just got the invite for your best friend’s wedding (or your high-school reunion, a New Year’s Eve party, prom, etc.). Now you’ve got to look hot -- fast! We all have a special occasion we want to look our best for. With a big event looming in the coming months, it’s the perfect time to lace up those sneakers and hit the gym. But don’t worry, this workout won’t keep you at the gym for hours on end. It combines the most efficient calorie-burning moves to get you in shape for your big day. Whether your event is three months away, one month away, next week or tomorrow, here’s the workout that will get you looking fierce and feeling confident.
1. Sprinting
If you want to feel the maximum amount of burn and torch the most calories in the least amount of time, look no further than the anaerobic king -- the sprint. Each sprint should be run at least 90 percent of your running capacity. In other words: Fast! HOW TO DO IT: Start by standing with one foot in front of the other. Explode out of your start by powerfully driving your knee up as your opposite arm pumps. What your arms do, your legs do, so remember to powerfully pump those arms. Also remember to properly warm up as sprints incorporate your largest muscle groups at maximum power output. REPS/SETS: Five sets. Beginners: 60 to 80 meters. Intermediates: 100 to 120 meters. Advanced: 200 meters. Sprints should include proper rest to be able to perform at maximum capacity.
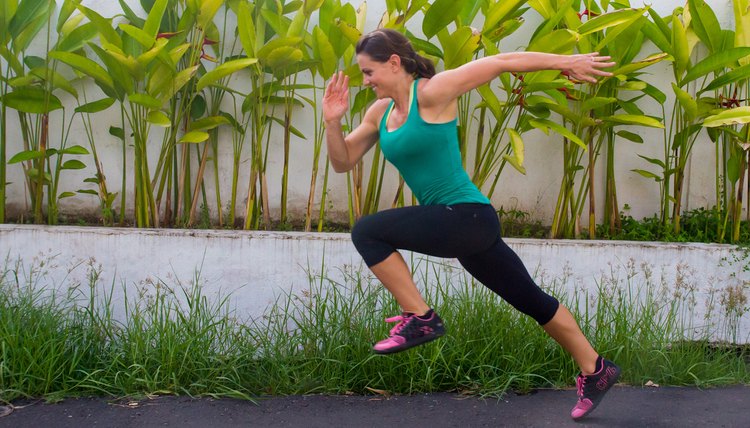
Scott Stohler/Roamaroo.com
2. Burpee
Burpees are easily the most efficient way to burn calories and hit every major muscle group. And while some might view them as a punishment, try looking at them as your one-way ticket to a hot bod. HOW TO DO IT: Start standing with your feet underneath your hips and hands at your side. Bend your knees and place your hands on the ground. Kick your feet back into a push-up position, and then lower your chest to the ground. Push your chest off the ground into a cobra position while keeping your legs on the ground. Explosively snap your hips up so that your feet come to your hands. As you stand, drive your arms up to the sky as you jump and clap your hands overhead. REPS/SETS: Every minute on the minute, do eight to 10 burpees for 10 minutes.
Scott Stohler/Roamaroo.com
3. Jump Squat
Yes, squats help you sculpt your best booty. But jump squats burn mega calories too. HOW TO DO IT: Start standing with your feet hip-width apart. With a flat back and tight core, lower your glutes back and down into a squat. With power, drive your arms up as you squeeze your glutes and explode up into the air. Land softly and lower back down and repeat. REPS/SETS: Five sets of 10.
Scott Stohler/Roamaroo.com
4. Push-Up
Push-ups are an incredible way to tone your entire body, with a focus on your upper body. HOW TO DO IT: Start in a high plank with your hands underneath your shoulders and feet back so that your body is in a straight line from head to toe. Tighten your core as you slowly lower down to the ground and hug your arms into your body. Squeeze your glutes and push off the ground back to the starting position. REPS/SETS: Six sets of four.
Scott Stohler/Roamaroo.com
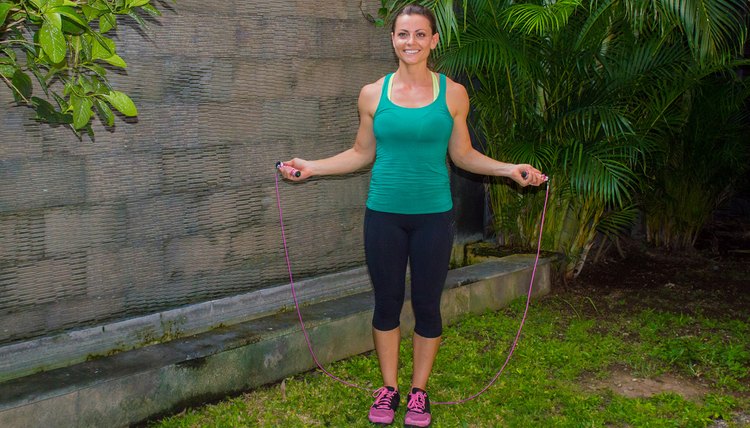
5. Jumping Rope
Jumping rope gives you a killer cardio workout while working on your legs and shoulders. Plus, you’ll get to add some childlike fun into your workout. HOW TO DO IT: Start with a jump rope handle in each hand and your feet close together. Swing the rope over your head and then jump as it swings under your feet. You can do single unders (one rotation of the rope per skip), double unders (two rotations of the rope per skip) or triple unders (three rotations of the rope) if you’re an expert! REPS/SETS: Five rounds of three minutes on and one minute off.
Scott Stohler/Roamaroo.com
6. Tabata Wall Ball
Tabata is one of the best ways to burn calories in a short period of time. While you can pick almost any exercise to do Tabata-style, wall balls are the perfect way to sculpt your lower body and your arms. HOW TO DO IT: Grab a medicine ball (try 10 to 14 pounds for ladies and 14 to 20 pounds for gentlemen). Stand about two feet away from a wall, and face it with the medicine ball at your chest. Lower the glutes down and back into a squat. As you squeeze the glutes and drive up, use your momentum to explode the medicine ball into the air and against the wall. Aim for an imaginary target of nine feet off the ground for women and 10 feet for men. REPS/SETS: Eight rounds of 20 seconds on and 10 seconds off.
Scott Stohler/Roamaroo.com
7. Tuck Jump
While all plyometrics are great for toning up and burning calories, tuck jumps challenge your lung capacity and your lower body. HOW TO DO IT: Stand with your feet underneath your hips and your hands at your sides. Bend slightly at the knee and drive your arms up to shoulder height as you explode off the ground and drive your knees to your chest. As you land on the ground, quickly blast off into the air again as fast as you can. You should spend the least amount of time possible on the ground. REPS/SETS: Three sets of 10.
Scott Stohler/Roamaroo.com
8. Step-Up Jump
Just like so many of these exercises, step-up jumps combine lower-body power with heart-pumping cardio. You’ll be feeling the burn in no time! HOW TO DO IT: Use a bench or box of at least 16 inches for your step-up jumps. Place one foot on the box so that your knee is at a 90-degree angle. Put pressure on your foot as you explode off the box and into the air, working on straightening your legs and extending your hips at the top of the jump. Switch legs in the air and repeat. REPS/SETS: Four sets of five on each leg.
Scott Stohler/Roamaroo.com
9. Kettlebell Swing
The kettlebell swing is a glorious glute toner, so get ready to swing into shape. HOW TO DO IT: Start standing with your feet slightly wider than your hips and hold a kettlebell with both hands. Slightly bend your knees and hinge forward at the hips while keeping a proud chest and flat back. As you hinge forward, the kettlebell goes back between your legs. Reverse the momentum as you squeeze your glutes and thrust your hips and the kettlebell forward, driving the kettlebell up into the air. Only drive the kettlebell to eye height (overhead is not necessary) and lower back down. Remember to keep your core tight during the entire exercise to protect your lower back. REPS/SETS: Four sets of 12.

Scott Stohler/Roamaroo.com
What Do YOU Think?
Do you have a big event coming up? What’s the special occasion? What’s your plan to look and feel your best? Are you planning on hitting the gym? Cutting down on junk food? Or do you have some other plan?
Scott Stohler/Roamaroo.com
Writer Bio
Collette Stohler is the author of Passport to Fitness. She is also the creative director and co-founder of the travel blog, Roamaroo. She was an All-American Track and Field athlete & Olympic trials qualifier in Olympic Weightlifting. She attended the University of Pennsylvania and received a master's degree from the University of Miami.