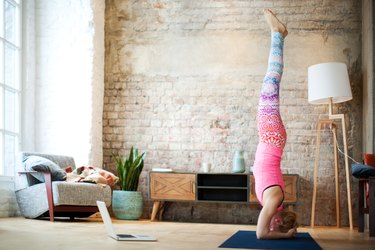
A headstand is one of the most challenging yoga poses because it requires strength and flexibility. It also involves going upside down, so there's a fear factor, too.
While some yogis make it look effortless, it isn't a pose you learn how to do overnight. So if nailing a yoga headstand is your goal, doing headstand progressions will help you get there.
Video of the Day
Physically, the yoga headstand strengthens your arms, shoulders and back and tests proprioception — understanding where your body is in space.
Although there's not much science to back this up, the headstand yoga pose — like all yoga inversions (your head is placed below your heart and hips) — is said to provide benefits, including promoting mental clarity, reducing stress, relieving lower back pain and activating the pineal and pituitary glands.
In my experience as a yoga teacher doing and teaching headstands, it's never actually about the inversion but rather the exploration and adventure of learning something new. Through the process of learning to do a headstand, you will gain new skills, bolster body awareness and build total-body strength — whether or not you end up reaching the full pose.
Following a headstand progression sequence, or a compilation of yoga poses that progress to a headstand, can help you clearly define where you are in your learning process and work on the skills needed to do the headstand yoga pose. It also gives you options for accessible poses to practice in class.
Here are eight yoga headstand progressions that will help you build your headstand practice. All you need are two yoga blocks and a wall. The time you'll need to work on each pose will vary, so take your time and listen to your body.
Tip
Headstand is not required to practice yoga. These progressions can give you similar benefits and help you grow a fonder and deeper appreciation of your self-awareness. You can still reap all the benefits of yoga without ever doing a single headstand.
1. Lateral Child’s Pose
Bringing your arms overhead can be challenging, particularly if you have movement restrictions in your shoulder blades. Reaching your arms overhead and side bending can help mobilize and bring awareness to how your shoulder blades move, while stretching your lats, which, when tight, restrict overhead arm movements.
- Start kneeling on the floor.
- Sit your hips back in the direction of your heels. (They don’t need to touch.)
- Lean forward toward the ground and place your hands on the floor.
- Walk your hands to the right at about 2 o’clock if your hands were on a clock.
- Stay here for 5 to 10 breaths and then switch sides.
2. Standing Headstand With Blocks
Does your neck move with the chin jutting forward or tucking toward your chest? Try to keep your neck neutral. Whatever you do here, chances are you will repeat them when upside down. Ideally, your chin remains parallel to the floor to maintain optimal alignment when bearing weight on your head.
- Place a block horizontally between your feet and then stand in mountain pose, where you stand up straight with your spine in a neutral position and roll your shoulders back and down with arms at your sides.
- Squeeze the block and feel your inner thighs engage all the way up to your pelvic floor. Feel how your body adjusts itself.
- Take your second block and place it on top of your head.
- Press down on the block gently (your hands are one the block, pressing down on it, but your elbows are bent) and push the top of your head up into the block, just as you would if you were upside down.
- Stay here for as long as you’d like.
3. Standing Forward Bend
Tight hamstrings can make it more difficult to get into a headstand. Practicing bending your knees and lifting your hips without lifting your legs can help a lot. And it's easier to learn this with your feet on the ground instead of in the air.
- Stand in mountain pose, where you stand up straight with your spine in a neutral position and roll your shoulders back and down with arms at your sides.
- Place two yoga blocks on the ground in front of you on the tallest height. Soften your knees so that they are not locked out.
- Bend forward from your hips and place your hands on top of the blocks. Hold here for a few breaths. Notice how deeply (or not) your body folds in half.
- Come back up to standing.
- Try again, and this time, generously bend your knees and push your feet away from each other (without picking up your feet).
- Deepen your stretch by lying the blocks flat on the floor and placing your hands on top of them.
- Notice if this forward fold feels different in your body.
- Choose to straighten or bend your legs pending the results of this mini-experiment and stay in the fold for 5 to 10 breaths.
4. Forearm Block Squeeze and Lift
This pose helps you get a clearer understanding of shoulder flexion (lifting your arms overhead). It's also a way for you to properly engage your serratus anterior (fan-shaped muscles around your rib cage), which is responsible for maintaining shoulder blade stability — a must for a headstand.
- Stand and hold a block between your inner elbows, hands clasped. Start with the block in front of your chest.
- Exhale and keep your lower back steady and ribs down as you lift your arms.
- Squeeze the block and push your elbows up with your arms raised (they do not need to be overhead). It might not look like a lot is happening from the outside, but you will feel the effect in your body.
- Lower your arms when you are ready.
- Repeat this 5 to 10 times.
Tip
It’s helpful to first put the block on a table or high surface, where you can lift it with your elbows.
You can also challenge yourself by placing the block on the floor and picking it up in a forward bend or squat, which will give you more practice folding and be beneficial for a beginner headstand pose setup.
5. Rock the Boat
This pose helps increase your body awareness and strengthens the muscles in the front and the back of your body. This is important for inverting, since if the body starts to sway in one direction or the other, you will be familiar with what's happening and be able to counter the action by "rocking" the other way.
- Lie on the floor with your head, shoulders and legs lifted a few inches.
- As slowly as you can, without momentum, roll to your right side and onto your abdomen with your legs, chest, arms and head lifted.
- Roll back to the initial position.
- Then, roll to the left.
- You can build up how long you hold each pose and the number of reps you do.
6. Downward Facing Dog
Downward facing dog is an inversion! You can practice this in lieu of a headstand and get the same benefits of a headstand.
- Start on all fours.
- Tuck your toes and keep your knees bent as you lift your hips to deepen your hip crease.
- Once your hips are as high as possible, slowly straighten your knees, being mindful not to drop your hips, round your back or press your chest forward.
- Build up your strength and inversion stamina here, working on holding this pose for up to 2 minutes.
Tip
To make it more challenging, lift one leg.
7. Dolphin Against the Wall
A natural progression, this pose helps you become more familiar and comfortable with going into the inversion (going upside down), while incorporating previous headstand elements that help create a firm foundation. This might also be the place you stay if you're unfamiliar with headstands and are just getting started.
- Position your blocks on the tallest height and the narrowest sides facing you and the wall, one on top of the other.
- Kneel in front of your block tower and grasp the bottom block between your hands and forearms on the ground. The block and your elbows should form a triangle-like shape, with your shoulders approximately above your elbows.
- Tuck your toes under (you may need to walk your feet back some) and enter dolphin pose as you did downward facing dog, except that now your forearms are on the ground.
- Walk forward toward the wall until you can feel the narrow side of the block press against your back.
- Let your head hang down toward the floor but not touch the floor.
- Similar to when you had the block between your elbows, squeeze them without bringing the arms closer and push your forearms into the floor. Notice your head lifts farther from the floor.
- Build up your time here from 5 seconds to 2 minutes.
- When you are ready to come out, walk your feet back and lower your knees to the ground.
- Repeat this one more time with the option to place your head on the ground. Place the top of your head on the floor (where you felt the block on your head). You can do this while entering the pose or while in it. However, when your head is on the ground, make sure you continue to push your forearms into the ground. If needed, place a blanket under your head.
Tip
Gradually build up time staying in the pose and feeling the balance between bringing weight into your head and forearms. This can be a delicate dance between the two. If you feel ready to move forward, try lifting one leg up at a time, as you did in downward facing dog.
8. Dolphin on Blocks
Placing your feet on a higher surface is the next step to building up to a headstand. This pose is a progression of the previous one since your feet are higher than the floor. It will also help you become more confident with going upside down.
- Kneel in front of the wall and set your blocks up horizontally next to each other, just behind your knees.
- Clasp your hands with your third knuckles close to or touching the wall and your forearms in the triangular shape on the ground.
- Place the top of your head on the ground and the back of your head against your hands.
- Push down into your forearms, tuck your toes and lift your knees into the pose.
- Walk as far forward as you can with your hips high and your spine long and step onto your blocks.
- Feel how more weight shifts into your forearms and head, and you lift higher into your inversion.
- Build up your time here, and when you are ready to come out, step off of the blocks, lower your knees to the floor and rest.
Tip
Instead of blocks, you can also use a sturdy step stool, chair, bed, etc. to progress. You can lift one leg, then the other, or both to get the feeling of headstand with the support and safety net of the wall.