Ryhor Bruyeu/iStock/Getty Images
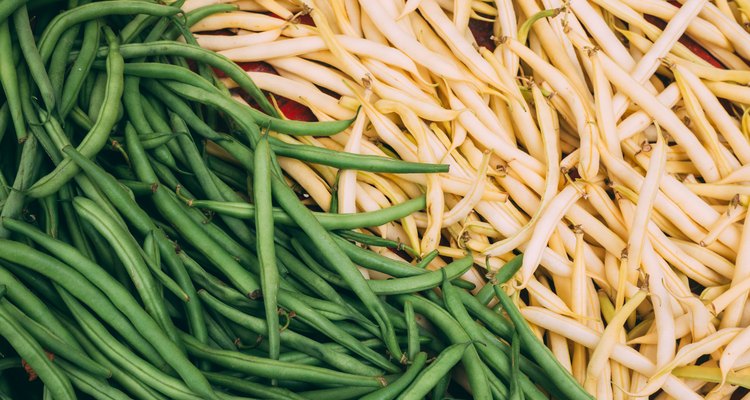
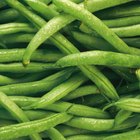
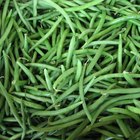
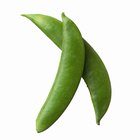
Before you freeze vegetables, it is important that you blanch them. Blanching halts natural enzyme processes so the frozen vegetables retain flavor, texture and color during storage. It also cleans surface dirt and kills pathogens. Use a kitchen timer when you blanch vegetables. Over-blanching destroys vitamins and minerals and it can break down cell structure, resulting in mushy vegetables. Under-blanching actually stimulates enzyme activity and causes poor quality frozen food. Use the same boiling-water method to blanch both green and yellow beans. A 1-cup serving of cooked, frozen yellow or green beans contains only 38 calories and are high in fiber, vitamin K and manganese.
Wash fresh green or yellow beans in cold water, sorting out and discarding damaged pods. Remove and discard stems and ends and break the beans into pieces.
Heat water to a full rolling boil in the blanching or large pot. Place the prepared beans in the perforated inner section of the blanching pot or in a wire basket that fits inside the single large pot. Lower the beans into the boiling water for 4 minutes. Begin timing when the water returns to a boil after adding the beans, about one minute. Don’t crowd the beans in the pot. There should be enough water so the beans float freely in the pot, about one gallon per pound of prepared beans. Keep the heat high during the blanching process.
Drain the water into the sink. Lift the inner perforated section of the two-piece blanching pot to drain the beans. If you are using a single large pot, lift the beans from the water with the wire basket, or pour the beans and water through the colander to drain.
Immediately plunge the drained, hot beans into a large bowl of ice water. The rapid cooling halts the enzyme action and readies the beans for quick freezing. Add more ice cubes as the water warms or replace with fresh ice water.
Related Articles
How to Freeze Pole Beans
How to Freeze Romanesco
How to Bake Fresh String Beans in the ...

How to Soak Adzuki Beans
How to Convert Dried Beans to Cooked ...
How to Cook String Beans
How to Freeze Garbanzo Beans
How to Preserve Rutabagas
How to Freeze Fresh Beets
How to Freeze Cooked Dried Beans
How to Use the Steamer on the Showtime ...
How to Deep Fry Vegetables With Batters
How to Blanch Green Beans for Freezing
How to Freeze Mangetout Vegetables
How to Blanch, Peel, & Freeze Whole ...
How to Make and Eat Edamame, Microwave ...
How to Rehydrate Chickpeas

Do You Need to Soak Lentils Before ...

How to Freeze Edamame Soybeans
Can You Freeze Cut Carrots, Broccoli & ...
References
- Stocking Up; Organic Gardening and Farming Staff
- USDA National Nutrient Database: Beans, Snap, Green, Frozen, Cooked, Boiled, Drained Without Salt
- USDA National Nutrient Database: Beans, Yellow, Frozen, Cooked, Boiled, Drained, Without Salt
Resources
Writer Bio
Fern Fischer's print and online work has appeared in publications such as Midwest Gardening, Dolls, Workbasket, Quilts for Today and Cooking Fresh. With a broader focus on organic gardening, health, rural lifestyle, home and family articles, she specializes in topics involving antique and modern quilting, sewing and needlework techniques.
Photo Credits
Ryhor Bruyeu/iStock/Getty Images