The Weber Q Grill is actually a series of portable gas grills conveniently toted to parks, camping trips or tailgating events. The grills are not designed for quantity, with a smaller grill surface. These grills have an average cooking area of 280 sq. inches, at least half of standard gas grills. Break a rack of ribs down into smaller components to cook sequentially. You don't need to to adjust other preparations such as favorite seasonings or marinades using a Weber.
Step 1
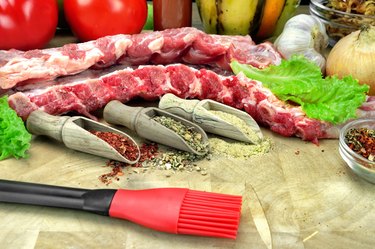
Prepare the ribs. Use a knife to remove the skin off the rib rack, inserting it between the skin and the meat, pulling the skin away from the ribs. Trim the fat off the ribs, leaving about 1/8-inch of fat to help baste the ribs as they cook. Cut the ribs into small sections of two ribs per section.
Video of the Day
Step 2
Season the ribs. Use a dry rub or marinate the ribs overnight. A dry rub uses dry seasonings such as one part salt, one part pepper, one part paprika and one part onion powder massaged into the meat surface. A marinade mixes dry seasonings with a liquid base such as oil, lemon, vinegar or sherry that sits on the meat for two to 24 hours to absorb into the meat.
Step 3
Heat the grill to "Low-Medium." Make sure the drip tray is under the grill; drip trays are accessible on the Weber Q from the front. Close the lid and let the grill heat to approximately 225 degrees Fahrenheit.
Step 4
Place the ribs on the grill with the bone facing down. Close the lid and cook for 15 minutes on each side.
Step 5
Insert a meat thermometer between the two ribs to check the internal temperature. Barbecue champion Craig "Meathead" Goldwyn states that while the ribs are cooked safely at 160 degrees, they are more tender at 180 degrees.
Step 6
Brush the ribs with barbecue sauce five minutes before they are complete. Putting sauce on too soon will caramelize the sugars, turning them black if left too long.
Step 7
Pull off the ribs and allow them to rest for five minutes before serving and throw on the next batch.
Video of the Day