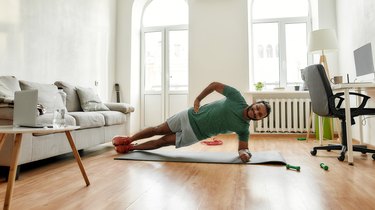
"Side plank" may sound like something you'd find on the set of Pirates of the Caribbean or in a Home Depot aisle. But as fitness enthusiasts know, the side plank is actually a body-weight exercise — and a highly effective one at that.
An isometric exercise (one that you hold in place), the side plank involves getting into a stiff-as-board position, balancing on your side while supported by a single forearm or hand and contracting nearly every muscle group between your head and your toes.
Video of the Day
Video of the Day
"When done correctly, the side plank is a full-body movement that works your core, shoulders, glutes, quads and more" says strength coach Albert Matheny, RD, CSCS, nutrition advisor to Promix Nutrition and co-founder of SoHo Strength Lab in New York City.
The key phrase here is, "when done correctly." You won't reap the muscle-sculpting benefits of the side plank if your form is faulty.
According to Anel Pla, CPT, personal trainer with Five Point Zero Fitness, a fitness studio in New Jersey, there are three main reasons someone might struggle with the side plank: shoulder instability, core (especially oblique!) weakness and inactive glutes.
Luckily, no matter your side plank sticking point, there's an exercise (or three!) below that'll help you overcome it. Keep reading for the moves that'll transform you from a rider on the side plank struggle bus into a side plank Olympian.
1. Kneeling Side Plank
The most common side plank mistake, according to Matheny, is wonky shoulder positioning. "Often, people set up with their elbow joint too far away from their body," he says. But proper form dictates that you position your elbow directly under your shoulder and your wrist directly under your elbow, so that the three joints are stacked one on top of the other.
"The best way to ensure proper shoulder position during the standard side plank is to master the side plank from your knees first," he says.
- Lie on your right side, with your left leg and hip resting on top of your right leg and hip. Bend your knees so that your feet are slightly behind you.
- Position your right hand directly under your right shoulder.
- Brace your midline and squeeze glutes, then raise your hips straight up toward the ceiling. You should be able to draw a straight line from your chest to hips to knees.
- Hold as long as you can with good form, working up to 60 seconds.
2. Front Plank
You should be able to dominate the front plank (aka high plank or standard plank) before graduating to the side plank. Assuming you do it correctly, the front plank can help build the prerequisite shoulder stability, Matheny says. It can also help you get used to properly stacking your joints.
- Start on all fours. Position your hands so that your wrists are under your shoulders.
- Draw your bellybutton toward your spine to engage your core. Then, step each foot straight back into a high plank (top of a push-up).
- Create tension throughout body by screwing your pinkies into ground to engage your upper back, thinking about pulling your quads up and squeezing your glutes.
- Hold as long as you can with good form, working up to 60 seconds.
Tip
To lessen the demand on your upper body, you can drop to your knees.
3. Cat-Cow
Beyond upper-body joint alignment, for a side plank to be perfect, you also need to be actively pressing out of your shoulders, according to Matheny. "Your shoulders cannot be a passive participant in the movement," he says.
To get a sense of how it feels when your shoulders are active versus when they're passive, he recommends becoming a master of the Cat-Cow yoga pose.
- Start on all fours, hands under your shoulders and knees under your hips.
- On the inhale, drop your belly toward ground. Release one segment of your spine at a time until you're looking toward the ceiling. Take a breath, actively pressing your hands into ground while pulling your shoulder blades down your back.
- Next, exhale while pulling your bellybutton in toward your spine and tucking your chin toward your chest to round your back.
- Continue cycling through the two poses for 60 seconds, syncing your breath to movement.
4. Glute Bridge
"Dead butt" is a common issue for desk-job grinders — and it can hinder your ability to side plank. Dead butt syndrome refers not to weakness in the glute muscles, but an inability to properly activate (read: use) the glute muscles.
"If your glutes are not properly activating, it's going to inhibit your ability to get into a good side plank position," Matheny says. Or it's going to result in your lower back compensating for your glutes, which can lead to back pain or an overuse injury.
Matheny recommends learning how to engage your glutes with the good ol' glute bridge.
- Lie on your back with feet planted, knees bent at a 90-degree angle. Tuck your tailbone to engage your core.
- Press your feet into the ground and squeeze your butt cheeks together as you lift your hips up toward the ceiling.
- Continue raising your hips until you form a straight line from your shoulders to hips.
- Keep your glutes and core engaged and hold for 20 seconds.
- Lower back down to the ground.
- Complete 3 holds, resting as needed in between.
Tip
At the top of the glute bridge, Matheny recommends lifting your hands off the ground to give your bum a good tap. “You’ll be able to figure if your glutes are firing by feeling for how solid the muscle is,” he says.
5. Kneeling Side Plank With Leg Lift
Essentially the lovechild of the glute bridge and kneeling side plank, Pla recommends doing the kneeling side plank with a leg lift. "This movement works the entire core and glute muscles," she says. Both of which your body relies on big time during the standard side plank.
- Lie on your right side, with your left leg and hip resting on top of your right leg and hip. Bend your knees so that your feet are slightly behind you.
- Position your right hand directly under your right shoulder.
- Brace your midline and squeeze glutes, then raise your hips straight up toward the ceiling. You should be able to draw a straight line from your chest to hips to knees.
- Straighten your left leg.
- On an exhale, raise your left leg up as far as you can, without tightness in your midsection.
- On an inhale, bring that leg back down, tapping toes on the ground.
- Complete 10 to 15 raises per side, before switching sides.
6. Dead Bug
If you have any weaknesses in your core, they'll be exposed during the side plank. "If there's a main muscle group worked during the side plank, it's your core," Matheny says.
That's where the dead bug comes in. The oddly named movement "is one of the best core-strengthening movements out there — it works your deep core muscles," he says. That includes your transverse abdominis, pelvic floor and obliques.
- Lie on your back, arms overhead and lower back glued to the ground.
- Lift your legs and bend your knees so your calves are parallel with the floor.
- Keeping your core engaged, simultaneously lower one arm overhead while straightening the opposite leg toward the ground without letting it touch.
- Return to center and switch your arm and leg.
- Complete 3 sets of 10 to 12 reps.
Tip
If you can't currently do a side plank, odds are, you won’t be able to lower limbs very far — that’s OK! Only lower your arm and leg as far as you can without lifting your lower back off the floor.