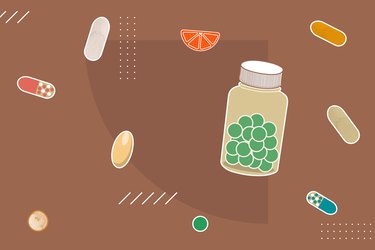
Stroll down the supplement aisle at any health food store or pharmacy and you'll see there's no shortage of vitamins and other dietary add-ons out there, promising everything from bigger muscles to a longer lifespan.
But wading through all of the options to find the best — and safest — choice for your personal wellness needs can be a challenge, to say the least.
Maybe you're looking for a vitamin that can help keep your bones strong as you age, or you'd like to try a supplement to boost your weight-loss efforts. Or perhaps you're completely new to all of this and searching for a foothold when it comes to supplemental wellness.
Whatever your goal, we've got the info you need in this comprehensive guide.
Here, we'll cover everything you need to know to find the best vitamins and supplements, from primers on the big players to tips on protecting your health — and wallet — when you're ready to make a purchase.
First, Let's Talk Safety
Before you consider adding any vitamin or supplement to your dietary plan, speak to your health care professional.
Why? Well, your body and needs are unique, and only a trained health care professional can tell you what's safe and what's not based on your health history, current conditions, prescription medications and other key factors. And if you're feeling hesitant to bring it up, keep in mind that your doc's goal is to help you be as healthy as possible, so no question about your wellness is too silly or small.
Once you get the OK from your MD, here's some more food for thought: The U.S. Food and Drug Administration does not ensure the safety of dietary supplements before they go to market like it does for other food and drug products, so the quality and consistency of these products can vary.
While some may be simply overrated and not deliver the results they promise, others could be harmful to your health. Luckily, there are a few easy ways to tell if a product is worth your investment.
Here's everything you need to know about vitamin and supplement safety.

You may not have a specific dietary goal, but you think your diet is a bit lacking in all the nutrients you need on a daily basis. While food should always be your primary source of vitamins, multivitamins can help you fill in the gaps and potentially help correct nutritional deficiencies.
But when it comes to these all-in-one powerhouses, there's no one-size-fits-all formula. Some multis target men's needs, while others are better suited for women, and that's just the tip of the iceberg.
Learn what specific things you should look for when selecting a multivitamin.

Although it's probably best known for supporting eye health, vitamin A is also crucial for keeping your immune and reproductive systems in tip-top shape. And some research has even linked the nutrient to a lower risk of skin cancer and obesity.
Vitamin A is fat-soluble, which means your body can stockpile it. It's also available via a variety of foods, from carrots to cantaloupe, so you're likely getting enough if you're eating a healthy diet. But those with certain health issues are at risk for deficiency and may benefit from taking a supplement.
Read more about the benefits of this A-list nutrient and who should consider upping their intake.
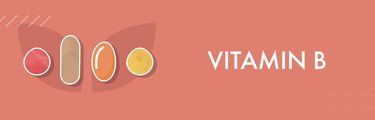
Vitamin B may be the most complex (pun intended) of the singular vitamins, because it's actually a group of eight distinct nutrients. As a whole, though, they're responsible for keeping your metabolism running smoothly and efficiently, and a deficiency in any one of them can seriously affect your health.
The rub? The Bs are water-soluble (as opposed to fat-soluble, like vitamin A), which means your body gets rid of whatever it doesn't use right away, and you constantly need to replenish your stores via food or supplements.
Here's how to make sure you're reaping all the perks of the B vitamin group.
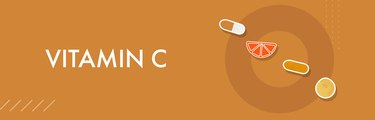
Think of vitamin C as the power source that keeps your body's natural defense system running.
This mighty little nutrient bolsters your immune system, which helps you fight off potentially harmful germs and bacteria, and it also acts as an antioxidant, combatting the free radicals that might otherwise damage your DNA and lead to chronic illness.
There's a lot more to know about this important vitamin (no, it can't actually prevent the common cold), and some of it might surprise you — like just how much you should be getting on the daily.
Get all the details on why you need vitamin C and the many delicious ways to add more to your diet.

Speaking of immune-boosters, let's talk about vitamin D, the hormone (yes, hormone) that also helps your body build strong bones and teeth and keeps your muscles functioning properly.
Research has even linked a long-term lack of D to a higher risk for hypertension, type 2 diabetes and cancer.
Unfortunately, it's estimated that billions of people don't get enough of this nutrient on a daily basis, and certain people are especially at risk for deficiency based on where they live, what they eat and how old they are.
Learn more about vitamin D and what you can do to raise your levels.

Vitamin E may not be as popular as its buzzier peers (ahem, vitamin D), but it's just as essential for good health.
Getting enough of the fat-soluble vitamin is linked to cognitive health and immune support thanks to the nutrient's antioxidant properties.
On the flipside, not meeting your daily recommended amount of E on a regular basis can lead to impaired vision and decreased immune function, among other concerns.
Here's everything you need to know about vitamin E, including how to get more on your plate naturally.

Yes, calcium is often touted for helping build strong bones, but it's also responsible for maintaining healthy blood pressure levels.
While calcium is naturally found in foods you probably already eat like dairy, many Americans don't seem to be meeting their daily calcium needs across the board. That's where a supplement can help.
Discover how much calcium you need and what to look for in a safe supplement.

Magnesium is one of the most commonly occurring minerals in our bodies, so it's not surprising that it plays many critical roles.
Involved in hundreds (yes, hundreds) of enzymatic reactions in the body, magnesium is a key player in critical functions, including blood sugar control and muscle and nerve function.
Despite its importance, many of us don't get enough magnesium on the daily.
Find out what matters about magnesium and how much you should be getting.

Of all the dietary supplements out there, collagen seems to be stealing the limelight most often these days (sorry, fish oil).
The protein, which is naturally made in our bodies, has gotten a lot of attention in the beauty world for its potential to deliver better hair and a younger-looking complexion, but its benefits are more than skin deep.
Collagen is key when it comes to repairing damaged muscles, cartilage and bones, as well as maintaining the mobility of our joints and connective tissues as we age. The protein is readily available in many foods, but budding research indicates that taking a collagen supplement (along with vitamin C) may benefit active people.
Here's how to choose the best collagen supplement for you based on your personal wellness goals.

Let's say your get-up-and-go isn't what it used to be, or you're on the hunt for a natural alternative to the amp-you-up beverages that help you get through the day.
There are many potential culprits when it comes to sluggish energy levels, but getting the right amount of certain nutrients is an excellent place to start.
B-complex vitamins, vitamin D and iron all play an important role in fighting fatigue. And while most people can typically find these nutrients in abundance in their diets, supplementation may be the right move for others.
Here's how to determine which energy-boosting vitamins and nutrients are best for you.

If you're trying to lose weight, you may be tempted to try a pill or powder that claims to help with the process or even speed up your results.
But, unfortunately, there's no supplement in the world that can magically melt away pounds — the solution to that lies in the tried-and-true tenets of better nutrition and more exercise.
However, if you're not getting enough of a few critical vitamins and minerals — which can certainly happen when you're following a reduced-calorie diet — it can make weight loss all the more challenging.
Find out which vitamins for your weight-loss journey are the most important, plus how to pack more into your meals.