
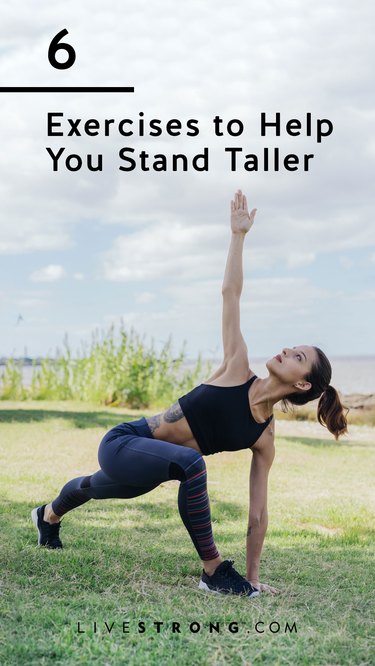
Feel like you have a permanent slouch? You're not alone. Poor posture has become more prevalent since many people find themselves seated in front of a computer all day.
And it's not doing us any favors. More than 80 percent of Americans have back problems at some point in their lives, according to the National Institutes of Health.
Video of the Day
Video of the Day
The good news is that there are things you can do to improve your posture and help prevent chronic low back pain — most of them involving movement. "The best posture is a variety of postures," says Justin Ternes, a physical therapist in San Diego, California. "The worst posture is your default posture or the posture you're in the longest."
If you're seated for an extended period of time, getting up and moving every 30, 60 or at least every 90 minutes is vital. During that time, you can incorporate one (or all) of the six exercises below to help you stand taller and feel better.
1. Mountain Pose (Tadasana)
The best way to improve your posture? Practicing good posture. "The standing postures in yoga such as Tadasana teach people how to stand and build a strong foundation," says yoga teacher Josh Vincent. This pose brings awareness to the weight distribution in your feet, awakens your lower legs and strengthens the arches of the feet — all of which help train your body to stand taller.
- Start with your feet hip-width apart. Shift the weight into your heels. Lift and spread your toes.
- Lift the inner arches of your feet as you wake up the muscles of your lower legs. Set the toes down as you keep the activation through the arches of your feet. Evenly distribute your weight and press into all four corners of your feet.
- Firm your quadriceps to feel a slight lift in the knee caps.
- Lengthen your tailbone toward the floor as you draw your navel in toward your spine.
- Lift your breastbone and widen across your collarbones as the shoulders release back and down.
- Let your arms hang by your sides with palms forward.
- Draw your chin slightly in toward your chest to feel a lengthening through your cervical spine.
- Reach the crown of your head up toward the sky.
2. Spinal Wave
"To increase pain-free range of motion, you can move further into poor posture (shoulders rounded forward and slouching) and come back upright by using the erector spinal muscles to pull you back upright," says Ternes. After the push and pull of spinal flexion and extension, allow your body to fall into an upright position somewhere in between.
- From either seated or standing, roll into spinal flexion, rounding your back forward.
- Actively rise up into spinal extension, arching slightly backward.
- Repeat 5 to 10 times.
Read more: 12 Moves for a Stronger Core and Better Posture
3. Diaphragmatic Breathing
When you're sitting and slouched forward, the diaphragm (your main respiratory muscle) isn't in the best position for optimal function. So sit up tall and practice diaphragmatic breathing (aka belly breathing). Focusing on your breath will also bring awareness to your posture.
- Start either seated, lying on your back or standing and place one hand on your lower abdomen and the other on your chest.
- Breathe into your belly so the lower hand rises first as you inhale.
- Practice belly breathing for two to five minutes a few times a day.
Tip
Notice if your shoulders rise and fall with your breath. Often times, people overuse these secondary respiratory muscles instead of using the diaphragm to breathe fully.
4. Locust Pose (Salabhasana)
Perhaps you've heard the phrase, "pinch your shoulders together like you're squeezing a pencil between them," to correct your posture. Locust pose does something similar but also brings awareness to what your shoulders are doing and activates your upper back muscles, Vincent says.
- Begin lying face down with legs together and arms by your sides, palms down.
- Inhale as you lift your upper torso away from the floor.
- Pull your shoulders back by activating the muscles of your upper back.
- Hold for a few breaths, then lower back down.
5. T-Spine Opener
If your upper back is out of alignment, you'll likely experience problems in your neck and lower back as well, says Los Angeles-based chiropractor Robert Bates. And that can lead to imbalances and movement-pattern problems. The T-spine opener helps loosen and realign your spine.
- Lie on your side with your knees bent to 90 degrees and your arms outstretched, hands together. Place a towel or blanket under your head for support if you like and a small pillow or yoga block between your knees.
- Keep your knees in place as you inhale and reach the top arm up and over to the other side so your arms are in a T shape.
- Exhale and return to the start position.
- Perform five to 10 reps on each side.
Read more: The Best Yoga Poses for Your Back
6. Segmental Cat-Cow
Proper curvature in you spine provides structure and function to the body and acts as a shock absorber for motion. "If a segment of the spine is stuck, it's not allowing proprioception to be generated, nutrients can't flow to brain and throughout the body and stress hormones are produced," says Bates. Counteract all of that with this dynamic stretch.
- Begin on your hands and knees in a neutral spine position.
- Exhale as you fully round your back, pull the belly button in toward your spine and tuck your chin toward your chest.
- Starting at the tailbone, release one segment of your spine at a time, relaxing through the lumbar spine, thoracic spine (mid-back) and finally, your cervical spine as you lift your chin upward into full flexion.
- Then, starting at the tailbone again, reverse the motion until you come back to the starting position.
- Be aware of what segments feel stuck. Breathe into these spaces and remember to move slowly.