
Spend eight-plus hours curled in the fetal position or lying face-down on a rock-hard mattress, and your body will likely feel as stiff as a board come morning. And if you're one of the 70 percent of people over the age of 50 who experience joint pain at least occasionally, per a University of Michigan poll, that tightness may also come with a side of uncomfortable aches in your knees, shoulders or hips.
The good news: Performing a handful of dynamic stretches and mobility drills before you start your day can give you the pain relief you need. Here, physical therapists share the exercises they recommend for clients experiencing joint pain when they wake up and explain why they can be so beneficial.
Video of the Day
What Causes Joint Pain?
By and large, joint pain stems from a consistent lack of varied movement, says Grayson Wickham, PT, DPT, CSCS, a physical therapist and the founder of Movement Vault. Most folks are glued to their desk chairs five days a week.
And in their workout routines, they may be focusing primarily on exercises that take place in the sagittal plane (think: forward and backward exercises that involve flexion and extension of a joint, like bench presses, forward lunges and squats), Wickham says. In turn, the muscles that fire up during rotational and side-to-side movements aren't working as frequently, which can ultimately lead to muscle weakness.
"Over the years, your body adapts [to the lack of movement] and gets these tight muscles and tight joints, and tight joints don't move like they should move," he tells LIVESTRONG.com. "Then, another joint or area of the body has to compensate for the joints that aren't moving well."
For instance, if you have weak, tight hip muscles, your knees will move differently than how they're designed so you can effectively carry out a movement pattern. In this case, the knee joint tends to rotate slightly, according to Wickham. That tweak leads to wear and tear in the compensated joint that, over time, can lead to pain or injury, he notes.
You may also develop pain due to weakness in the muscles surrounding the affected joint, says Bethany Cook, PT, DPT, CSCS, a physical therapist and the founder of Be Free MIAMI.
"Your joints take the stress of your day-to-day activities, and the weaker you are around that joint, the more stress it's going to take," Cook tells LIVESTRONG.com. "So, the more you can strengthen the muscles and soft tissues surrounding that joint, the less stress will be placed on it."
Though less common, joint pain can also be caused by sudden injuries — say, a slip on an icy sidewalk or a fall during a contact sport — or genetic predisposition (perhaps your joint has an atypical orientation that leads to wear and tear), Wickham says.
Arthritis can also be to blame, including osteoarthritis (when the cartilage covering the ends of bones begins to break down) and rheumatoid arthritis (a disease in which the immune system attacks joints), according to the Mayo Clinic.

Why Movement Can Relieve Joint Pain
When weakness and tightness are to blame for joint pain, movement is often one the best treatment strategies. Along with gently yet dynamically exercising the aching joint (so long as it doesn't exacerbate the pain), you'll typically want to practice active stretches that target the tight muscles and joints driving the movement compensation, Wickham says. So if tightness in your hips is behind your knee pain, you'll want to focus on active stretches that target the hip joint, he notes.
With active stretching, you're improving your joint's active mobility, which can help you become more "flexible," and you're improving your activation of muscles throughout your range of motion, Wickham explains. In the process, you're also building a more resilient joint that's less likely to get injured, he notes.
Performing controlled articular rotations (CARs) — which involve slowly moving your aching joint through its end range of active motion — can also be beneficial, according to Cook.
"You're not just activating the muscles around it, but you're also letting your brain know, 'Hey, let's prioritize these tissues for whatever they need,' whether it's repair, remodeling or nourishment," Cook says.
Movement drives the production of synovial fluid, produced by the connective tissue (called the synovial membrane) that lines your joints. This fluid lubricates and nourishes your joints, hence the expression "motion is lotion," Cook says.
Performing exercises that improve range of motion and strengthen muscles surrounding aching joints can also be helpful for some types of arthritis, according to the Mayo Clinic.
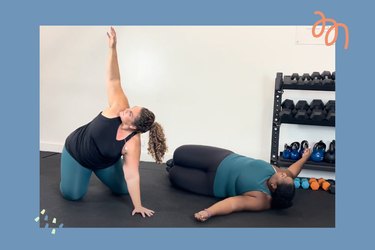
11 Exercises to Relieve Morning Joint Pain, According to Physical Therapists
After sleeping in a stagnant position, your joints may feel particularly stiff once your morning alarm sounds off, Cook says. However, spending just 10 to 15 minutes on movement before you head out the door, at least three times a week, can help ease joint pain, Wickham adds.
"Your body is going to really reap the benefits of preventing pain and injury and being able to move better," Wickham says. "Once your joints aren't as tight as they are, you're able to perform better in your day-to-day activities, such as reaching up and putting away a glass, cleaning your house, doing yard work, gardening or movements in the gym."
To help you on your journey toward ache-free joints, Wickham and Cook shared their favorite exercises for joint pain in your neck, shoulders, elbows, wrists, hips, knees and ankles, demonstrated below. If you're not sure which movements are right for you, don't be afraid to reach out to a physical therapist for personalized recommendations.
1. For Neck Pain: Full-Range Neck Activation Drill
- Sit on your heels on the floor with your spine tall, your shoulders rolled down and back and your gaze forward. Rest your hands at your sides.
- Tuck your chin as close to your chest as is comfortable, then begin to slowly circle your neck in a counter-clockwise direction, allowing your gaze to follow the direction of movement.
- Utilize every millimeter of range of motion that’s available to you and is pain-free. Remember to continue breathing.
- Do 10 reps, then switch directions for another 10 reps.
2. For Shoulder Pain: Reverse Snow Angel
- Stand with your feet hip-width apart with your arms hanging at your sides, palms facing behind you. Bend your knees slightly and hinge forward at your hips as far as is comfortable. Maintain a neutral spine.
- Maintaining this hip hinge position and keeping your arms straight, slowly raise your hands up toward the ceiling as far as is comfortable. This is the starting position.
- Bend both of your elbows to cross your forearms behind your back, palms facing the ceiling. Slowly slide your hands up your back as far as comfortable, then reverse the movement. Uncross your forearms and straighten your arms, keeping them lifted up toward the ceiling.
- With your arms raised, rotate your forearms so your palms face the floor, then rotate again until they face the wall in front of you.
- Slowly sweep your arms forward until your biceps are next to your ears.
- Pause, then reverse the entire movement to return to the starting position.
- Aim to move your shoulders and shoulder blades through every millimeter of range of motion that’s available to you and is pain-free. Remember to continue breathing.
- Do 3 to 5 reps.
3. For Shoulder Pain: Shoulder CAR
- Stand a few inches away from a wall next to the left side of your body with your feet hip-width apart, your arms hanging at your sides and your palms facing one another. Roll your shoulders down and back and stand tall.
- Slowly and with control raise your left arm out in front of your body and up toward the ceiling, then sweep it back behind you.
- When you feel a sticking point about midway through the movement, rotate your arm until your thumb is pointing down toward the floor.
- Continue to slowly sweep your arm until it’s back next to your left leg. Avoid touching the wall with your hand and rotating your body toward the left.
- Pause, then reverse the entire movement to return to the starting position.
- Utilize every millimeter of range of motion that’s available to you and is pain-free. Remember to continue breathing.
- Do 5 to 10 reps, then switch sides for another 5 to 10 reps.
4. For Elbow Pain: Full-Range Elbow Activation Drill
- Sit on your heels on the floor with your spine tall, your shoulders rolled down and back and your gaze forward.
- Extend both of your arms slightly in front of your body with your palms facing forward, your fingertips next to your kneecaps, hovering a few inches above the floor. Your thumbs should be pointed out toward the sides of the room.
- Keeping your shoulders stable and elbows tucked at your sides, slowly lift your fingertips up to your face, your palms now facing you. Utilize every millimeter of range of motion that’s available to you and is pain-free.
- Slowly lower your fingertips back to the floor next to your kneecaps. Midway through the movement, rotate your forearms so your palms continue to face you. Your thumbs should be pointed toward your knees.
- Continue bending and extending your elbows while rotating your forearms so your palms are always facing your body. Remember to continue breathing.
- Do 10 reps.
5. For Hand and Wrist Pain: Eccentric Active Palm Stretch
- Start in a table-top position on the floor with your wrists underneath your shoulders and your knees underneath your hips. Look down at the floor slightly in front of you to maintain a neutral neck. Spread out your fingers as far as comfortable.
- Lift the palm of your hands off the floor until just your fingertips are touching, pressing them into the ground. While contracting the finger muscles on the inside of your hands, slowly lower the rest of your hands down onto the floor.
- Slowly lift your palms off the floor, continuing until just your fingertips are pressing into the ground. The further you lean forward over your hands, the more challenging the stretch will be.
- Do 20 reps.
6. For Wrist Pain: Wrist CAR
- Sit cross-legged on the floor with a tall spine. Roll your shoulders down and back.
- Extend your right hand out in front of you at shoulder height, with your palm facing toward the ceiling. Create a gentle fist with your left hand, then hold onto your arm, just below your wrist, with your left hand to provide stability.
- Slowly and with control, rotate your right wrist counterclockwise, drawing a small circle with your fist.
- Pause, then reverse directions.
- Then repeat with your hand open. Utilize every millimeter of range of motion that’s available to you and is pain-free. Remember to continue breathing.
- Do 5 to 10 reps, then switch sides for another 5 to 10 reps.
7. For Hip Pain: Active Hamstring Stretch to Active Hip Flexor Stretch
- Start in a kneeling lunge position with your left foot resting on the floor in front of you and your right knee bent at a 90-degree angle, in line with your left hip. Your right knee is resting on the ground directly underneath your right hip and bent at a 90-degree angle, your right shin resting on the floor behind you.
- Hinge forward at your hips and place both of your hands on the floor on the inside of your left foot. Keeping your left heel and hands pressed into the floor, shift your hips back as far as is comfortable to maximally stretch out your hamstrings.
- Then, contract your hamstring muscles by driving your left heel into the ground. Hold this contraction for 20 seconds.
- Lift your hands off the floor, lower the rest of your left foot back to the ground, and return to the starting kneeling lunge position. Hang your arms at your sides.
- Keeping a tall spine and gazing forward, drive your left knee forward as far as is comfortable, ensuring your left heel doesn’t lift off the floor. You should feel a stretch in your hip flexors.
- Then, contract the hip flexors for 20 seconds by flexing your right hip forward, as if you’re trying to drag it on the mat (although it shouldn’t move).
- Reverse the movement to return to the starting position. Utilize every millimeter of range of motion that’s available to you and is pain-free. Remember to continue breathing. That’s 1 rep.
- Do 3 reps, then switch sides for another 3 reps.
8. For Hip Pain: Hip CAR
- Start in a table-top position on the floor with your wrists underneath your shoulders and your knees underneath your hips. Look down at the floor slightly in front of you to maintain a neutral neck. Grip the floor to engage forearms and core.
- Lift your left knee off the floor, then slowly drive it up toward your chest as far as comfortable.
- Maintaining a bend in your left knee, slowly raise your left leg out to your left side and up toward the ceiling as far as comfortable.
- Keeping your left leg lifted, slowly rotate your left knee to point your heel toward the ceiling.
- Then, sweep your left knee back behind you until it’s in line with your left hip, simultaneously pressing your left heel up toward the ceiling. Maintain a bend in your left knee.
- Slowly lower your left knee toward the floor until it’s stacked underneath your left hip, then reverse the movement.
- Utilize every millimeter of range of motion that’s available to you and is pain-free. Remember to continue breathing.
- Do 5 to 10 reps, then switch sides for another 5 to 10 reps.
9. For Knee Pain: Knee CAR
- Sit tall on a bench with your hands on your hips, toes resting on the floor and your gaze forward.
- Keeping your right thigh glued to the bench, lift your right foot off the floor and rotate your foot at the ankle joint to the right.
- Holding this position, slowly raise your right foot up toward the ceiling to straighten your knee.
- Pause, then slowly bend your knee and lower your foot back to the starting position.
- Keeping your right thigh glued to the bench, lift your right foot off the floor and rotate your foot at the ankle joint to the left.
- Holding this position, slowly raise your right foot up toward the ceiling to straighten your knee.
- Pause, then slowly bend your knee and lower your foot back to the starting position.
- Utilize every millimeter of range of motion that’s available to you and is pain-free. Remember to continue breathing.
- Do 5 to 10 reps, then switch sides for another 5 to 10 reps.
10. For Ankle Pain: Tiptoe Squat
- Stand with your feet closer than hip-width apart behind a stable chair. Rest your hands gently on the back of the chair and lower down into a deep squat, keeping your heels lifted and using the chair for support.
- Gaze down and slightly forward to maintain a neutral neck and engage your core.
- Maintaining a squat position with your hands resting on the chair, lift your heels off the floor as high as possible, focusing on pressing your toes into the ground.
- With your toes driving into the ground, slowly lower your heels as far as possible. Your body should be stable, and only your heels should be moving.
- Utilize every millimeter of range of motion that’s available to you and is pain-free. Remember to continue breathing.
- Do 15 to 20 reps.
Tip
To modify, perform the exercise while standing upright. To progress, perform the exercise without the support of the chair.
11. For Ankle Pain: Ankle CAR
- Sit cross-legged on the floor with a tall spine. Roll your shoulders down and back.
- Drive your left knee up toward your chest, then hug your thigh against your body by wrapping your left arm behind your thigh and holding your left arm on top of your kneecap.
- Slowly and with control, rotate your ankle clockwise, drawing a small circle with your foot.
- Pause, then reverse directions.
- Utilize every millimeter of range of motion that’s available to you and is pain-free. Remember to continue breathing.
- Do 5 to 10 reps, then switch sides for another 5 to 10 reps.