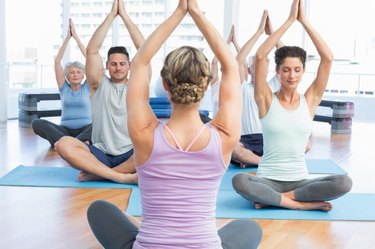
Your posture can significantly add or detract from your overall appearance. Good posture makes you look confident, open and friendly. A hunched posture, on the other hand, can make you look guarded, shy and older than you are.
Although more common in old age, an upper thoracic hump can develop in younger adults, too, and is often the result of prolonged poor posture. The muscles of the upper back become underactive, and the muscles of the chest become contracted.
Video of the Day
Video of the Day
Yoga can help you correct your upper thoracic hump over time. The best poses are those that lengthen tight chest muscles and strengthen weakened upper back muscles.
Cat-Cow Pose
Begin with several rounds of this warm up pose to lengthen and gently strengthen the back muscles and open the chest.
Step 1
Get on all fours on your yoga mat with your shoulders aligned over your wrists and your hips aligned over your knees.
Step 2
As you inhale, drop your belly down toward the ground as you broaden across your chest and lift your tailbone. Emphasize squeezing your shoulder blades together.
Step 3
Exhale as you reverse the position, rounding your back and tucking your tailbone. Bring your chin toward your chest and broaden across your shoulder blades.
Step 4
Alternate between the two poses for 10 rounds, then return to a neutral spine.
Standing Forward Fold with Bound Hands
This standing pose opens the chest and the fronts of the shoulders and strengthens the upper back muscles. It also helps lengthen the entire spine.
Step 1
Stand at the top of your mat with your feet together (or apart if you have lower back pain or are pregnant) and your arms at your sides.
Step 2
Pull your shoulders back, squeeze your shoulder blades together and lengthen up through the crown of your head.
Step 3
Clasp your hands together behind you, maintaining the erect, shoulders-back posture.
Step 4
Bend your knees slightly. Although this pose lengthens the hamstrings, you want the focus to be on the upper body here. Especially if you have tight hamstrings, bend your knees as much as you need to.
Step 5
On an exhale, fold forward at your hip creases, not at your natural waist. This helps keep the spine elongated. Bend your knees as much as necessary to get your belly onto your thighs.
Step 6
Bring your arms over your head as far as you can. Try to keep the elbows straight. Continue to pull the shoulders back and squeeze the shoulder blades together. Pull your shoulders away from your head.
Step 7
Hold here for five to 10 deep breaths. Rise back up to standing with a flat back, switch the grip of your hands and repeat the pose.
Modification: If you can't clasp your hands behind your back, you can use a towel or yoga strap to bridge the gap. Keep narrowing the grip until you're able to clasp your hands.
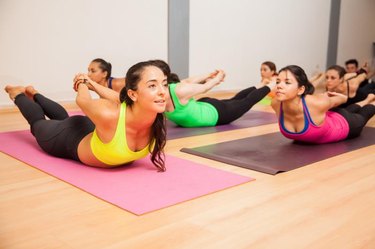
Locust Pose
This supine pose strengthens the entire spine and opens the chest. Clasping the hands behind you emphasizes the upper back and deepens the chest stretch.
Step 1
Lie on your stomach with your arms at your sides, palms down, and your legs together or slightly separated. Rotate your inner thighs down toward the mat so your heels point toward the ceiling.
Step 2
On an exhale, lift your legs, shoulders, arms and chest off the mat. Broaden across your chest and reach back through your fingers and toes. Squeeze your shoulder blades together.
Step 3
Hold here for five to 10 breaths and release.
Step 4
On the second round, interlace your fingers behind your back if you're able. Broaden across your chest and squeeze your shoulder blades together. Straighten your arms as much as you can.
Step 5
Exhale as you lift everything up. Lift your hands away from your buttocks if possible. Continue to lengthen through the crown of your head and squeeze your shoulder blades together.
Step 6
Hold for five to 10 deep breaths and release.
Seated Spinal Twist
Twisting postures encourage a long spine and strengthen the muscles that support the spine for improved posture.
Step 1
Sit on your mat with your legs extended. Bend your right knee and place the foot flat on the floor. Interlace your fingers around your right shin just below the knee. Pull with your arms to help you sit up as tall as you can. Squeeze your shoulder blades together.
Step 2
Release your hands and place your right hand on the mat behind your right hip with your arm straight. Take your left arm and place it outside your right knee, so your knee is pressing into your upper arm just above the elbow.
Step 3
Lengthen up through the crown of your head and twist your torso the right as far as you can, pressing your left arm into your right knee. Hold here for five to 10 deep breaths, then return to center. Repeat on the other side.
Read more: Exercises to Correct Bad Posture