Tight hips can feel like a fact of modern life. After all, sitting all day (in front of the computer?) is the number-one cause of tight hips, according to the International Sports Science Association.
Luckily, there's something you can do: yoga hip openers.
Video of the Day
"A hip opener is a pose whose main anatomical responsibility is to create a greater ranger of motion in the hips," says Shawna Davis, a certified yoga instructor and founder of Froing and Flowing. "They increase mobility and flexibility while alleviating tightness."
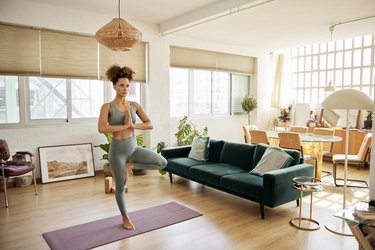
And this 20-minute yoga flow for tight hips is all about embracing the power of hip openers — progressing from gentle warm-up postures into more intense stretches, and then calming things down with final grounding poses.
So grab a yoga mat, focus your breathing and ease into each of the following poses for 1 minute or four to six breaths. (Do all single-sided poses for 1 minute per side.)
Check out more of our 20-minute workouts here — we’ve got something for everyone.
Move 1: Corpse Pose (Savasana)
- Lie on your back in a comfortable position with the backs of your hands on the floor and your eyes closed.
- Pay attention to and let go of any muscle tension. Let your body go limp. Feel your feet drop out to your sides.
- Breathe slowly and deeply.
Variations
If you have a tight lower back, placing a folded towel underneath the small of your back can reduce stress there.
Move 2: Supine Twist (Supta Matsyendrasana)
- Lying on your back, place your feet flat on the floor and bring your legs together.
- Lower both of your knees to one side, and turn your head to face the other.
- You should feel gentle stretch through the outside of your hips and lower back.
- Breathe slowly and deeply.
- Repeat on the other side.
Variations
If your bottom knee doesn't touch the floor or your knees separate, use a prop (like a rolled-up towel) to support your joints.
Move 3: Reclined Butterfly (Supta Baddha Konasana)
- Lying on your back, bring the soles of your feet together and let your knees lower to the sides. You can rest your head however feels most comfortable.
- You should feel a mild stretch from your inner thighs to your groin.
- Breathe slowly and deeply.
Variations
During this yoga hip opener, slide your feet out farther from your body to minimize the bend in your knees and hips. This will lessen the intensity of the stretch.
You can also place yoga blocks or rolled-up towels under your knees for support.
Move 4: Reclined Butterfly Counter Pose
- Lie on your back with your feet flat on the floor about hip-width apart.
- Let your knees fall in toward each other.
- Keeping your knees together, inch your feet out to the sides until you feel a stretch in your outer hips.
- Breathe slowly and deeply.
Variations
If you feel any stress to your lower back, try placing a folded-up towel under the small of your back.
Rest your head on the floor however feels most comfortable to you.
Move 5: Revolved Downward-Facing Dog (Parivrtta Adho Mukha Svanasana)
- Begin in a tabletop position on all fours with your wrists under your shoulders and knees under your hips.
- Exhale as you tuck your toes and lift your knees off the floor.
- Reach your pelvis toward the ceiling, keeping your spine long and sending your tailbone back and up. Gently straighten your legs without locking your knees.
- As you inhale, lift one hand and reach it under your body to grasp your opposite ankle.
- Hold for a breath, then alternate on the other side.
- Breathe slowly and deeply.
Variations
If you can’t comfortably reach your ankle, rest your hand on the outside of your opposite leg's shin or thigh.
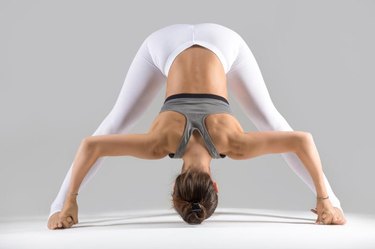
Move 6: Standing Cross-Leg Forward Fold (Uttanasana Variation)
- From standing, cross one leg over the other to stand with the outsides of your feet next to each other.
- Inhale, lengthening your spine, then exhale as you bend from the waist to fold forward over toward your feet.
- You should feel a gentle stretch stretch in the outer hip of your back leg.
- Breathe slowly and deeply.
- Repeat on the other side.
Variations
Adjust your position to bring the stretch to the place it feels best.
You can work up to this posture by doing a traditional forward fold. You don't have to cross your legs over one another.
Move 7: Low Lunge (Anjaneyasana)
- From forward fold, inhale to rise and step your right foot back into a low lunge. Your feet should be hip-width apart on separate tracks (they shouldn't line up front to back). Your left and right toes should both point forward.
- Keep your spine long by lifting your heart and extending the crown of your head away from your tailbone.
- Allow your hips to shift forward and down. You should feel a gentle hip flexor stretch.
- Breathe slowly and deeply.
- Repeat on the other side.
Variations
If you have sensitive knee joints, place your back knee on a pillow.
If needed, you can also place one hand on a sturdy object for support and balance.
Move 8: Warrior II (Virabhadrasana II)
- From low lunge, inhale to rise.
- Keeping your lead toes pointing straight forward, turn your back toes out to face the side of your mat.
- The heel of your front foot should be aligned with the arch of your back foot while your front knee stays above or slightly behind your ankle.
- Rotate your torso to the side and extend your arms to your sides at shoulder level.
- Turn your gaze over the fingertips of your front hand, lengthening your stance to go deeper. You should feel a mild stretch through the thighs and hip flexors.
- Breathe slowly and deeply.
- Repeat on the other side.
Variations
If your leg muscles start to fatigue, straighten your front knee. Rest for a few breaths, then try lowering back into the pose.
Move 9: Triangle Pose (Utthita Trikonasana)
- From warrior II, straighten your front leg, coming to stand with your feet slightly greater than shoulder-width apart.
- Exhale to send your back hip toward your back foot and hinge at the waist toward the front of your mat.
- Twist your torso to the side reaching your front arm toward the floor as your back hand extends toward the ceiling. Gaze toward your top hand as long as it’s comfortable on your neck.
- As best you can, stack your shoulders and hips. Keep your front leg as long as you comfortably can.
- Breathe slowly and deeply.
- Repeat on the other side.
Variation
To ease up on the stretch, gently bend the knee of your lead leg.
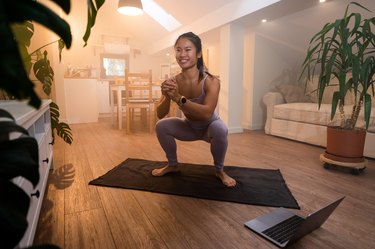
Move 10: One-Legged Chair Pose (Eka Pada Utkatasana)
- From triangle pose, inhale to rise, then exhale as you step to the top of the mat. Stand with your arms at your sides.
- On the next inhale, place one ankle on top of your other knee and exhale to sit back and lower your hips toward the floor.
- Let the knee of your raised leg fall toward the floor to feel a stretch through that side's hip.
- Breathe slowly and deeply.
- Repeat on the other side.
Variations
Place one hand on a sturdy object next to you for support and balance. The focus here is on loosening your hips, not balancing.
Your hands can be at heart’s center in prayer position, or if you wish to deepen the pose, fold forward and allow your hands to touch the floor.
Move 11: Happy Baby (Ananda Balasana)
- Lie on your back, then bend your knees.
- Grip the outsides of your feet and gently pull them down toward your armpits.
- Try to keep your ankles directly above your knees so your shins are perpendicular to the floor. You should feel a gentle stretch in the inside of your hips.
- Breathe slowly and deeply.
Variations
If you have a hard time comfortably reaching your feet, hold a yoga strap by both ends and loop it around your feet.
Move 12: Corpse Pose (Savasana)
- Lie on your back in a comfortable position with the backs of your hands on the floor and your eyes closed.
- Pay attention to and let go of any muscle tension. Let your body go limp. Feel your feet drop out to your sides.
- Breathe slowly and deeply.
Variations
If you have a tight lower back, placing a folded towel underneath the small of your back can reduce stress there.
How Does Yoga Help With Tight Hips?
"Yoga addresses tight hips by reversing the shortening and keeping supporting musculature — hip flexors, quads and hamstrings — long and supple, thereby preventing narrowing of the joint," says yoga expert Brendon Abram, author of Teaching Trauma-Sensitive Yoga and founder of Get Yoga in Ontario, Canada.
"If we don't take the time to do some hip-friendly stretching, we could end up with a condition called adaptive shortening," he says. This happens when "the muscle groups that support the hips become shorter and weaker and the hip joint narrows to the point where we could start experiencing chronic discomfort."
Yoga hip openers for beginners and long-time yogis combat that narrowing. In a word, they "open" the joint. This helps improves both hip mobility and total-body function. "Tightness in the hips lead to other ailments in the body such as lower back pain," Davis explains.
"I recommend practicing hip openers regularly, as practicing daily for just a few minutes can help greatly," she says.
If you don't have time to do this entire 20-minute yoga flow for tight hips in your regular routine, try breaking it up into mini flows. Aim to spend 5 minutes on a few of your favorite hip openers from the sequence. Consistent stretching goes a long way in loosening the hips.
Yoga Hip Openers and Emotion Release
What's more, "holding poses for 30 to 60 seconds permits your natural relaxation response to kick in," he says. That means doing yoga for your hips and thighs can counter the stress response, which preps the body to fight or flee by, among many things, tensing your muscles. But when your hip muscles are relaxed, you can get a better, deeper stretch to relieve tightness.
On top of that, yoga also involves focused breathwork — which is critical to triggering a relaxation response — so you get double the calming benefits for your mind and body.
"The hips serve as a container for emotions," Davis says. "Doing hip openers can help release trapped emotions and ease stress."
If you feel a strong emotional response doing yoga poses for tight hips, be gentle with yourself. Pay attention to what you're feeling in both mind and body.