
Sometimes, mustering the motivation to even start your workout zaps all your mojo, leaving very little for things like standing (we're only partly kidding). Fortunately, you can still get an effective butt and ab workout while lying down.
This 20-minute routine, created by Erica Heisler, certified personal trainer, CSCS, at Life Time Summerlin, combines glute and core moves into one time-efficient butt workouts at home or the gym.
Video of the Day
Video of the Day
"Strong glute and core muscles are the foundation to moving more effectively and efficiently, which is key to seeing progress, no matter your goal," Heisler says.
By including exercises that strengthen your backside and abdominals, Heiser says you'll help improve posture, decrease back pain, enhance balance, build functional strength and improve sports performance.
Plus, performing combination moves that target multiple muscle groups simultaneously saves you time, boosts the calorie burn and increases the intensity of your workout.
Try This 20-Minute Butt and Ab Workout Lying Down
All you need to get started with this 20-minute butt and ab workout is a yoga or exercise mat, a stability ball and some floor space.
Just make sure your muscles are warm before jumping into this workout. You can warm up with a few minutes of high knees, jump rope or jogging in place.
Move 1: Glute Bridge
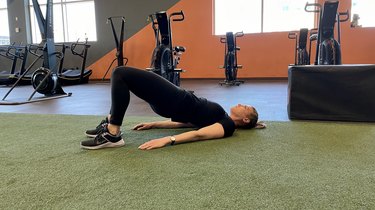
- Lie on your back with your arms at your sides, feet flat on the ground and knees bent.
- On an exhale, squeeze your glutes, press into your heels and drive your hips up toward the sky.
- Raise your hips until you form a diagonal line from knees to hips to chest.
- Pause here for a moment.
- Reverse the motion and return to the starting position.
Tip
This foundational move targets the glutes, hamstrings and core muscles. Make sure to keep your body in a straight line from your knees to your shoulders at the top of the movement. Raising your hips too high can strain the lower back. To make the glute bridge more challenging, move your heels closer to your body or hold a dumbbell over your hips.
Move 2: Single-Leg Glute Bridge (Leg Bent)
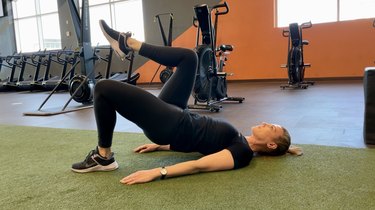
- Lie on your back with your arms at your sides, feet flat on the ground and knees bent.
- Raise your left foot off the ground and bend the knee to 90 degrees. Hold this leg elevated throughout the motion.
- Press into your right heel and raise your hips up, contracting your glutes.
- Reverse the motion and bring the hips back to the ground.
- Perform all your reps with the left leg elevated, then switch sides.
Tip
Bending the leg during a single-leg glute bridge requires the hamstrings to work more. You should feel the back of your leg working through the entire move.
Avoid dipping your hips or dropping one side. Imagine balancing a cup of water on your pelvis while raising your glutes off the floor. This should help steady your hips and keep them square.
Move 3: Single-Leg Glute Bridge (Leg Straight)
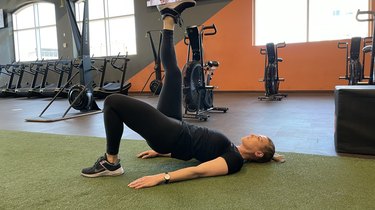
- Lie on your back with your arms at your sides, feet flat on the ground and knees bent.
- Raise your left foot off the ground and extend it straight, keeping your knees in line. Hold this leg elevated throughout the motion.
- Press into your right heel and raise your hips up, contracting your glutes.
- Reverse the motion and bring the hips back to the ground.
- Perform all your reps with the left leg elevated, then switch sides.
Tip
For maximum benefits, contract your abdominal and lower back muscles throughout the movement. This helps to keep the hips square and spine stable throughout the exercise. Also, focus on driving through the heels and hips and extending the hips at the top of the move.
Move 4: Stability Ball Leg Curl
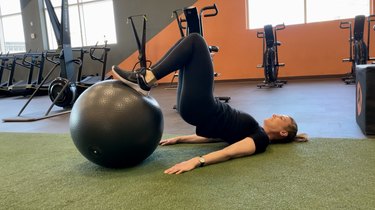
- Lie on your back with your arms at your sides and your palms pressing into the ground.
- Place your feet on the Swiss ball.
- Bring your feet toward your body as you lift your hips off the ground and squeeze your glutes.
- Pause, and then return to the starting position.
Tip
The stability ball leg curl targets the hamstrings and glutes. It also recruits the core muscles to stabilize your pelvis and lower back. Avoid arching your back when you press the hips upward.
To make the move more challenging, place your hands on your chest instead of on the floor. This reduces the contact points with the floor. You can also move you feet closer together on the ball to increase the intensity of the exercise.
No stability ball? Do a glute bridge hamstring curl with your feet on sliders or a piece of paper or in socks on a hardwood floor.
Move 5: Bicycle Crunch
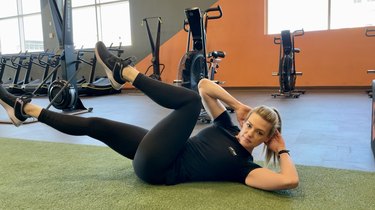
- Begin lying face up with your knees bent at 90 degrees over your hips and your hands clasped behind your head.
- Exhale and round your spine, lifting your head and shoulders off the floor.
- Twist your torso and draw your left knee in so that your right elbow touches it.
- Twist the opposite way so that your left elbow meets your right knee.
Tip
The bicycle crunch is a classic exercise that activates the rectus abdominis, obliques and transverse abdominis muscles.
If you have chronic neck pain or this exercise causes discomfort in your neck, consider the standing bicycle crunch. Perform the rotation slowly and avoid using momentum. Let your core do the work.
Move 6: Dead Bug
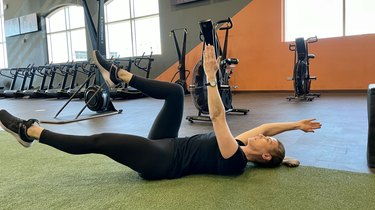
- Lie flat on your back (on the ground or any flat, stable surface) with both arms reaching straight toward the ceiling.
- Lift your feet off the ground so your legs are bent at a 90-degree angle.
- With control, lower one arm and the opposite leg away from each other and toward the floor.
- Lower your limbs as far as you can while keeping the lower back on the ground. Fight the impulse to arch your back by tightening your abs, pressing your bellybutton down to anchor your lower back to the floor.
- Exhale as you return your arm and leg to the starting position with the same controlled movement.
- Repeat with the other arm and leg, then return to the center again.
Tip
This move focuses on core stability and trunk stabilization while teaching you to move opposing limbs in unison. It requires physical and mental fitness, as you have to think about what you’re doing throughout the exercise.
Keep the lower back in contact with the mat so the spine maintains a neutral position at all times. This prevents you from arching your lower back.
Move 7: Double Straight-Leg Lift

- Lie on the ground with your legs out straight, arms at your sides. You can place your hands under your tailbone for more support.
- Brace your core and root your lower back into the ground.
- Raise your legs straight up toward the ceiling.
- Lower your legs back toward the ground, keeping your lower back in contact with the floor.
- Hover your feet just above the ground before rising for the next rep.
Tip
This is an excellent exercise for targeting both the rectus abdominis and transverse abdominis. When lowering your legs, don't let your lower back come off the mat — only go as low as you can while maintaining contact with the floor.