Whether you're a gym newbie or a bona fide exercise addict, we all have exercises that fill us with dread — and it's not always the toughest move in the routine.
"It's not just that the exercise is hard. Because we do plenty of other exercises that we don't hate that are hard," says Nick Tumminello, CPT, a personal trainer in Florida and author of books including Strength Training for Fat Loss and Strength Zone Training. Often, he says, there's another reason gym-goers despise a move: They might find it boring. Or they feel awkward or silly doing it. Or the exercise just makes them feel unsafe.
Video of the Day
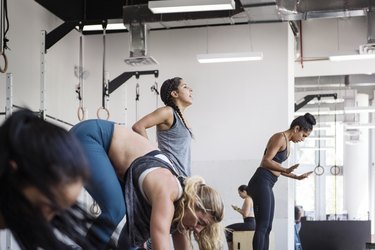
One move that combines all three (and is seriously hard) is the burpee, which might be the reason it's one of the most dreaded exercises in the gym.
"A lot of people believe that the ability to perform burpees is synonymous with being fit," says Jarrod Nobbe, CSCS, the head weightlifting coach for the Athletic Lab Weightlifting team and Garage Gym Reviews. "And so there's this misconception with some people that 'I'm not doing a good workout or a hard workout if there's not burpees.'"
A workout's not a workout without burpees? That's bupkes. In fact, there is no single exercise that every gym-goer has to do.
"Barring any medical considerations that would prevent this, you should push something. You should pull something. You should hip hinge. You should knee bend. And you should also rotate," says Tumminello. "Those are the 'have to do's.' And there are endless options for exercises to do those movements."
You can always swap out an exercise — and you can absolutely swap out the moves you truly despise. Here are nine of the most dreaded exercises in the gym, according to top trainers, including the hated burpee, and some effective exercises to do instead.
1. Burpees
This diabolical move combines so many exercises into one: You've got to squat, jump back into a plank, do a push-up, jump back out of the plank and jump into the air. Burpees crams together many movements and provide serious heart rate elevation without a lot of space or equipment, Nobbe says, which is why it's so popular for group HIIT classes.
All those movements smashed together "gets people completely out of their comfort zone," Shannon Cooper, CPFT, NordicTrack and iFIT trainer, says. It's partly the challenge of it that makes the burpee so hated.
But for some, it's not just that burpees are challenging. The exercise can cause strain on wrists and offers technique challenges for those who aren't used to squatting or jumping so fast. And if you don't have perfect form, it can cause injuries: A July 2022 study in BMC Sports Science, Medicine and Rehabilitation looked at injury rates in people doing body-weight training with an app and found that the greatest proportion of injuries occurred with the burpee.
Do This Instead: Break It Down
Both Nobbe and Tumminello suggest breaking the burpee down into its component parts.
"We're basically going down into a squat, doing a power plank, a push-up and then jumping," Nobbe says. So instead of doing those moves all in a single movement, do them back to back to back. This way, you can get and keep your heart rate up just as you would during a burpee finisher, and challenge yourself just as much without smashing your wrists.
"Let's go five, five and five," he says. "We're going to do five body-weight squats, five push-up and five squat jumps. If you put those moves together, that's basically a burpee."
This plan also skips the transition between going down to the floor and coming back up, which is where form often starts to slip during burpees, especially as you get tired.
Use this trio of moves as a one-for-one swap with burpees: If you'd normally do 20 burpees, do this 5-5-5 of the broken down move for four rounds, getting 20 reps of each.
Body-Weight Squat
- Stand with your feet hip-width apart, toes pointed slightly out from parallel.
- Push your hips back to initiate the squat.
- Bend your knees to descend until your thighs are at least parallel to the floor, keeping your chest up and your weight on your heels.
- Keep the weight of your body in your heels and press back to standing.
Push-Up
- Get into a plank position on the floor, with hands directly beneath your shoulders, your body forming a straight line from head to heels.
- Maintain this rigid body line as you bend your elbows to lower your chest toward the floor.
- Press back to start, maintaining the straight body line.
Tip
Struggle with the classic push-up? Do an incline push-up instead.
Squat Jump
- Stand with your feet slightly wider than shoulder-width apart.
- Push your hips back to squat while swinging your arms back. Drive up through your heels so forcefully that your feet leave the ground.
- Land softly, rest, reset and repeat.
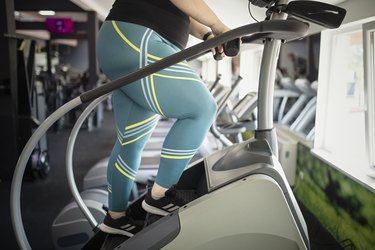
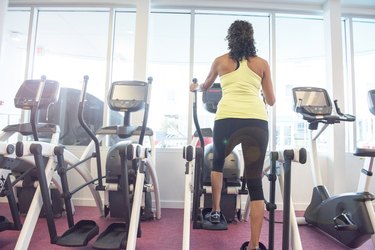
2. Running
There's a reason it's nicknamed the "dreadmill." Lots of gym-goers hate to run but believe it's a must.
"There is this enduring misconception that in order to get in shape, you've got to run. You don't have to," Steven Head, CSCS, owner of Head Strong Fitness and author of Not Another Fitness Book, says. "While we want things to be challenging, we don't want it to be such a struggle that it turns people off to exercise."
And that, he says, is the problem for many when it comes to running: They aren't ready to run for long periods of time, but they get discouraged by walking. While brisk walking is a powerful tool for mental and physical fitness, some trainees don't feel like it's enough of a challenge to "count."
Do This Instead: Climb Stairs
One reason Head likes the stair climber: There's no "walking versus running" distinction. Whether you're climbing fast or slow, on level 1 or level 20, you're climbing stairs.
"The nature of climbing stairs is challenging, but it's low-impact," he says, as it removes the pounding of the treadmill or road running. And climbing provides benefits that running alone can't, like targeting the posterior chain (the glutes and hamstrings).
If you've had discomfort in your knees on a stair climber or on stairs in the past, Head says, focus on your form: "Don't get up on the balls of your feet," he says. "Try and get your entire foot on the step — this will distribute your weight as evenly as possible across your foot. If you're concerned about your balance, you can hold on."
To keep stairs off your own dreaded exercise list, he says, don't go all out the first time: Estimate how long you think you can climb, and back off a little. Build that time, or the speed and intensity, over time.

3. Planks
Some moves are no fun because they're tough. But others, Tumminello says, are tough because they're no fun.
"Planks come up a lot because they're boring," he says. "You're just sitting there."
They're great for building stability in your core, but once you've built up some plank strength and endurance, holding the position for an extended period can feel like a grind, especially in the middle of an otherwise mentally engaging, exciting workout.
Do This Instead: Add a Shoulder Tap
Performing shoulder taps in a high plank position makes the plank a movement with sets and repetitions, so you can count instead of watching the clock.
This variation also challenges your core stability in new ways: Keeping your hips level while you raise and lower each hand from the ground is more challenging for your stability than the static plank, and you need to maintain your rigid core during movement.
Plank With Shoulder Tap
- Get into a plank position on the floor, with hands directly beneath your shoulders, your body forming a straight line from head to heels.
- Widen your feet slightly to increase your base of support, making them wider than your hips.
- Keeping your hips level and maintaining your rigid body line, lift your right hand off the ground and bend your elbow to reach up and tap the front of your left shoulder. Perform this tap under control. Return your hand to the floor.
- Repeat on the other side, lifting your left hand up to tap the front of your right shoulder. Return it to the floor.
- That’s 1 rep. Alternate back and forth in this way for 20 to 40 seconds per set.
Tip
Need to make it easier? Perform this move with your knees on the ground, maintaining a rigid body line from head to knees.
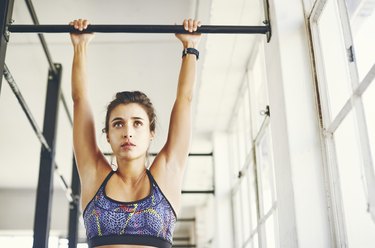
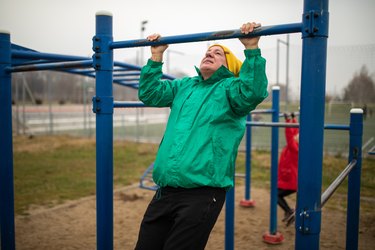
4. Pull-Ups
For many, pull-ups are frustrating, Ryan Koziol, CPT, owner of RYKO Fitness, says.
"Imagine trying to do an exercise, and you're just not able to do it," he says. "You may even have the strength to pull your body weight up, but you just don't have the technique yet."
Because pull-ups are a body-weight movement, you can't just dial down the weight to lock in the technique. And you can't always progress to lots more reps really quickly: Going from 4 pull-ups to 5, for example, is a bigger jump than adding another plate to a lat pulldown machine.
Do This Instead: Pull-Ups With a Looped Resistance Band
Your gym may have an assisted pull-up machine, but doing the move with a resistance band provides more of a core challenge, Koziol says, making it more like the body-weight pull-up.
Placing your foot into the band instead of the knees gives more rebound at the bottom of the move, he says, providing additional assistance that will let you do more reps and practice your technique. And holding for a few seconds at the top of the movement will help build strength in the back and arms.
"Hold that top position for 3 to 5 seconds, and then slowly come down," he says. "Use that rebound to get back up, and hold that top position again."
Adding the band will allow you to do more reps and sets: Koziol suggests starting out with 3 sets of 6 to 10 reps. When that becomes easy, add a fourth set, knowing it's OK for the last set to have fewer repetitions.
Looped Resistance Band Pull-Up
- Tie a looped resistance band in between the handles of a pull-up bar so that it hangs down.
- Place one foot inside the band and grip the bar with an overhand or underhand grip with your hands around shoulder-width apart.
- Before you start the move, pretend you’ve got jeans on: Now imagine tucking your shoulder blades into the back pockets of your jeans. This can help keep your shoulders back and down.
- Pull your breastbone toward the bar by bending your elbows. To help engage your back, concentrate on bringing your elbows down to touch your lats instead of thinking about bringing your chin over the bar. This can help you keep from reaching your head forward, which can cause neck strain, and can keep you from rolling your shoulders forward or back.
- Hold at the top for 3 to 5 seconds.
- Slowly return to the start position, and repeat.
5. Bulgarian Split Squat
In the Bulgarian split squat, or rear-foot elevated split squat, one foot is elevated behind the exerciser while they perform a split squat, the lowering and raising part of a lunge.
"There are so many benefits to this movement: It works so many different muscle groups. It improves balance. It improves hip flexor flexibility, which is good for overall fitness and wellness," Cooper says.
But getting into and out of the position to do the move can make people uncomfortable, she says, and can make them feel like they're going to fall, both before and during the movement.
Do This Instead: Weighted Step-Ups
Like the rear foot-elevated split squat, step-ups hammer the hamstrings and glutes, but there's less stress in the setup, Cooper says.
To maintain your balance, perform this move with one leg at a time: Do all the step-ups on the right side without taking your right foot off the bench. Focus on using your raised leg to push your body up and come down slowly. Don't slam your foot and ankle into the ground as you descend.
Weighted Step-Up
- Stand with a bench in front of you, holding dumbbells at your sides at arm’s length.
- Keep your torso upright as you place your right foot on the bench and press through your heel to bring your left foot up so you’re standing on the bench.
- Return to the ground, controlling your descent. Perform all your reps on this side, then switch sides and repeat.
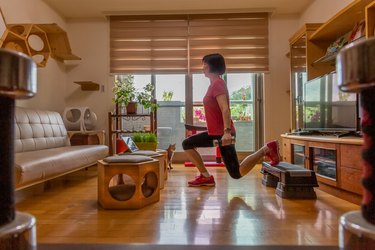

6. Lunge
When taking a long lunge step forward or backward, trainees "can feel like they're on a tightrope," Tumminello says. Even if you have the strength and balance to perform this move, he says, it's easy to feel as if you're going to topple while lunging.
That awkward feeling can also mean you're getting less out of each rep, as you focus on the funny feeling instead of feeling the tension in your legs.
Do This Instead: Use a Resistance Band for Assistance
To provide a little balance assistance, Tumminello will have shaky lungers hold a resistance band anchored at chest height in front of them.
"If they're holding it with their right arm, I'll have them step back with their right leg. This sort of gives them two legs of the table at once, like a cross-balance: The left leg and the right arm," he says.
This assistance helps make the move more stable and comfortable without taking a challenge away from the legs. And because one arm remains free, you can still add resistance (and a core challenge) by holding a dumbbell in the hand that's not holding the resistance band.
Band-Assisted Reverse Lunge
- Anchor a resistance band in front of you around chest height. Hold the resistance band at arm’s length in front of you with your right hand so it’s slightly taut. If you want to add weight, hold a dumbbell at arm’s length in your left hand.
- Stand with your feet shoulder-width apart. Take a large lunge step backward with your right leg, descending as you step until your knees both form 90-degree angles. As you descend, the band will go taut, providing some balance support.
- Press through your right foot to stand back up. Once you finish all your reps on the right side, do an equal number with your left foot, holding the band in your left hand, and the dumbbell in your right.
7. Thrusters
Like the burpee, the thruster is a heart-pounding combo move that doesn't require a lot of space. So this fast-paced squat-plus-shoulder press is often used as a finisher during high intensity interval training classes.
Because they're challenging, coaches will get eye rolls when this move is part of a workout, Cooper says. But the move has benefits that are worth the discomfort: "It's a total body strength move. And depending on the weight and speed you use, it can be used to build aerobic and anaerobic fitness."
Thrusters do require some shoulder and wrist mobility, though, which can cause discomfort, Cooper says. And even if you have the mobility but hate the move, exercises should make you feel empowered. So choose an alternative if thrusters just aren't your thing.
Do This Instead: Push Presses or Wall Balls
Performing thrusters with heavier weight and less speed can build serious strength. And doing them fast with lighter weights is perfect for cardio conditioning. Cooper says to choose an alternative that fits your goals.
For heavier lifting, the barbell or dumbbell push press offers many of the same benefits of a thruster in an equally powerful package: You're still thrusting the weight overhead, but instead of a full squat, you're dipping your hips into a quarter squat, loading up your back side to blast the weight overhead. This move is ideal for sets of 4 to 8 reps.
If you're looking for more of a cardio challenge, Cooper says, you can add some fun while requiring less wrist mobility by swapping thrusters for wall balls. In this move, you're basically doing a thruster, but tossing a soft-sided medicine ball up and against a wall. Throwing and catching the ball makes the move feel like a game, which you're certain not to dread!
Perform these for the same amount of time you would with thrusters — 20 to 60 seconds per round, for example.
Wall Balls
- Hold a soft-sided medicine ball in front of your chest with elbows bent. Stand in front of a wall with your feet around hip-width apart.
- Keeping your weight in your heels, push your hips back to squat, lowering until your thighs are at least parallel to the floor.
- Stand back up forcefully and use your momentum to straighten your arms and toss the ball up against the wall.
- Catch it, and immediately squat again. Continue in this way for 20 to 60 seconds, or however long your interval is.
Dumbbell Push Press
- Hold dumbbells at your shoulders (or a barbell in rack position in front of your shoulders) with your feet slightly wider than shoulder-width.
- Bend your knees slightly, dip your hips and explode up, pressing the dumbbells overhead.
- Return the dumbbells to your shoulders and repeat. Perform sets of 4 to 8 reps.
8. Front Squats
Like the thruster, the front squat can really bother the wrists, Nobbe says. Holding a barbell in a front rack position requires some mobility, and without it, the bar winds up pressed against your throat, creating an uncomfortable position that some exercisers dread.
"Most people don't have the mobility to get the elbows into a position where they can hold the bar in a place that feels safe," he says. And even if you have that mobility, you can lose it temporarily. "If I take a few weeks off and then go back, I can feel uncomfortable for a few weeks."
But front squats offer benefits you don't want to skip, Nobbe says: "The load is more forward on the body than with back squats, which challenges the torso more. And it also focuses more on the quads."
Do This Instead: Goblet Squats
Holding a heavy dumbbell in front of you provides the same kind of challenge for the quads, but can feel more safe than a barbell, Nobbe says.
Switching to a goblet squat, though, may not allow you to squat as much weight as you would with a barbell. To add to the challenge in this case, he suggests changing your tempo for the first few sets.
"Lower for 3 seconds, do a 1-second pause at the bottom and then drive up with intent," he says.
Doing the move in this way can mean that instead of doing sets of 15 reps, you might drop down to a time-saving 8 to 10. Aim for 3 to 5 sets of 5 to 12 repetitions, performing the first few sets with this tempo and the last few at a normal tempo once you've started to fatigue.
Goblet Squat
- Stand with your feet hip-width apart, toes pointed slightly out from parallel. Cup one end of a dumbbell in both hands in front of your chest with your elbows pointing down. In this position, the dumbbell and your arms will look like a goblet.
- Push your hips back to initiate the squat. Bend your knees to descend until your thighs are at least parallel to the floor, keeping your chest up and your weight on your heels.
- Keep the weight of your body in your heels and press back to standing.
9. Barbell Deadlifts
In some ways, exercise doesn't get simpler than a deadlift: Pick a heavy weight off the floor, and put it back down. But with the hips, knees, ankles, shoulders and back all needing to work in sync, a traditional barbell deadlift can make some people uncomfortable, Koziol says.
"This movement can be a trigger. It can trigger feelings of fear, pain or just a concern that they're going to get injured," he says.
Do This Instead: Romanian Deadlift
Koziol believes everyone should deadlift in some form, but it doesn't need to be the traditional barbell deadlift. Performing a Romanian deadlift is still a hip-hinging, back of the legs challenge, but your knees stay stationary. One less joint to move can make the exercise easier to coordinate while still providing a great training stimulus.
How to Do It: Romanian Deadlift
- Unrack the barbell in front of you, palms facing the front of your thighs.
- Push your hips back to bend at the waist and lower your body until your back is parallel to the floor. Let the weight hang down as you bend, and maintain a natural curve in your spine.
- Thrust your hips forward to return to standing to complete 1 rep.