There are a few things a lot of us do in our day-to-day lives: We spend a good chunk of our day hunched over a screen of some sort, and our workouts generally involve a lot of pushing exercises.
In other words, the muscles on the back of your body probably don't get much attention. And that's exactly why you need to add the face pull to your exercise arsenal.
Video of the Day
"[This exercise] just hits everything back there differently than any other exercise," says Steven Head, CSCS, owner of Head Strong Fitness. "It does a good job of hitting the posterior deltoid, the mid-trap and others in the upper back."
- What is a face pull? The face pull is a back and shoulder exercise where you pull a resistance band or rope just above eye level toward your face, leading with your elbows.
- What muscles does the face pull work? For the most part, face pulls work your lateral and posterior deltoids, which are the sides and backs of your shoulders. This move also strengthens the muscles of your upper back.
- Should you go heavy on face pulls? Usually, the muscles on the back of your shoulders are small and under-trained, Head says. That's why it's hard to lift a ton of weight with this move. Instead of lifting heavy, use a lighter weight and focus on your form. (Check out these other exercises you can do with just a 10-pound weight.)
- Should I do face pulls on shoulder day or back day? Shoulder day might be better. Many back exercises hit the same back-of-the-shoulder muscles that the face pull taxes, so those muscles may already be worked on back day. But if it fits better in your schedule on your back day, that's the right answer for you.
- Who can do this exercise? People of any fitness level with the shoulder mobility to do the exercise without pain can do it, Head says. If your back is sensitive, he suggests trying it in a half-kneeling position (more on that below).
How to Do the Face Pull With Perfect Form
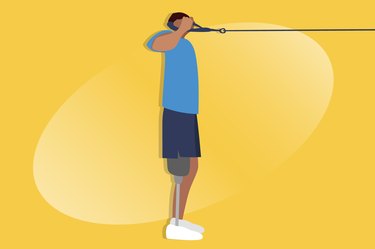
- Set the anchor of a cable machine at eye level. Attach a tricep rope.
- Grab one end of the rope with each hand so the balls of the rope are on the thumb/index finger sides of your hands. Bend your elbows up in front of you so your palms face each other.
- Take a step back to make the rope taut and bend your knees slightly, feet at shoulder-width distance.
- Pull the center of the rope — the metal anchor in the middle — toward your forehead.
- At the same time, draw each elbow to your sides in line with your shoulders at a 90-degree angle. At the finishing position, your hands should be by or past your ears, elbows pointed down.
- Hold this position for a second or two, squeezing your shoulder blades together.
- Reverse the move to return to start and repeat.
Watch the Full Face Pull Tutorial
4 Face Pull Benefits
1. It Helps Even Muscle Imbalances
Many of the activities you do each day (like sitting hunched over a screen) can shorten and tighten muscles in the front of your body, including your front shoulder muscles and pecs, Head says. When these muscles get tight, your upper back can get weak.
Plus, many gym exercises (like push-ups) strengthen the muscles on the front of your body, leaving the muscles on the back (aka your posterior chain) untouched. This combination is the perfect recipe for muscle imbalance, increasing your risk of injury.
Face pulls help strengthen your upper-back muscles while stretching the overworked muscles in the front of your body. Although a few face pulls won't perfect your posture, they can help you engage your upper-back muscles over time, Head says, pulling your shoulders down and away from your ears (a common posture issue).
2. It Strengthens Often-Missed Muscles
"[The face pull] targets muscles that don't get targeted when you're pulling bigger weight," Head says. When you perform big, heavy back exercises (like bent-over rows) the larger muscles in your back do a majority of the pulling. So, other muscles in the center of your back can get overpowered and under-worked.
With the face pull, larger muscles (like your lats) aren't in a position to dominate the pull, he says. Face pulls isolate smaller, often-missed muscles like your rear delts, rhomboids (the muscles between your shoulder blades) and traps. This helps prevent poor posture and the typical shoulder or neck issues that may follow.
3. It Works Your Entire Shoulder
Your shoulders are actually made up of three portions or heads: the anterior (front) delt, the lateral (side) delt and your posterior (rear) delt. Whereas most other shoulder exercises focus on the front and side delts, face pulls work all three heads at once, according to Alex Viada, CSCS, founder of Complete Human Performance.
Thanks to their total-shoulder focus, face pulls also help you engage your rear delts in other exercises, he says. In the long run, this can help build more balanced strength and protect your shoulders.
"Just making your rear deltoids stronger may not actually help protect your shoulder if you're not engaging that rear deltoid as part of bigger movements," he says. "It's much better for shoulder health to use multiple muscles in one movement in anatomical positions."
4. It Doesn't Require a Ton of Equipment
Because face pulls focus on often-missed muscles (and these muscles aren't huge), you don't need to go heavy to benefit from this exercise. While you can do this move at the gym with a cable machine, even a light, long-loop resistance band can do the trick.
4 Face Pull Form Tips
1. Squeeze Your Glutes and Core
When you do this exercise, your back should sit flat with little to no arch. Over-arching your spine while doing this exercise can cause lower-back issues or discomfort.
To keep your spine safe, squeeze your glutes and brace your core before every rep — this should lock your low back in place. You can also do your reps in front of a mirror, taking an occasional peek at your form.
If you find that you're still over-extending your lower back, reduce the weight or perform the half-kneeling version of this exercise (more on that below).
2. Keep Your Anchor at Eye Level
Don't use a cable that's anchored below your eye level. When you do, you pull up instead of back and down. This can engage your upper trapezius muscles — your "shrugging" muscles — which isn't the goal of the exercise.
Anchor your cable machine or resistance band at eye level to prevent injury and activate the right muscles.
3. Keep Your Shoulders Down
Even if the cable is set sufficiently high, you may find yourself shrugging your shoulders up toward your ears, but this puts too much emphasis on the upper traps and can put unwanted pressure on your neck.
Reset with each rep and pull your shoulders down and back away from your ears.
4. Squeeze Your Shoulder Blades Together
As you pull the cable up around the sides of your head, imagine you're trying to hold an orange between your shoulder blades. When you do this, you can't hike your shoulders up and you better activate your rear delts and rhomboids.
3 Face Pull Variations
1. Resistance Band Face Pull
- Anchor a long-loop resistance band at eye level or slightly higher and grab one end of the band in each hand.
- Take a step back to make the band taut and bend your knees slightly, feet at shoulder-width distance.
- Pull the sides of the band back so your arms spread out as if you're flexing your biceps. Your hands should be by or past your ears, elbows pointed down.
- Hold this double biceps position for a second or two, squeezing your shoulder blades together and keeping your shoulders down.
- Reverse the move to return to start
- Repeat for all reps.
Tip
If you’re working out at home, or your gym doesn’t have a high cable pulley, you can use a resistance band. Because resistance bands get harder to pull the more they stretch, this move will actually become more challenging as you pull.
2. Half-Kneeling Face Pull
- Get into a half-kneeling position — one knee on the ground, the other bent 90 degrees.
- Anchor a long-loop resistance band at eye level or slightly higher and grab one end of the band in each hand.
- Move back as needed to make the band taut.
- Pull the sides of the band back so your arms spread out as if you're flexing your biceps. Your hands should be by or past your ears, elbows pointed down.
- Hold this double biceps position for a second or two, squeezing your shoulder blades together and keeping your shoulders down.
- Reverse the move to return to start
- Repeat for all reps.
Tip
If you’re having trouble doing face pulls without overextending your low back, or if your gym doesn’t have a cable stack high enough to anchor it at your eye level or above, you can do the move in a half-kneeling position. This reduces your hip motion, helping stabilize your pelvis and lower back, Viada says.
3. Band Pull-Apart
- Stand with your feet at hip-width distance, your hands straight out in front of your shoulders holding a long-loop resistance band so it’s loose between your hands.
- Keeping your arms parallel to the floor, separate the band out to the sides so your torso forms a “T” shape and the band is taut. Your palms should face forward, as if you were going to give a big, wide double thumbs up.
- Hold the “T” position for a second, then return to start.
- Repeat for all reps.
Tip
This cable face pull alternative also works the center of your back and posterior deltoids. As you do the pull-apart exercise, keep your core braced and back flat.