No matter if it's your first-ever indoor cycling class or your first time riding a particular bike model, fiddling with your saddle height or handlebars under the watchful eyes of your classmates can immediately make you feel uneasy. Even tweaking your new at-home bike's settings ahead of a virtual workout can feel overwhelming, especially because you don't have an instructor who can double-check your equipment.
So it's no surprise that the intimidation involved with setting up a stationary bike is one of the main reasons newbies back out of the classes they book, says Donna Cennamano, CPT, manager of instructor training at CycleBar.
Video of the Day
Video of the Day
But adjusting a stationary bike to your body and preferences doesn't have to be complicated. Here, your step-by-step guide to setting up your stationary bike so you can head into your first cycling workout — at home or in the studio — feeling confident and ready to sweat.
Why Your Stationary Bike Set-Up Matters
It's tempting to pop your butt onto your exercise bike's saddle and pedal with all your might without a second thought. But adjusting the equipment before your ride is key to reducing your risk of injury and getting the most out of your workout.
One of the biggest mistakes a rider can make is setting the saddle too high or too low, as it affects your pedal stroke, Cennamano tells LIVESTRONG.com. Throughout your first class, you may experience some discomfort in your knees. And over time, an improper seat height may contribute to joint issues, among other side effects, she explains.
"If you're seated too low or too high, it's going to really put a lot of stress on the joints, it's most likely going to result in recruiting the wrong muscles, it's going to impact the comfort of [your ride], and, chances are, you're not going to be able to maximize performance," she says.
You also want your handlebar set at a height that encourages a neutral spine, according to Cennamano.
"You're not riding straight up, but you're also not hinging very low into the bars from your hips — it's around a 45-degree angle," she explains. "It allows you to recruit the proper muscles, not just for in the saddle but also when you lift out of the saddle."
However, if your handlebar height is set too low, you risk straining your back and suffering an injury, adds Amanda Hinds, a certified indoor cycling instructor in New Jersey.
Above all, make sure all adjustable elements of your stationary bike are securely fastened before you ride, Cennamano says. For example, if a pin isn't fully inserted in a hole on the saddle post, your seat may come loose mid-ride. Hello, injury!
"The only thing they should be moving on an indoor cycling bike is the flywheel [the weighted disc that sits at the front or back of a stationary bike that generates energy]," Cennamano says.
3 Steps to Set Up a Stationary Bike
There's no single stationary bike set-up that works for everyone, and even people with the same heights will require different settings, according to Cennamano. To ensure the equipment is in sync with your unique proportions and preferences, follow this three-step plan.
1. Set the Saddle Height
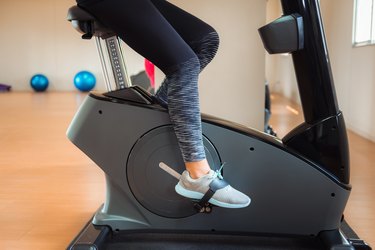
Before you clip into the pedals or slip your foot into the bike's foot cages, you'll need to adjust the saddle height. In your cycling shoes of choice, stand tall with your feet flat on the ground right next to the bike, then lower or raise the seat until it's aligned with your hip bone, Hinds tells LIVESTRONG.com.
From there, hop on the bike, rest your feet on the pedals and do some fine-tuning. Fully extend one of your legs to the floor (think: a 6 o'clock position) and take note of the bend in your knee. Ideally, the joint will have a "microbend" of roughly 25 to 35 degrees, Cennamano says.
"Anything less than that runs the risk of locking [your knees] on the extension," she explains. "Too much bend in the knee [will put] too much force on the joints. It's going to restrict the pedal stroke, it's going to impede your ability to find and hold the rhythm. It's also going to restrict your ability to leverage maximum power."
If needed, step off the bike and lower or raise your seat until you're able to create that microbend in your knee.
2. Adjust the Handlebar Height
Once your stationary bike's seat height is solid, it's time to modify the height of your handlebars, which are ideally in line with the saddle.
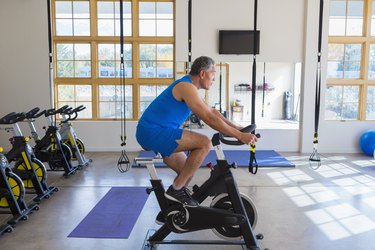
While sitting tall in the seat, place your hands gently on the handlebars and hinge forward slightly at your hips (roughly a 45-degree angle), maintaining a neutral spine, Hinds says. Your elbows should be ever-so-slightly bent, Cennamano adds.
"The rider [shouldn't] feel that they are hunching or rounding their back, which means the handlebar height is too low," Hinds says. "The rider also should not feel they are overreaching, as that means the handlebar height is too high."
So, if you notice your upper back is rounding or you're having to stretch to hold the handlebars, raise or lower the handlebars as needed.
New riders may feel more comfortable with the handlebars set slightly higher than the height of the seat, as it provides additional support while riding out of the saddle and reduces back strain, according to the experts. Ultimately, being able to maintain a slight bend in your elbows, a neutral spine and a soft grip will set you up for success.
"That'll promote the shoulders to relax, so the chest stays open and you're not recruiting from auxiliary muscles like the chest and back," Cennamano says.
3. Tweak the Distance Between the Handlebars and the Saddle
Finally, adjust the amount of space between the handlebars and the seat. While sitting in the saddle with your feet clipped in or secure in the cages, lift one foot up to the 3 o'clock position. In this spot, your knee should be in line with the ball of your foot, Hinds says.
"If I were to hold a string at the knee that goes down to the foot, I'd want the bottom of that string to land in the center of the shoe," Cennamano adds. "You want a nice 90-degree angle in the knee."
If your knee is behind the ball of your foot, the seat is situated too far backward, which can cause discomfort. If your knee is reaching over your toes, the seat is set too far forward, which can increase the risk of joint injury, Hinds says. You might even feel cramped on the bike, as though you don't have enough space to extend and relax your arms, Cennamano says. Take note of your knee positioning and bring your seat forward or backward until you can create a 90-degree bend in the joint and align it over the ball of your foot.
The Bottom Line
Adjusting a stationary bike so it properly fits your body isn't something to sweat over. However, the process can feel much easier if you have a workout buddy or cycling instructor to guide you — especially because not all bikes are designed the same, so the mechanics of how you move the handlebars and seat will vary — so don't be afraid to ask for help, Cennamano says.
Feeling comfortable throughout your workout is key, so take these tips as a general guide and modify your set-up as you need — even if you're a more experienced rider. You might elevate your handlebars slightly when you're first starting out to minimize back discomfort, for example.
"Over time, as you continue to work on endurance and strengthening in and out of the saddle, you can drop the handlebars down," Cennamano says. "But I think it's really important to emphasize that form and settings are not a one-and-done type of thing. You don't walk in, get your initial fitting and then you're set for life."
Injuries, joint concerns and a changing fitness level may all require you to alter your exercise bike settings at some point down the line.
The final takeaway: "Adjust as necessary and be patient," Hinds says. "The positioning is new, so it will take time to get used to [it] while riding."