Sprouts have the potential to provide significant nutritional benefits to your regular diet. The process of seed germination results in a dramatic increase in their vitamin content over a very short time span.
Sprouts are high in folate, magnesium, phosphorus and vitamin K — even higher than the fully grown version of the plant, according to WebMD. Adding sprouts to your meals is simple, and you can even grow them at home with a jar, cheesecloth, water and a rubber band. Here are four types of sprouts to add to your next grocery run.
Video of the Day
Video of the Day
1. Bean Sprouts
Bean sprouts are among the easiest to grow as well as being commonly available. A number of options are at hand when you want to add bean sprouts to your diet, including mung bean, garbanzo beans and adzuki beans.
Blanching is required or recommended before eating most bean sprouts, according to The Vegetable Bible. Depending on the specific type, bean sprouts are rich sources of folate, protein, vitamin C, B vitamins and iron.
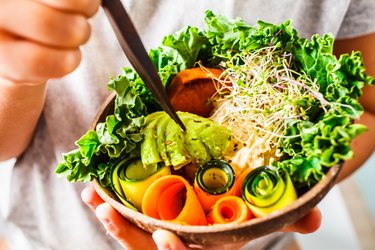
2. Alfalfa Sprouts
Alfalfa sprouts are best eaten raw, such as in sandwiches, to retain their crunchy texture. Cooking alfalfa sprouts is not recommended. When you grow them at home, preserve them in a jar for four days without soaking.
According to sproutpeople.org, alfalfa sprouts are an excellent source of niacin, calcium, fiber and an array of vitamins including vitamin C and riboflavin, according to WebMD. Alfalfa sprouts also provide essential minerals like zinc and magnesium.
3. Lentil Sprouts
Lentil sprouts are a very good source of vitamin C, according to Harvard School of Public Health. When raising lentil sprouts yourself, let them soak up to 10 hours a day for four days. Make sure to rinse the sprouts twice daily.
Only whole lentils should be raised because split lentils won't sprout. In addition to vitamin C, lentil sprouts are sources of thiamine, copper and iron and especially rich in folate and manganese.
4. Sprouted Grains
Sprouted grains such as brown rice and buckwheat can be added to breads to supply a crunchy texture. Preparation of sprouted grains can be accomplished by kneading them into the dough immediately following the first rising, but before you shape the loaf.
According to the Whole Grains Council, sprouted grains have potential health benefits that include reducing the risk of cardiovascular diseases, fighting the effects of diabetes, decreasing depression and reducing blood pressure.
Health Concerns
Keep in mind that sprouts can be repositories of E. coli and salmonella bacteria. The Centers for Disease Control and Prevention have issued advisories about infectious diseases associated with unclean sprouts that have included outbreaks associated with mung beans, alfalfa, cress and clover.
Since even carefully washing your sprouts won't guarantee lack of bacteria, recommendations include refrigerating them to slow bacterial growth and buying fresh sprouts with the buds still on them.
- WebMD: Sprouts: Are They Good for You?
- Swanton, Tricia: The Vegetable Bible
- WebMD: Alfalfa: Health Benefits, Nutrients and How to Prepare
- Harvard School of Public Health: Sprouted Lentils
- Whole Grains Council: HEALTH BENEFITS OF SPROUTED GRAINS
- Centers for Disease Control and Prevention: Multistate Outbreak of Human Salmonella Enteritidis Infections Linked to Alfalfa Sprouts and Spicy Sprouts (Final Update)