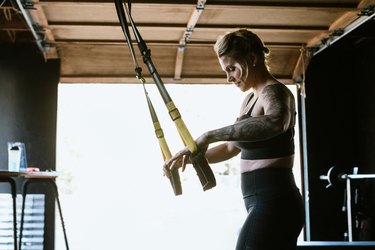
If you've never used a TRX, now's your time.
"The TRX is an amazingly versatile piece of equipment," says Caroline Juster, CPT, a Chicago-based certified personal trainer and functional strength coach. "You can use it to train every muscle in your body, and it's ideal for home gyms."
Video of the Day
But for as simple and user-friendly as the TRX suspension trainer is meant to be, it can look intimidating. Don't let that hold you back.
Here's everything you need to know about how to use TRX straps, including the best beginner TRX exercises to get you started.
What Are TRX Straps, Anyway?
TRX stands for "total resistance exercises," and a TRX suspension trainer is one system to do lots of total-body resistance exercises whenever, wherever. It makes that happen through a combination of heavy-duty adjustable straps, handles, foot straps and locking carabiners.
Fun fact: According to TRX, Navy SEAL Randy Hetrick developed the first TRX using a jiu jitsu belt and parachute webbing. With the rise in popularity of TRX suspension training, there are other types of suspension systems on the market. TRX is one popular brand that many professional sports teams, Olympic athletes and thousands of commercial gyms use, according to the company.
"TRX training is a form of suspension training that uses body-weight exercises to develop strength, balance, flexibility and core stability simultaneously," says Matt Gleed, a U.K.-based TRX senior master trainer.
And, yes, by suspension, we mean that you hang from it.
With it attached to a ceiling, door or other anchor point, you simply grip the handles or place your feet in the foot straps and perform any number of exercises, such as rows, biceps curls, planks, hamstring curls and push-ups.
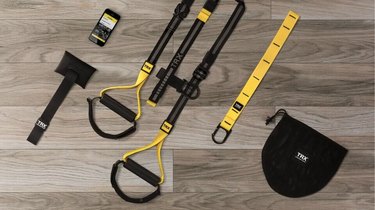
The Best TRX Suspension Trainer for Beginners
Buy it: TRXTraining.com; Price: $184.95
Benefits of TRX Suspension Systems
The TRX is a great fitness tool for beginners and gym veterans alike. While novice exercisers can use it as a way to progress to body-weight squats, advanced athletes can fully hang from it for pull-ups.
You can use it to add variety and challenge to your at-home workouts, and it won't take up precious real estate the way bulky fitness equipment does, Juster says. And if you're traveling, you can easily fit it in your bag for hotel-room workouts.
Plus, with the TRX, it's easy to progress your strength exercises as you get fitter and stronger — no dumbbells or weight plates needed. (More on that next.)
And here's some good news for multitaskers: Every single TRX exercise doubles as an effective core strengthener, Gleed says. As you hang from the suspension trainer, your core is in charge of stabilizing your body and helping you move your body as a strong, cohesive unit.
How to Use TRX Straps
Anchoring the TRX
The TRX attaches to practically any sturdy anchor point, allowing you to use the TRX in a gym, hotel room or even outside in a park by securing the straps to an overhead beam or a strong tree branch.
The TRX trainer also comes with a dedicated door anchor (pictured above) to close the TRX inside the top of a door. When using the door anchor, your body should always be positioned opposite the direction that the door swings. That way, you cannot accidentally pull the door open during your workout.
You can also secure the device to the studs in your home's ceiling with a permanent TRX ceiling mount. (The TRX is tested to support up to 1,300 pounds.)
To avoid a nasty fall, make sure the TRX suspension trainer is anchored securely before performing any exercise, and don't use the suspension trainer if any of the straps, handles, carabiners or other supports are broken or showing significant wear and tear.
For more help, check out TRX's easy-to-follow instructional videos that show how to set up the equipment based on the attachment point you want to use.
Adjusting the Straps
Make sure the straps are the appropriate length for the exercise or exercises you plan to do. There are four main lengths to use, but anything in between is possible, too.
- Fully shortened: Best for rowing and beginner exercises
- Mid-length: Best for standing exercises
- Mid-calf length: Best for floor exercises
- Fully lengthened: Best for pressing and advanced exercises
"The key to moving the TRX straps in either direction is to always grab the black buckles," Juster says.
To shorten the straps, push down on the cam buckle and pull the yellow tab until the strap is the right length. Pull the yellow tab until it's just under the loop at the top of the suspension trainer if you want the straps fully shortened. Repeat with the other strap.
To lengthen the straps, push down on both cam buckles at the same time and tug the straps down. If you want to fully lengthen the straps, simply tug until the straps can't lengthen any more.
For mid-length, make sure the yellow tabs are in the middle of the straps. For mid-calf length, let the straps hang toward the floor and check that the cradle of the foot strap hits the middle of your calf.
Once the straps are at the right length, you can grip the handles or use the foot straps (attached to the handles) to perform any number of exercises.
Keep in mind that if you've attached the TRX to a low anchor point like in a basement gym, you may need to keep the straps somewhat shortened at all times.
Positioning Your Body
Once you attach the TRX suspension trainer to an anchor point, you hold the handles (or place your feet in the loops) and use the system for as much support as you need to perform a variety of body-weight exercises, from push-ups to single-leg squats to inverted rows.
You can also hold the TRX handles to help you balance during exercises like single-leg squats, plyo lunges and jump squats.
Use the foot straps to make floor exercises like glute bridges, hamstring curls, planks and mountain climbers more challenging. Follow the usual exercise set-up, but stick your feet into the foot straps instead of placing them on the floor.
To make an exercise easier or harder, change the angle and position of your body. The steeper the angle, the harder the exercise. For example, with TRX rows and push-ups (both two of the best beginner TRX exercises you'll find below), the more horizontal your body, the harder the exercise.
You can also progress many TRX exercises by adding external weight, increasing your range of motion, changing to a single-arm or single-leg exercise, switching up your exercise tempo or combining multiple moves into one.
Get Started With the 7 Best TRX Exercises for Beginners
When learning how to use TRX straps, Juster recommends starting with these seven beginner TRX exercises.
The beauty of these moves is that you can easily combine them into a complete a full-body beginner TRX workout. Complete 3 sets of 8 to 12 reps of each exercise, resting for 30 to 90 seconds between sets and exercises.
Move 1: TRX Row
- Adjust the straps to a mid-length or fully shortened position and stand facing the anchor point. Hold both handles with your palms facing the floor, and straighten your arms to lean back. Brace your core.
- Keeping your torso in a plank position, pull your body toward the anchor point. Rotate your palms to face your sides. Squeeze your shoulder blades down and together and point your elbows directly behind you.
- Pause, then slowly lower to start.
Move 2: TRX Assisted Split Squat
- Adjust the straps to a mid-length or fully shortened position and get in a staggered stance facing the anchor point. Hold the handles at your shoulders with your elbows bent.
- Bend your hips and knees to lower your torso as low as comfortable toward the floor. Extend your arms as you do so.
- Pause, then push through your front leg to return to start. Row through your back and arms as needed or to increase your upper-body engagement.
- Do all reps, then switch sides.
Move 3: TRX Face Pull
- Adjust the straps to a mid-length or fully shortened position and stand facing the anchor point. Hold both handles with your palms facing the floor, and straighten your arms to lean back. Brace your core.
- Keeping your torso in a plank position, pull the handles to the sides of your face to raise your body toward the anchor point.
- Pause, then slowly lower to start.
Move 4: TRX Squat
- Adjust the straps to a mid-length to fully shortened position and stand facing the anchor point with your feet hip-width apart. Hold the handles at your shoulders with your elbows bent.
- Bend your hips and knees to lower into a squat. Extend your arms as you do so.
- Pause, then push through your legs to return to start. Row through your back and arms as needed or to increase your upper-body engagement.
Move 5: TRX Push-Up
- Adjust the straps to a mid-length or mid-calf position and stand facing away from the anchor point. Hold both handles, extend your arms and step your feet back to get into an incline plank. Brace your core.
- Keeping your torso in a plank position, bend your elbows and shoulders to lower your chest between the handles as far as comfortable. Let your elbows flare out diagonally to the sides.
- Pause, then push through your chest and arms to return to start.
Move 6: TRX Biceps Curl
- Adjust the straps to a mid-length or fully shortened position and stand facing the anchor point. Hold both handles with your palms facing up, and straighten your arms to lean back. Brace your core.
- Keeping your torso in a plank position, curl the handles toward your shoulders to raise your body toward the anchor point.
- Pause, then slowly lower to start.
Move 7: TRX Triceps Extension
- Adjust the straps to a mid-length or fully shortened position and stand facing the anchor point. Hold both handles with your palms facing each other, and straighten your arms to lean back. Brace your core.
- Keeping your torso in a plank position, curl the handles toward your shoulders to raise your body toward the anchor point.
- Pause, then slowly lower to start.