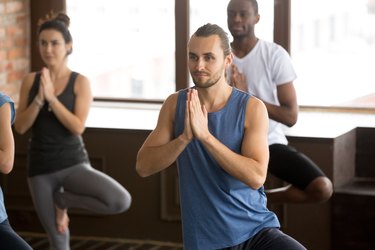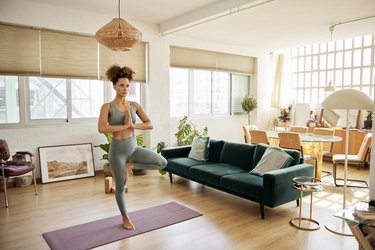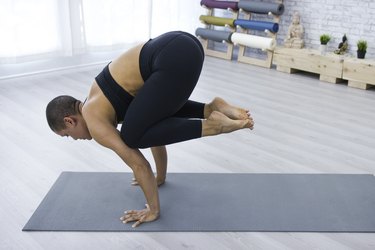
Working on arm balances is an excellent way to build strength and confidence to level up your yoga practice. Crow pose (Bakasana), in particular, is a good arm balance to start with, as it builds the foundation for more advanced poses.
But as many yogis know, you can't just flip up into crow pose, you have to build up strength and stability first. This ensures you have the proper alignment to begin to shift your weight into your upper body and a foundation you can safely build upon.
Video of the Day
Increase Your Wrist Flexion
Arm balances require strong and flexible wrists. This ensures you can stack the joints to find balance and fly. For many people who work at a computer all day or are on their smartphones a lot, movement here may be limited.
In fact, a September 2014 study in the Journal of Occupational and Environmental Medicine reports that occupational repetition and physical activities with wrist strain significantly related to the presence of carpal tunnel syndrome.
"Most people are not used to the kind of stress that hand balancing work can have on the wrists. I advise you to stretch and strengthen them alongside your practice in order to prevent future issues," says movement specialist Ido Portal.
To counteract the effects of your day job, here are two exercises to prepare your wrists for crow pose:
1. Wrist Circle
- Hold your right wrist below the crease with your left hand.
- Keep your right hand open, fingers extended and aim not to curl your fingers inward as you circle the wrist slowly.
- Reach for the outer limits forming as big of a circle as possible. Move through tension as if the air is dense.
- Repeat on other wrist.
2. Wrist Raise
- Come to all fours.
- With your elbows locked, lift onto the fingers of your left hand (not fingertips, but from the first knuckle in the base of the fingers and up).
- Raise up and lower down slowly.
- Perform 10 to 20 reps, then repeat on your right hand.
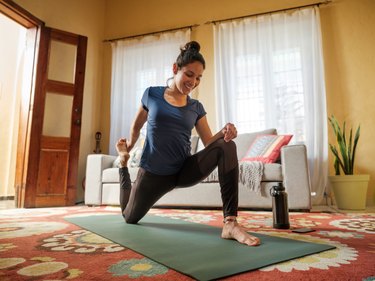
Deepen Your Hip Flexion
Another way sitting all day isn't helping your yoga practice? Your hips are getting tighter. An August 2018 study in the International Journal of Environmental Research and Public Health found that participants who sat for two hours experienced discomfort in all body areas measured, but significant discomfort in the lower back, hip, thigh and butt.
Your body adapts to the positions it's in the most, so if you're seated for a majority of the day, your body gets better at sitting and worse at other movements such as full active hip flexion and external rotation of the hip.
Training hip flexion may not be on the top of your priorities when you hit the gym, but it's essential for everything from running, climbing stairs, walking, putting your pants on in the morning and definitely essential in crow pose.
Use these two exercises to prepare your hips:
1. Wind Relieving Pose (Pavanamuktasana)
This mobility exercise helps restore the range of motion of your hips while building strength and improving your brain-body connection so you not only have the flexibility to bring your knee in toward your chest or high up onto your triceps in crow pose, but you also have the strength to control the movement.
- Lie on your back with both legs extended and arms down at your sides.
- Bring your left knee in toward your chest. Make sure your knee doesn't bow out to the side; keep it in snug to your rib cage. Hold with both hands around your shin.
- Hold the stretch for approximately 30 to 60 seconds.
- Repeat on the other side.
Tip
You can also do this pose bringing both knees in toward your chest at the same time.
2. Bound Angle Pose (Baddha Konasana)
Crow pose requires flexibility of your hips to open and to externally rotate and wrap your triceps, but it also requires the strength of your inner thighs to adduct (squeeze in toward the center of the body). Bound angle pose opens your hips and improves your flexibility.
- Sit upright with your legs straight out in front of you. If this is uncomfortable, sit on a blanket to raise your hips up slightly higher than your legs.
- Bend your knees and bring your heels in toward your pelvis, bringing the soles of your feet together. Lower your knees toward the ground to the point where you feel a stretch.
- Keeping your spine long and core engaged, hinge from your hips. Place your elbows on your inner thighs.
- Hold the stretch for 30 to 60 seconds.
Improve Your Spinal Flexion
Back pain is the most common musculoskeletal condition in Western countries. According to a June 2016 study in the journal Healthcare, 60 to 80 percent of adults will experience lower back pain at some point in their lives.
A stiff, achy back makes it difficult to fly with ease. And crow pose requires your back to not only be flexible, but also strong, particularly in flexion (rounding your back).
In this arm balance, you're perched with knees pressing into your upper arms, but you must access the bandhas (spinal locks) and find the lift and lightness in the pose and flex your spine to pull your weight upward. To help you do that, try these two exercises.
1. Segmental Cat-Cow Pose (Bitilasana Marjaryasana)
This traditional yoga pose is excellent for loosening up the back and lubricating your spinal discs. Because when your spine is out of alignment, your brain-body connection is off and other neurological issues can occur.
"If you're not firing neurologically, you're going to create imbalances and movement-pattern problems," says Robert Bates, DC, owner of Bates Chiropractic in Manhattan Beach, California.
- Begin on your hands and knees in a neutral spine position.
- Exhale as you fully round your back, pull your belly button in toward your spine and tuck your chin toward your chest.
- Starting at the tailbone, release one segment of your spine at a time, relaxing through the lumbar spine, thoracic spine (mid-back) and finally, your cervical spine, as you lift your chin upward into full flexion.
- Then, starting at the tailbone again, reverse the motion until you come back to the starting position. Be aware of what segments feel stuck. Breathe into these spaces and remember to move slowly.
2. Plank Pose Knee-to-Triceps
Crow pose requires you to close the gap between your thigh and chest, which requires hip and spinal flexion and core strength. Adding some compression to plank pose helps with all three while building straight-arm strength (which you'll also need for crow). It's the same movement pattern, but it's an easier way for most people to begin.
- Begin in a high plank with your wrists under your shoulders and body in a straight line. Push the ground away and lift your heart as you separate your shoulder blades.
- Lift your right foot and bend at your knee to draw your right knee in toward your right armpit.
- Hold for 5 to 10 seconds, aiming to draw the knee up higher and higher.
- Return your right leg to starting position, then repeat for a total of 3 to 4 reps.
- Repeat on your left leg.
Put the Pieces Together
Now that you've build sufficient full-body strength and flexibility and have a feel for the movement pattern, here are three poses to incorporate into your your practice that mimic some of the pieces of crow pose.
These postures will open your hips, activate your core and help you breathe deeply to calm the mind and aid in balance and focus.
1. Yogi Squat (Malasana)
- Stand with your feet slightly wider than hip-width apart, with your toes slightly turned out.
- Bend your knees and come down into a full squat with your butt as close to the ground as your mobility allows.
- Once you're in your full squat, take the time to adjust your feet and stance as needed. Try to keep your heels flat on the ground, but it's OK if they come up slightly.
- Keep your torso straight as you bring your palms together and press your elbows into your knees to draw your legs apart.
- Keep your gaze forward, shoulders back and focus on lengthening through your spine.
- Think about reaching your tailbone toward your heels.
- Hold for 30 to 60 seconds.
Tip
If you need to, roll your mat up and place it under your heels or put a yoga block under your butt.
2. Standing Split With Knee Tuck
- Stand with your feet hip-width apart and your arms at your sides.
- Come into a forward fold (Uttanasana) by bending over and placing your hands on the floor beside your feet or on blocks, depending on your flexibility. Keep a slight bend in your knees and stack your hips over your knees and your knees over your ankles.
- Extend your right right leg out and back behind you.
- With an exhale, draw your knee in toward your chest. Flex your spine and draw your navel in toward your spine.
- Hold and breathe for 5 to 10 breaths, maintaining tension and contact between thigh and chest.
- Inhale to extend your leg and exhale to set it back down next to the left.
- Repeat on the other side.
3. Dead Crow
- Lie on your back and draw your knees in toward your chest.
- Curl your tailbone off the floor and lift shoulder heads off the mat as you press your lower back into the mat and draw your navel to your spine.
- Extend your arms shoulder-width apart and flex your wrist as if you're placing them on the ceiling.
- Aim to bring your knees in toward your triceps as if you were in crow pose on your back.
- Hold for 10 breaths.
Now Fly Into Crow Pose
Ready for the real deal? If the above poses and exercises have been comfortably a part of your practice for a while and you feel solid in them, it's time to attempt crow pose. Here's how to do it:
- Begin in a low squat. Place your hands on the ground shoulder-width apart with fingers spread wide. Have your feet wider than your shoulders.
- Come up to your tiptoes. If this isn’t comfortable, try to put your feet on a folded blanket or a block. Snuggle your knees in toward your rib cage.
- Shift forward, bringing your shoulders over the creases of the wrists. Squeeze your knees into your upper triceps.
- Draw one foot away from the floor.
- Try lifting the other foot off the floor and bringing the big toes together.
- Keep your neck neutral and breathe calmly and deeply.
- Hold for 5 to 10 breaths and return your feet to the floor.