When six-pack abs are the hallmark of fitness — the one thing that unequivocally makes people think, "Hey, that person is really fit!" — it's common to strive for a shredded stomach. But endless crunches and other ab exercises can get boring — and sometimes don't even work (looking at you, sit-ups).
Having six-pack abs would be nice, but a washboard tummy doesn't always equate to a strong core — and a strong core is what's important for overall health and fitness.
Video of the Day
Video of the Day
Your core protects your spine and also initiates almost every movement: From standing up to walking to lying down, your core muscles — your abs, of course, but also your lower back, upper back, glutes and many muscles that move the hips — do a large part of the work. Because your core is so all-encompassing, a weak core can affect nearly everything you do.
This 10-minute workout can improve both your core strength and increase the musculature of your abdomen, which can result in a more defined look. In other words: You get the most bang for your buck.
The Workout
This routine is entirely isometric, meaning you contract your muscles without actually moving them. Think of it as resisting movement instead of creating movement.
You're probably already familiar with one of the best isometric exercises for core strength: the plank. You'll perform planks and more ab-burning holds in the quick workout below.
Do: Each move for 30 seconds. Rest for 30 seconds when indicated. Complete the whole circuit twice.
- Low plank
- High plank
- Bird dog (left leg)
- Bird dog (right leg)
- Rest
- Superman
- Boat pose
- Side plank (left)
- Side plank (right)
- Rest
Tip
Try to shift into each movement without taking a break, except when indicated. You’ll get to rest twice throughout the sequence.
Step-By-Step Instructions
Low Plank
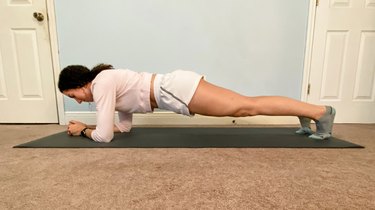
- Lie face down on the floor.
- Prop yourself up on your elbows and toes. Make sure your elbows are stacked directly beneath your shoulders and your feet are flexed. Depending on what's more comfortable for you, you can clasp your hands together or leave them apart.
- Inhale and engage your core: Think about pulling your bellybutton to your spine.
- Press through your forearms, elbows and toes to lift your belly, hips and legs off of the floor.
- Tighten your glutes and keep your spine and pelvis neutral, shoulders and upper back flat. Avoid rounding the upper back or letting the hips sag.
High Plank
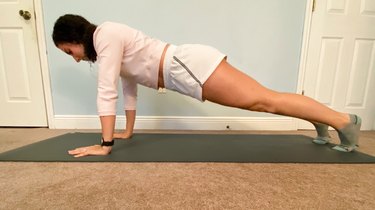
- From low plank, go directly into high plank. Press up with your arms until they are fully extended and your hands are flat on the ground.
- Continue activating your glutes, core and back muscles. Only your toes and hands should be in contact with the ground.
- Make sure you continue to breathe in this position, and don’t let your hips sag. Keep your head in line with your spine; don’t crane your neck up or down.
Bird Dog (Left Leg)
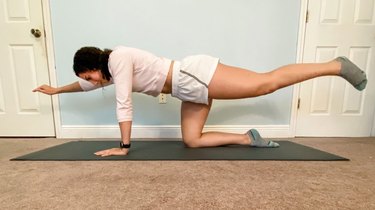
- From high plank, lower yourself to all fours. Your hands, knees and the tops of your feet should touch the ground. Keep your knees stacked directly under your hips and your elbows and wrists directly under your shoulders.
- Inhale and engage your core.
- With control, lift your left leg off of the ground and extend it behind you. Simultaneously extend your right arm in front of you.
- Make sure to squeeze your left glutes and your right upper-back muscles to avoid over-arching your back.
Bird Dog (Right Leg)

- Start on all fours with your knees stacked directly under your hips and your elbows and wrists directly under your shoulders.
- Inhale and engage your core.
- With control, lift your right leg off of the ground and extend it behind you. Simultaneously extend your left arm in front of you.
- Make sure to squeeze your right glutes and your left upper-back muscles to avoid over-arching your back.
Check out more of our quick workouts here — we’ve got something for everyone.
Superman
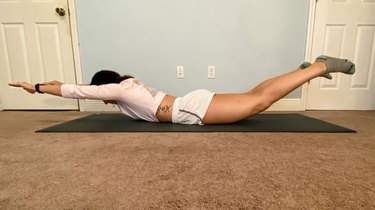
- Lie face down on the floor with your legs extended behind you with the tops of your feet resting on the floor. Extend your arms in front of you, palms resting on the floor.
- Activate your shoulder and upper-back muscles to peel your chest off the ground. At the same time, activate your hamstring and glute muscles to peel your legs off the floor.
- Only your belly, hips and upper thighs should be in contact with the floor. The majority of power should come from your glutes, not your lower back. If you feel pain in your lower back, try squeezing your glutes tighter.
Boat Pose
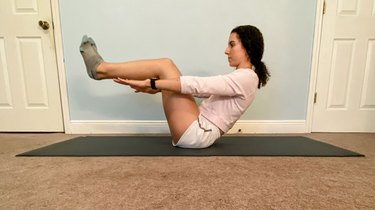
- Start seated position with your knees bent and feet flat on the floor.
- Rock back slightly so that your weight is centered just below your tailbone. (Don’t actually sit on your tailbone — that might hurt.)
- Lift your feet so your shins are parallel with the ground.
- Extend your arms straight out in front of you for balance. Keep your back flat.
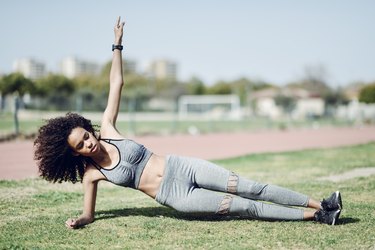
Side Plank (Left)
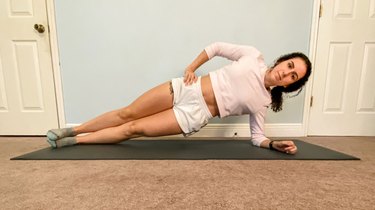
- Lie on your left side, propped up on your left elbow. Stack your right foot on top of your left, and make sure your left elbow is directly beneath your shoulder. Place your right hand on your hip.
- Using your obliques (the muscles on the sides of your torso), press your body up until your hips create a straight diagonal line from your head to your toes.
- Keep your shoulders back and chest open. Your neck should also stay in line with your spine.
Side Plank (Right)
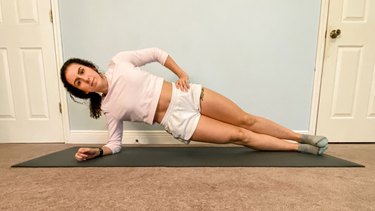
- Lie on your right side, propped up on your right elbow. Stack your left foot on top of your right, and make sure your right elbow is directly beneath your right shoulder. Place your left hand on your hip.
- Using your obliques (the muscles on the sides of your torso), press your body up until your hips create a straight diagonal line from your head to your toes.
- Keep your shoulders back and chest open. Your neck should also stay in line with your spine.
- PLoS One: "Effects of 8-week core training on core endurance and running economy"
- Sports Health: "Core Stability Training for Injury Prevention"
- Pakistan Journal of Medical Sciences: "Effectiveness of core stabilization exercises and routine exercise therapy in management of pain in chronic non-specific low back pain: A randomized controlled clinical trial"
- Turkish Journal of Physical Medicine and Rehabilitation: "Does a core stabilization exercise program have a role on shoulder rehabilitation? A comparative study in young females"
- Physical Therapy Rehabilitation Science: "Comparison of three different surface plank exercises on core muscle activity"