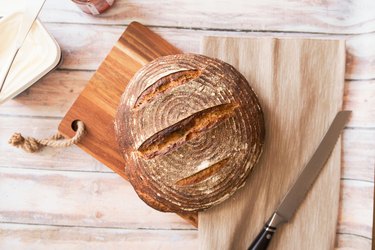
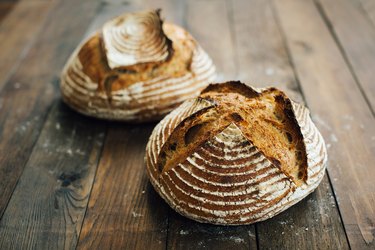
Baking bread is a creative process, but you need to follow some directions to make it work. The dough needs to rise, and proofing bread in the oven is an easy way to do this.
To proof the dough, you have two stages: There's the bulk proof, or first rise, and the proofing, or final rise.
Video of the Day
Video of the Day
Below we discuss how to proof dough in the oven for the perfect rise.
Tip
Baking homemade bread allows you to control the ingredients in your bread. Some commercial breads, even whole-wheat, may contain added sugars to give the bread a nice browned look, per the Academy of Nutrition and Dietetics. Baking 100 percent whole-wheat bread at home gives you fiber, vitamins and minerals from whole grains.
Proofing Bread in the Oven
Proofing bread is an important stage of bread baking. That tiny amount of sugar you used in the dough feeds the yeast and helps it release carbon dioxide, but yeast needs warmth to do this.
Most bread recipes call for bread to rise — or "proof" — twice. (The word "prove" is sometimes substituted for proof, but the meaning is the same.)
- The first time you'll need to proof the bread is after you've mixed the dough.
- The second time is after the dough has risen once and you've divided it.
Once bread dough is sufficiently warm, the chemical processes that make bread chewy and flavorful kick in, according to Washington State University (WSU). That's why, in order for the yeast to rise, the environment must be warm, but not too warm. If the dough rises too quickly, the flavor will go bad. So proofing dough in the oven may provide just the right atmosphere.
For many home cooks, the kitchen is too cold for proofing bread, while the oven offers the right bread-proofing temperature as it's usually a bit warmer. So when you get to the stage where the dough must rise, try proofing bread in the oven.
Proofing Bread Temperature and Process
Even cooks don't agree on the exact temperature needed to proof bread.
According to WSU, the ideal temperature for the dough to rise is 78 to 82 degrees Fahrenheit. According to King Arthur Flour, the perfect temperature for your dough to rise is 75 to 78 degrees Fahrenheit. In short, aim for a temperature in the upper 70s to proof dough in the oven.
WSU suggests turning the light on in your oven to warm it to the upper 70s, but remember not to turn your oven's heat on. King Arthur Flour suggests turning the light on and using an oven thermometer to measure the oven temperature. Once it's right, pop in your dough. After 2 to 3 hours, the dough in your lighted oven should rise by 30 percent and will be ready to divide.
Alternative Methods to Oven-Proof Your Bread
Another way to oven-proof your bread, according to Cook's Illustrated, is to place a loaf or cake pan on the bottom rack of the oven. Then do the following:
- Pour 3 cups of boiling water into the pan.
- Place the bowl with the bread dough on the middle rack of the oven.
- Close the oven door and watch your bread rise through the window.
According to Cook's Illustrated, if you limit the number of times you open the oven door, you should be able to use the same water to proof the dough for the second time.
You can try to create ideal proofing, or dough-rising, conditions by turning your oven on low, and turning it off again, but that may not work right, per Cook's Illustrated. Humidity and the variability of your oven's preheating ability may make proofing conditions less than ideal.
The Second Proof
If you used the oven method from Cook's Illustrated as described above, you shouldn't have any problem using the oven for the second rise. Just keep the door closed and the heat in until you remove the dough after its first proofing. If it's cooled, you can try refreshing the water and checking the temperature again.
When the second rise is finished, remove the loaves, which should be in their bread pans, preheat the oven and put the bread back into the oven to bake. Or, if you want to preheat your oven, as King Arthur Flour recommends, find another warm spot to do your second rise or try your microwave (instructions on how to do this below).
The important thing is, you've given your dough the warmth it needs to proof properly, and allowed the yeast time to produce the ethanol that will give the bread its flavor. The baking should just be the icing on the cake.
Proofing in the Microwave
Instead of your kitchen oven, you can proof bread dough in a microwave oven, according to King Arthur Flour. Again, you'll need boiling water. Here's how to do it:
- Place 2 or 3 cups of water in the microwave oven and bring them to a full rolling boil.
- Keep the door closed and let the hot water steam and warm the microwave.
- After 45 minutes, replace the water container with your uncovered bowl of bread dough and quickly close the door.
The microwave temperature should start in the mid-80s, and drop into the 70s, providing a good warming environment. If you forget to do this ahead of time, King Arthur Flour suggests you bring a smaller amount of water just to the boiling point and then remove it when you place the dough in the microwave. The temperature won't remain there as long, so this might work better for pizza dough or other dough that doesn't need as long to rise.
Tip
There are other places to proof your dough, although not as reliable as your oven or even your microwave. You could try on top of a warm appliance, like your refrigerator or water heater, according to King Arthur Flour. If you have a wood stove or radiators, you could try one of those. Or you could sit your dough on another heat source, but you may have to watch it closely.
The Need to Proof
What bread bakers need is sometimes called a proofing box, according to Cook's Illustrated. Using the boiling water method to proof your bread dough turns your oven into a proof box. Your oven will have ideal conditions for the yeast to do its job and ferment the dough. It is this fermentation that gives the dough flavor, according to King Arthur Flour.
By keeping the proofing temperature in the upper 70s, the yeast has the time to flavor the ethanol and provide the gluten in the bread structure. This works with the help of carbon dioxide. You don't want the bread to rise too quickly, because if it does, the loaf will fill with too much carbon dioxide, and it won't get much alcohol. That will make your bread taste flat.
If the proofing environment is too warm, bubbles from the yeast will form too quickly, with too much air, and begin to pop. That will cause your bread to be flatter than bread that proofed in the ideal environment.
If you want to proof the dough in an oven without hot water or light, you can do that, as long as you give the dough more time to rise. Cooler is better than warmer for proofing. While that works to a point, yeast only has so much food. You should need no more than 3 hours to get your dough to rise properly, or the quality of the bread's structure and flavor may deteriorate.
- Serious Eats: "Breadmaking 101: All About Proofing and Fermentation"
- Washington State Magazine: "How to Make Artisan Bread"
- King Arthur Flour: "Where to Put Dough to Rise"
- Cook's Illustrated: "Turning Your Oven Into A Proof Box"
- Health.gov: "Dietary Guidelines for Americans, 2015-2020: Chapter 1. A Closer Look Inside Healthy Eating Patterns"
- Academy of Nutrition and Dietetics: "Processed Food: What's OK and What to Avoid"