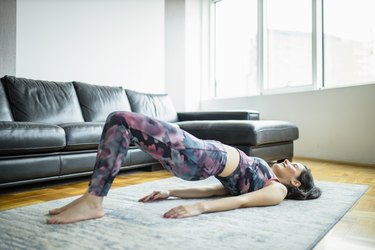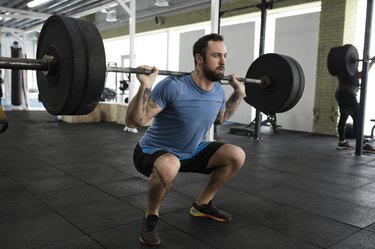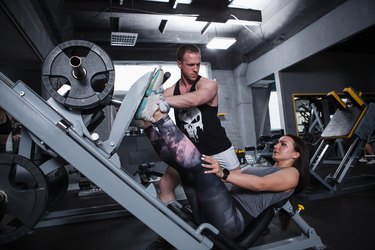
The leg press is a great machine for honing in your lower-body muscles, allowing you to replicate the benefits of lunges and squats even if you have mobility issues. But you need to use the machine correctly to maximize the strength in your quads, glutes and hamstrings.
While the fixed nature of the leg press machine means better control of the weight, good form can't go out the window. Making leg press mistakes can lead to a loss in strength gains because you're not targeting the right muscles. Improper form can also put you at risk for injuries.
Video of the Day
So the next time you hop into the machine, keep in mind these six common leg press mistakes and tips on how to fix them.
Want to see all the leg press mistakes together? You'll find all six, plus their fixes, in the video below.
1. Locking Out Your Knees at Full Extension
As you straighten your legs from the 90-degree bend, it's important to avoid locking out your knees, meaning your leg is straightened as much as possible and your knee joint can't unbend any further. There's a fine line that separates the end of the range of motion and the locked-out position.
"Here [the locked-out position], a large part of the load is shifted from the quads, glutes and adductors to the knee joint," says Guillermo Escalante, CSCS, a certified strength and conditioning specialist and associate professor of kinesiology at California State University San Bernardino.
When your leg is fully extended and your knee is locked out, Escalante says all the load is pressing against the joint where the bones of your shin meet your femur, or thigh bone. The surfaces of those two bones press together, which can result in pain and injury.
In addition, unloading the muscles and placing the weight on your joints reduces the time your muscles are under tension, Escalante says. Time under tension is the amount of time in which your muscles are being challenged, so in the case of a leg press, it's your quads, glutes and hips.
"More time under tension results in more muscle gains, so shifting the stress from your muscles to your joints not only risks knee injury but also reduces the training effect of your leg press reps," Escalante says.
Fix It
As you extend your legs, stop just short of locking out — about 10 degrees short of fully straightening — so the adjoining bones don't have maximal surface contact, Escalante says. If you have pre-existing knee problems, he says, you may want to stop even sooner, at 20 degrees or so, to have a pain-free range of motion.
You can also try this tip from Jarrod Nobbe, CSCS, the head weightlifting coach for the Athletic Lab Weightlifting team and Garage Gym Reviews: Imagine you're standing, and someone tells you to soften your knees. "That movement right there — what that looks like and feels like [when you soften your knees] — should be the end range of almost any kind of lower body exercise you do," he says.
2. Positioning Your Heels Off the Sled
When you're setting up in the leg press machine, your foot positioning on the sled will affect which muscles you target more. For example, positioning your feet low on the sled will make you feel the burn more in your quads while setting your feet high on the sled will hammer your glutes.
But dangling your heels off the ledge means you'll lose full contact with your feet against the sled. You want your feet to have full contact with the pad so you can push through your entire foot — not just your forefoot, which can make the exercise less effective.
By not keeping your entire foot on the foot platform of the sled, "you're losing points of contact, pressure points that you would normally use to push through and move the weight," says Shawn Arent, PhD, CSCS, professor and chair of the Department of Exercise Science at the University of South Carolina, and director of the university's Sport Science Lab.
"Being able to have your heel, the ball of your foot, your big toe and your little toe providing those four points of contact, you've got a much more stable base to control the weight."
"If you're trying to balance on the balls of your feet [because your heels are off the sled], you've shifted almost all the pressure to the front of your foot," he says. "You're engaging the Achilles tendon a lot more and the calf to try to keep that heel stabilized. You're losing the stability and the ability to deliver maximum force."
And because you're keeping your feet very low on the sled, it can put more pressure on your knees, which can cause an issue for those with pre-existing knee pain.
Fix It
Keep your entire foot on the foot platform of the sled, so that all four points of contact are providing stability, Arent says. To create maximum push and to stay balanced and centered, think about pushing through the middle of your foot while maintaining all the points of contact.
3. Lowering the Sled Too Far
One advantage of the leg press is that it supports your back, so it provides greater protection against rounding your lower back, which is common when squatting.
Depending on your flexibility, if you lower the sled too far, your glutes and lower back can lift from the back pad. Rounding your lower back causes the discs in your lumbar (lower) spine to take on more force, putting them at a greater risk of injury.
"The most critical thing that you want to be conscious of when doing the leg press is your butt in the seat," says Jim Stoppani, PhD, an exercise physiologist and author of Jim Stoppani's Encyclopedia of Muscle & Strength. "If you're at the bottom of the movement and your butt is coming off the bench, that's going to eventually cause a back injury or at the very least, hurt. What's happening here is spinal flexion."
Even before your back lifts off the pad, your hips can tell you that you've lowered too far, Arent says.
"If you're coming down so far that your hips are starting to rotate off the pad, you're heading toward rotating your low back off the pad as well," he says.
This is similar to a doing a butt wink in a squat, aka when your hips tuck underneath your body instead of pushing back.
"That's ultimately what you're forcing to happen when your hips start to rotate up off the pad. That puts your lumbar area in a much more precarious position," Arent says.
Fix It
Just because you can lower the sled farther down doesn't mean you should. Lower the sled with control and bring it down just before your hips begin to round off the seat — and long before your back rounds off the seat, Arent says.
If you can't feel where your hips are rounding, he suggests asking someone to watch a set or filming a set from the side with your phone. Determine the spot where your hips begin to round and rotate away from the pad, and don't descend beyond that point.
Another way to reduce hip and back rounding is to lower your foot position on the foot pad, Arent says. When your feet are higher on the pad, your glutes are more involved, but you're also more likely to round your hips (your knees are coming toward your head, so you need to curl your hips and back more to get there).
When your feet are lower on the platform (but still fully on the platform so you can push through your whole foot), you'll be able to lower farther without rounding.
Keep the movement at a safe range of motion and do post-workout stretches to ensure tight muscles don't limit the range of motion.
4. Not Lowering the Sled Far Enough
"Partial depth just kind of equals partial work," Nobbe says. If you're not lowering the leg press sled very far, you're not going to work your muscles enough to see muscle strength gains.
Your quadriceps, glutes and hamstrings are designed to move your legs through a full range of motion, Arent says. Doing a partial range of motion on the leg press means you're only strengthening your legs through part of that range — and consequently, strengthening only parts of the muscles.
"The reason you're going shorter probably isn't because that that's your intent. It's more likely that you can't go deeper because you're using too much weight," he says. "So if that's your limiting factor, and that's why you're doing partial reps."
Other reasons your range of motion might be shallow is an injury or tight hips. If your hips are tight, he says, you may start with some shallower reps in your first set to keep your hips from rounding off the seat. As your hips loosen up, increase your range of motion as your workout continues.
Fix It
For most lifters, lowering the sled until your knees form a 90-degree angle — or until your thighs are parallel to the leg press' footplate — is a good range of motion to aim for, Arent says.
If you can't do so, "lighten the weight a little bit to try to get a full range of motion," he says. Check your ego and progress from this full-range weight.
5. Caving Your Knees Inward or Outward
When your knees cave in during a leg press or other leg exercise, you're at an increased risk of injury, especially of tears to the anterior cruciate ligament (ACL). The ACL is one of several ligaments that holds your knee in normal alignment. The culprit is typically weak hip abductors, including the gluteus medius, Nobbe says.
The ideal position for your knee is tracking directly over your toes throughout the movement. Your knee is like a hinge, so it should only bend in one direction and not cave in or out as you perform the leg press.
Sometimes coaches cue people who have caving knees to think about pushing their knees out as they do a leg press or stand back up. But this is only to avoid the knees caving in and not to actually push the knees out to the sides.
"[That coaching cue] is designed to keep your knees in line with your feet as you're pushing," Arent says. It's far less common for your knees to go out too far than in, but in either case, you should focus on strengthening your knees.
Your knees may look like they're pushing out to the sides if your toes aren't straight — and that's OK, Nobbe says.
While you can do the leg press with your feet in a neutral, parallel position, turning your feet out slightly can be helpful if you don't have a lot of flexibility in your ankle for dorsiflexion, where your toes come towards your shin, he says.
Because the majority of us spend our time in ankle flexion positions and movements (like walking on flat ground), Nobbe says that lacking a bit of dorsiflexion is normal.
If you notice your knees are collapsing inward, Nobbe says you can strengthen your gluteus medius and hip adductors with moves like banded lateral walks, banded or body-weight clamshells and isometric glute bridge holds.
Fix It
Make sure your knees track with your toes throughout the movement. If your knees are caving in, you can place a mini band just above your knees to help remind you to keep them aligned with your hips as you press, Arent says.
You just don't want to press forcefully outward against the band so that it's stretching, he says. But if your knees start to collapse inward, the band will start to go slack, reminding you to keep some outward pressure on it throughout the move.
6. Rushing Through Your Reps
The safety of the back pad and sled may make it tempting to fly through each set on the leg press. But doing so makes the exercise less effective and can increase your risk of injury, Nobbe says.
When you rush through reps, your legs spend less time under tension, Nobbe says. This refers to the period that your muscle is under strain — more time under challenging tension translates to more strength and muscle growth. So while faster reps means you finish your workout sooner, they can also make it less effective.
If you're moving the sled too quickly, you may not notice if your hips are rounding off the pad, if your knees are caving in or if you're locking them out at the top, Nobbe says.
Fix It
For most lifters, Nobbe recommends a controlled tempo of two counts to lower the weight, one count at the bottom of the move, two counts to push the weight back up and a count of one at the top.
"So it's down one-two, hold one, up one-two, hold-one," and then repeat, he says. This counting strategy will let you control the weight and get some bonus time under tension at the bottom and the top of each rep.
If you like the "burning" feeling of nonstop repetitions, you can do a set where you skip the pauses at the bottom and the top. Count to two as you go down, then count to two as you go back up, keeping the weight under control as you do constant reps, he says.