Push-ups are one of the best exercises you can do to strengthen your upper body, but a lot of people can't do full push-ups — or do them without lower back or wrist pain. If you can relate, wall push-ups can be the perfect way to build up strength and eventually get horizontal (if you want to). After all, wall push-ups are a great upper-body exercise in their own right.
Wall push-up benefits include stronger chest, shoulder, arms and back muscles. Plus, you'll get improved core strength, posture and upper-body mobility.
Video of the Day
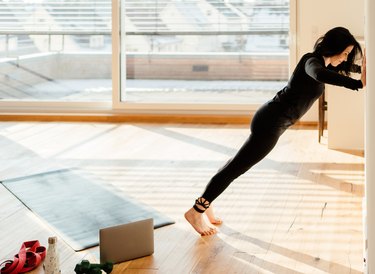
A wall push-up is where you use the wall instead of the floor to push off, essentially turning what's usually a horizontal exercise into a vertical one.
"Placing your hands on a wall makes the exercise easier, while still training the movement and muscles needed for a [traditional] push-up," Rick Richey, CPT, a NASM master instructor, tells LIVESTRONG.com. "The mechanics of the body are similar, but the load is different."
It all comes down to gravity, says Brooke Van Paris, CPT, a personal trainer at Life Time Deerfield Township in Ohio. The closer you get to parallel with the wall, the less force your body has to produce to overcome the pull of gravity on it, Van Paris says.
By doing wall presses, you'll ultimately be better at doing any and all push-ups with stellar form. "In a wall push-up, we can actually take the necessary time to slow down and break down the form to perfect it before going to the floor," Van Paris says. "This allows the body the time to form the correct mind-muscle connections to recruit the correct musculature on command."
Building strength doesn't happen overnight, but your efforts will pay off in increased muscle, improved posture and better function in everyday life. "The strength needed for push-ups will translate into other more complex movements," Lizzie May, CPT, a personal trainer and fitness consultant, tells LIVESTRONG.com. Think: Getting up off the floor, opening and shutting doors, bench pressing, even walking and running.
How to Do Wall Push-Ups With Perfect Form
Wall Push-Up
- Stand arm's distance from a sturdy wall with your feet under your hips.
- Place your palms on the wall, shoulder-width apart at shoulder height. This is the starting position.
- Bend your elbows and bring your chest toward the wall. Keep your elbows pointing away from your body at a 45-degree angle, rather than out to the side.
- Press back to the starting position.
Tip
"Keep your body in a straight line from your head, shoulders, back, hips, knees and feet,” Richey says. “It’s also important to move slowly so you can check your form before progressing." Good wall push-up technique leads to perfect full push-up technique.
Watch the Full Tutorial
6 Wall Push-Up Tips
1. Squeeze Your Core Muscles
In addition to arm and shoulder strength, you won't be able to do a standard push-up unless you also have sufficient core strength to provide the stability for the movement. While performing the exercise, keep your core muscles engaged the entire time to strengthen your abdominal muscles.
"Your body should hold tension through the entire movement," May says. "Tuck your tailbone, squeeze your glutes and pull your shoulders away from your ears."
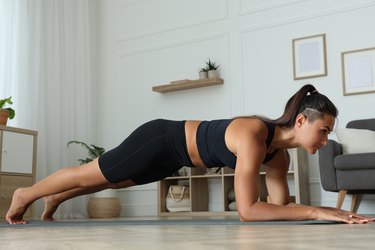
To further strengthen your core, the American Council on Exercise recommends starting by holding a forearm plank for 20 seconds and working your way up to 45 seconds. Progress to holding a high plank, in which you are in the top of the push-up position, for 20 seconds and performing 3 to 4 sets. As your core gets stronger, try holding it for 45 seconds.
2. Pace Your Breathing
As you increase the number of reps you do and your muscles become fatigued, controlled breathing helps deliver oxygen to your muscles and improve your stamina. Your inhalations and exhalations also act as a type of metronome, keeping you at a steady rate of push-ups. Be aware of your breathing and make sure you aren't holding your breath.
"The rule of thumb is that on challenging exercises we breathe out on the effort and in on the return," Richey says. "In this case, breathe out as you push up and breathe in while lowering."
3. Maintain a Neutral Head Position
"It is very common to see neck-reaching in all variations of the push-up," Van Paris says. "This is a compensation the body will make in an attempt to achieve more range of motion where there may not be any, or to cheat the range of motion by sticking the head out father." This is a good way to strain your neck muscles.
To correct it, focus on maintaining neutral head and neck position during the movement, Van Paris says. "Think: head, neck and spine, all in a straight line!"
4. Row Yourself Toward the Wall
Van Paris points out two other common range-of-motion compensations people tend to make during wall push-ups: Letting the shoulders shrug up toward the ears, and letting the shoulder blades go loose. Both of these can be bad for the neck and back and hold you back from developing full strength in proper push-up position.
"We can avoid this by making sure we engage the lats by pulling the shoulder blades back and down while squeezing them together as if there were a pencil between them we didn't want to drop," Van Paris says.
Bonus: By squeezing your shoulder blades down and together, almost rowing yourself toward the wall, you strengthen not just your chest, but also your back.
5. Tuck Your Pelvis
You want to avoid the dreaded hip sag at all costs.
"Hip sag occurs when the individual loses core control and the hips/pelvis make a tilting motion towards the wall," Van Paris says. "Usually this one is very obvious because the belly looks like it's reaching and the low back looks arched."
This might not seem like a huge deal, but you'll definitely feel the strain in your lower back the more horizontal you get in your push-ups. So, it's best to learn proper form now.
The easiest way to do that is by imagining you're doing a standing plank against the wall.
"Keeping everything in a straight line from the top of the head through the spine, drawing the navel in and tightening the core, while also squeezing the glutes and returning the hips and low back to neutral," Van Paris says. Think about tucking your pelvis under just a tad, until your spine is no longer arched.
6. Do as Many (Quality) Reps as Possible
To build strength, it's important to challenge yourself with each set, May says. But it can be tough to determine how many push-ups to do when you're just beginning.
"Start with 3 sets of as many repetitions as possible, until you start to lose good form," she says. "Once you have a number, continue with this until you begin to feel comfortable and then increase that number each week."
Common Questions
Are wall push-ups effective?
Yes! If you currently lack the strength or stability to do a standard push-up, starting with wall push-ups is a great way to build up to full push-ups. The wall push-up progressions below are also a great way to challenge your chest and arm muscles.
Are wall push-ups better than knee push-ups?
Knee push-ups are technically a little more advanced than wall push-ups, thanks to the increase in gravity. Both variations still strengthen the chest, shoulders and triceps. If you're ready for more of a challenge than a wall push-up, though, many experts recommend going to incline push-ups.
How do you know when you’re ready to leave the wall?
If you can do 3 sets of 15 reps with good form, it's time to up the ante. Try the variations below or move to an incline push-up.
The 5 Best Wall Push-Up Variations
Try these wall push-up progressions — listed from least to most advanced — to continue challenging your muscles and building strength.
1. Tempo Wall Push-Up
Making your muscles work for a longer period is known as increasing your time under tension.
- Stand arm's distance from a sturdy wall with your feet under your hips.
- Place your palms on the wall, shoulder-width apart at shoulder height. This is the starting position.
- Bend your elbows and bring your chest toward the wall. Count for 3 to 4 seconds as you descend into the push-up Keep your elbows pointing away from your body at a 45-degree angle, rather than out to the side.
- Hold for 2 to 3 seconds at the bottom of the push-up before pressing back to the starting position.
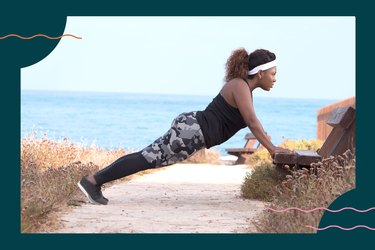
2. Far-Stance Wall Push-Up
Setting up with your feet about 6 to 12 inches farther back will increase how hard your chest and triceps have to work with each rep.
- Stand arm's distance from a sturdy wall with your feet under your hips.
- Place your palms on the wall, shoulder-width apart at shoulder height. Step back anywhere from 6 to 12 inches. This is the starting position.
- Bend your elbows and bring your chest toward the wall. Keep your elbows pointing away from your body at a 45-degree angle, rather than out to the side.
- Press back to the starting position.
3. Plyo Wall Push-Up
As you press back up to the top, see if you can get your hands to leave the wall or even add a clap at the top. This not only increases your strength, but also your power.
- Stand arm's distance from a sturdy wall with your feet under your hips.
- Place your palms on the wall, shoulder-width apart at shoulder height. This is the starting position.
- Bend your elbows and bring your chest toward the wall. Keep your elbows pointing away from your body at a 45-degree angle, rather than out to the side.
- As you press back to the starting position, push off hard, letting your hands leave the wall before coming back to it.
4. One-Leg Wall Push-Up
By decreasing your stability on the floor, your core and upper body will need to work harder to remain stable.
- Stand arm's distance from a sturdy wall with your feet under your hips.
- Place your palms on the wall, shoulder-width apart at shoulder height. Lift up your right foot so you're balancing on your left leg. This is the starting position.
- Bend your elbows and bring your chest toward the wall. Keep your elbows pointing away from your body at a 45-degree angle, rather than out to the side.
- Press back to the starting position.
- Repeat 5 times before switching sides.
5. One-Arm Wall Push-Up
This will require a lot more core engagement to keep your torso from turning or twisting.
- Stand arm's distance from a sturdy wall with your feet under your hips.
- Place your palms on the wall, shoulder-width apart at shoulder height. Lift up your left hand so you're balancing on your right hand, and place your left hand behind your back. This is the starting position.
- Bend your elbows and bring your chest toward the wall. Keep your elbows pointing away from your body at a 45-degree angle, rather than out to the side.
- Press back to the starting position.
- Repeat 5 times before switching sides.
More Push-Ups

Was this article helpful?
150 Characters Max
0/150
Thank you for sharing!
Thank you for your feedback!