The start of your yoga journey can feel overwhelming — class options are seemingly endless, and perhaps you're worried about preexisting injuries or pain. You may even wonder if you're fit enough to begin practicing.
The good news is that you don't have to be "fit" to practice yoga. However, beginner yogis should proceed with caution when performing poses that require a high degree of strength, mobility and focus. You'll encounter many different poses when beginning a yoga practice. Not all of them will be a great fit for your body.
Video of the Day
"Every person has individual anatomy that will dictate the postures that make sense and are accessible for them," says Jessie Lipkowitz, RYT, CPT, yoga teacher and owner of aUM Yoga in Ann Arbor. "The goal should be to find your fullest expression of each posture."
The following postures can be challenging for some beginners. Proceed with caution if you encounter these in class and they don't feel like a good fit for your body.
Tip
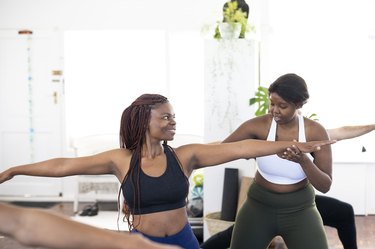
Ask for guidance and support if you're feeling insecure or uncertain. And if you have any injuries or other health conditions, consider seeking private instruction to make sure you're putting yourself in the best position for a successful — and safe — practice.
"There is no such thing as 'bad at yoga,' as long as you are entering into the postures progressively and safely with the guidance of an experienced teacher," Lipkowitz says.
1. Pigeon Pose (Eka Pada Rajakapotasana)
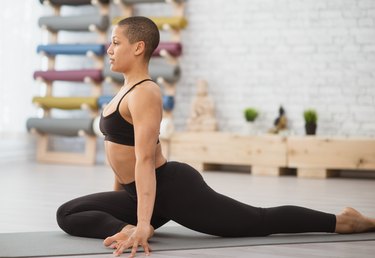
Pigeon pose is a powerful hip opener, but it may be too tough for some beginners. Excessively tight hips can make it difficult to get into position, and some might find this pose uncomfortable on their knees, says Tom Roth, RYT, CPT, yoga teacher and personal trainer.
If this pose is difficult for you, start by using props to modify your body position. Place a pillow or block underneath your hips, so you don't need to lower your legs all the way to the floor. You can also place yoga blocks under your hands or forearms to take some of the pressure off your hips.
If your knees are still bothering you, Roth suggests substituting a supine figure 4 stretch instead. You'll get a similar hip stretch without the pressure or strain on your knees.
Modification: Supine Figure 4 Stretch
- Lie on the floor on your back with your feet flat on the floor and knees bent.
- Cross your right ankle over your left knee.
- Wrap both hands around your left thigh and gently pull your leg toward your chest.
- Move your right knee away from you to feel a stretch in that hip.
- Hold, then repeat on the opposite side.
2. Wheel Pose (Dhanurasana)
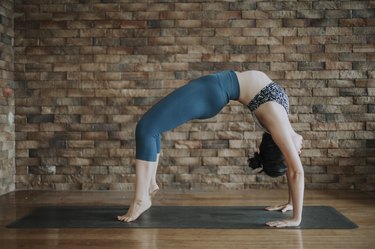
Wheel pose is a full backbend with hands and feet on the floor. You not only need to be able to fully extend your spine, but you also need strong arms and legs for support. Adequate wrist and shoulder mobility are also essential to help you properly distribute load and keep your joints safe.
"Backbends are a great release on the spine," says yoga teacher Robert Sanchez, RYT. "However, if we are not taught how to move into or out of the position correctly, we can herniate a disc over time or create permanent damage to the nucleus pulpous — the gel-like space between each vertebrae."
Sanchez suggests building full-body strength and mobility using different poses and body-weight exercises before attempting wheel pose. For example, try bridge pose, which teaches you to extend your hips and spine but is much easier to perform and reduces the demand on your upper body.
Modification: Bridge Pose
- Lie on your back, bend your knees and place your feet flat on the floor about hip-distance apart.
- Draw your feet in close enough to your hips that you can reach your heels with your fingertips.
- Press your palms into the mat next to your hips and, on an exhale, raise your hips up until they form a diagonal line from your knees to your shoulders.
3. Camel Pose (Ustrasana)
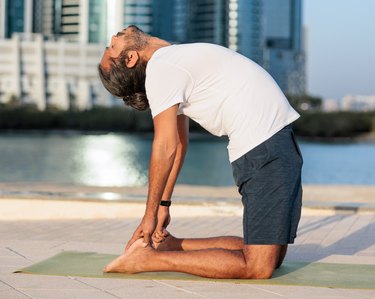
Camel pose is another backbend that requires a great deal of strength and mobility. "This pose requires a ton of spinal extension and isn't going to be very accessible for most sedentary folks," Roth says.
Modify camel pose by reducing how much you extend your spine. You can do this by placing your hands on your lower back or on yoga blocks instead of your feet. Keep in mind that the blocks should be taller than your feet to reduce the range of motion required.
If you choose to omit camel pose entirely, Roth suggests substituting a more gentle, supported backbend like fish pose to help you ease into spinal extension.
Modification: Supported Fish Pose
- Place two yoga blocks on your mat: one on the larger face so that it's short and can support your head and the other on the long side so that it can support your back.
- Lie down onto your back with your legs together and arms out to the side.
- Inhale as you arch your upper back slightly, coming onto the crown of your head (or as close as your mobility allows).
4. Dancer Pose (Natarajasana)
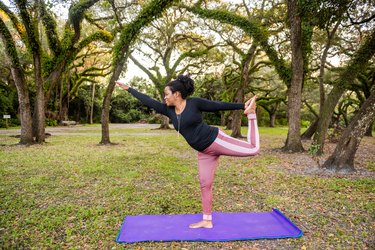
Dancer pose combines several physical elements that may be challenging for beginner. You must simultaneously balance on one leg, perform a backbend and reach behind your body with one arm.
"Most people will not have the shoulder mobility to do dancer pose at first," Roth says. He recommends using a strap to make it easier to get into position. This reduces the distance you'll need to reach your arm back behind you, making the pose more shoulder-friendly.
Modification: Dancer Pose With Strap
- Stand with your feet parallel, a few inches apart.
- Standing on your left leg, bend your right knee back so your right foot is behind you.
- Loop your right foot into one end of the strap, holding the other side with your right hand.
- Using your left arm as a counterbalance, lean forward as you kick your right foot into your right hand and lift your right foot back behind you.
Should Beginners Do Inverted Arm Balance Poses?
The final four yoga poses below aren't recommended for beginners for a few reasons. They're inversion poses and require a lot of upper-body and core strength, as well as balance, focus and mobility. They can also be challenging to come out of.
"If attempted and done incorrectly or unsafely, a practitioner could injure themselves," says says yoga teacher Dimokratia Michalopoulos, RYT. She suggests working toward these poses as long-term goals, rather than trying them right off the bat. Don't be in a rush to push your limits or jump to advanced poses before you're truly ready.
5. Crow Pose (Bakasana)
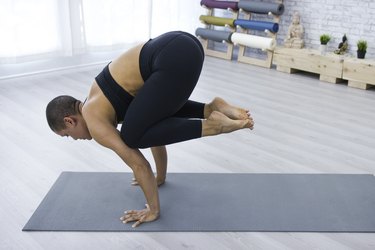
Crow pose is often the first arm balance pose yogis will attempt. It's a little easier than the three poses listed below, but it can still be quite challenging for anyone at the start of their yoga journey.
Michalopoulos has students work toward crow pose by first practicing malasana, also known as a yogi squat.
And if you're struggling to support your body during the crow pose, use a yoga block as a prop. The block can be positioned under your feet, head or chest. Another crow modification is to keep one foot on the floor or a block while you lift up the other leg.
Modification: Yogi Squat
- With your knees hip-distance apart and your feet turned slightly out, bend your knees and sink your hips down.
- Maintain length in your spine as you lift your sternum, open your chest and relax your shoulders away from your ears.
- Bring your hands into a prayer position, gently pressing your elbows against your inner thighs.
6. Shoulderstand (Sarvangasana)
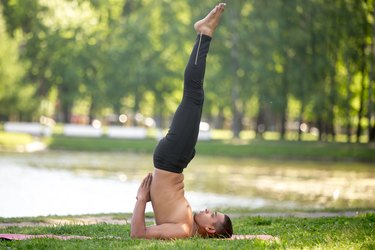
Shoulderstand can also be challenging for beginners if they aren't used to extreme neck flexion or placing their body weight directly onto shoulders. For those who still want to try, manipulating the body position can take a lot of the stress off the joints and help build more comfort and control in this posture.
One modification for shoulderstand is to place one or two yoga blocks underneath your hips and lower back. In this variation, your legs will still point upward, but your torso will only be slightly elevated off the ground. This reduces the pressure on your neck and shoulders and doesn't require as much core strength.
You can also make the shoulderstand pose a little easier on your neck and shoulders by placing folded blankets or a firm pillow underneath your shoulders. With your head slightly lower than your shoulders, you have a little more space for your neck.
Modification: Supported Shoulderstands
- For the first modification, begin by lowering your back slowly down to your yoga mat. Bend your knees and lift your glutes to form bridge pose.
- Place two yoga blocks under your low back/upper glutes. Lift your legs straight into the air for a modified shoulderstand.
- For the second modification, take a yoga mat or a blanket and roll it up tightly. Place it under your neck when lying on your back.
- With your arms and hands flat on the ground, lift your legs straight into the air, then place your hands on your lower back for support. From here you can continue to fold at the waist so your straight legs fold behind you.
- For the third (and most advanced) modification, start by lying flat on your back. Lift your legs straight up toward the ceiling, keeping your legs as straight as possible. As you begin to lift your back off the ground as well, use your hands to support your lower back.
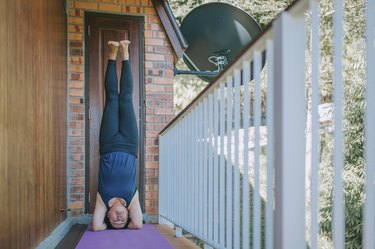
7. Handstand (Adho Mukha Vrksasana)
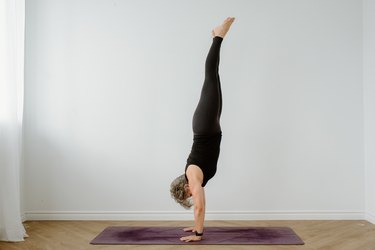
Handstands require a great deal of body control as well as strong arms, shoulders and core. Proper form becomes especially important, as you can injure yourself if you fall out of a handstand posture.
According to Sanchez, the best way to work up to performing full handstands is to use a wall to stabilize your body.
Modification: Handstand Progression
- Get into downward-facing dog: From all fours, curl your toes under and lift your hips up, straightening your legs. Place your longest finger 1 to 1.5 inches from the wall.
- Engage your core, then kick one leg up and use the wall to support yourself.
- Practice this 3 to 5 times with each leg.
- In time, you can work up to kicking both legs up against the wall.
8. Headstand (Sirsasana)
Because most people are unaccustomed to supporting load with their heads, headstands can also be challenging for beginner yogis. It's important to take your time and ease into this posture.
Nicole Velazquez, RYT, yoga teacher and owner of Ritual Hot Yoga — Lakeview in Chicago, uses a multi-step progression to teach headstand to her students. Beginners first practice planting the crown of their head on the mat with their hips toward the ceiling and feet on the ground.
As you get stronger, walk your feet closer to your elbows until your hips are directly above your shoulders. Next, alternate picking one leg up off the floor at a time. Throughout each progression, push your forearms into the ground and keep your back long to prevent placing too much weight onto your head and neck. (For a step-by-step breakdown of this progression, check out our headstand guide.)
With enough time and practice, some practitioners will be able to lift both legs to their chest and eventually overhead into a full headstand. However, this advanced variation may not be appropriate or even necessary for all people. Always seek the guidance of your teacher if you're unsure of what to do.
Modification: Legs on Floor
- Start on your knees and place either your forearms or hands in front of you on the mat. Plant the crown of your head on the mat.
- Tuck your toes and lift your hips, and then walk your feet close to your arms and hold.
- If you notice your shoulders collapsing, actively press the floor away.
Related Reading