How to Use Preserves to Make Strawberry Topping Sauce

Strawberry preserves are simple to find in any grocery store, and because they're already sweetened and thick, they're quite easy to make into a dessert sauce or topping. Pectin, a natural binding agent, keeps the preserves thick and will also give your sauce a desirable consistency. To ensure that you get the best taste from a sauce, use the highest-quality preserves you can find. Don't be afraid to splurge on an artisan or locally produced jar if you think that it contains the freshest, most flavorful berries, because you'll be rewarded with a fantastic topping.

Advertisement

Step 1

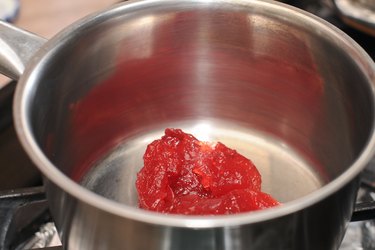
Scoop about 1/2 cup strawberry preserves from the jar to make enough sauce for four people. Place the preserves in a small saucepan.

Video of the Day

Step 2

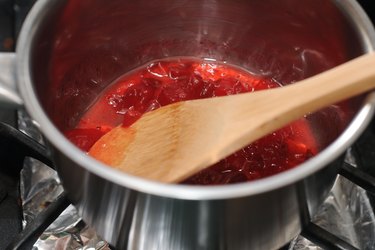
Heat the saucepan over low to medium heat on the stove, stirring occasionally with a wooden spoon.

Advertisement

Step 3

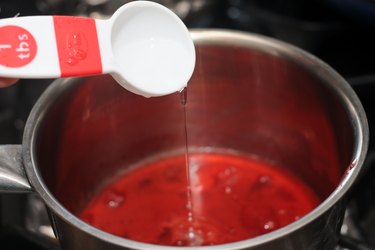
Add about 1 tablespoon of water to the pan of strawberry preserves after it has had a minute or two to grow warm. Stir the topping constantly, simmering over low heat, until the berries begin to break down and the sauce develops a thinner, pourable consistency.

Advertisement

Step 4

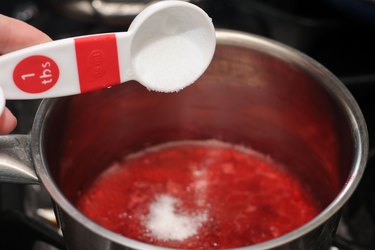
Take a small spoonful of sauce out of the pan and let it cool for a few seconds. Taste the sauce, and stir in up to 1 tablespoon sugar or honey if you'd like it to have more pronounced sweetness.

Advertisement

Step 5

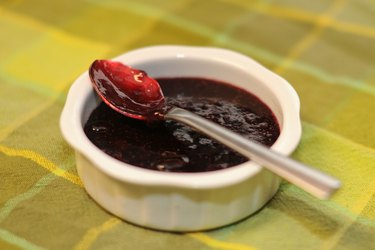
Turn off the heat when the sauce has reached the consistency you desire. Let it cool for 10 to 15 minutes or until it's still thin enough to pour but no longer piping hot. If the sauce thickens too much, simply reheat it on the stove for a minute or two.

Things You'll Need

  • Strawberry preserves

  • Water

  • Saucepan

  • Spoon

  • Stove

Tip

Preserves can be used on their own as a sweet topping if you’re pressed for time. The Food Network’s Emeril Lagasse suggests using plain strawberry preserves to top bread pudding, but you could also spoon them onto waffles, French toast, pancakes or muffins.

Combine fresh or frozen strawberries with your preserves to make an even more flavorful sauce. “Eating Well” magazine suggests tossing 1 cup fresh or frozen sliced berries with 1 scant tablespoon sugar and letting the mixture sit at room temperature for about 30 minutes. Pour it into the sauce with the preserves right before serving.

Warning

The sauce will be dangerously hot after it’s finished cooking. To make it cool more rapidly after you take it off the heat, you can transfer it to a nonreactive bowl or place the saucepan in the refrigerator for a few minutes.

Video of the Day

references

Nutritional Facts for Japanese Sweet Potato

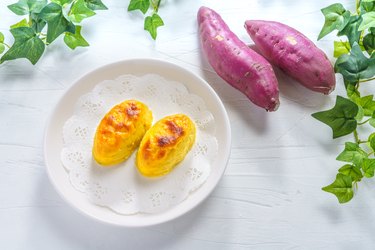
Japanese sweet potatoes have sweeter-tasting and softer flesh than most yams.
Image Credit: Wako Megumi/iStock/GettyImages

Japanese sweet potatoes, with their reddish-purple skin, are an alternative to the traditional sweet potato. Naturally low in fat and high in nutritional value, they are packed with health benefits. The sweet tuber is rich in antioxidants as well as heart-healthy minerals. In addition, the nutrients in Japanese sweet potatoes may help you lose weight, banish depression, improve your vision and control glucose levels.

Advertisement

About Japanese Sweet Potatoes

Japanese sweet potatoes are also known as Satsuma-imo.‌ They are botanically classified as ‌Ipomoea batatas‌ (from morning glory family), which includes many different varieties of sweet potatoes grown in Japan.

Small to medium in size, Japanese sweet potatoes are long, slender and irregularly shaped tubers. The semi-rough, textured skin is garnet-colored with a distinct purplish undertone. Once cooked, the mildly sweet-flavored soft flesh deepens to a golden, cream-colored hue with a dry, starchy texture.

Yams vs. Japanese Sweet Potatoes

Japanese sweet potatoes, also called a Japanese yam, are quite similar to American yams but possess a sweeter taste and softer flesh with a lighter yellow coloring. However, all varieties of sweet potatoes belong to the morning glory family, while yams are tubers related to lilies native to Africa and Asia, says Harvard T.H. Chan School of Public Health.

All varieties of sweet potatoes contain ‌similar nutritional profiles‌ but, depending on their color, some have a higher phenolic and carotenoid content. Yellow and orange sweet potatoes have a higher content than the purple and white ones.

Advertisement

Japanese Sweet Potato Calories

Japanese sweet potatoes provide 264 calories per 200 grams, which is the equivalent of one medium potato. Of the total calories in a sweet potato, 9.6 calories comes from protein, which is 2.4 grams. You need ‌protein‌ to build tissue including bones, muscles and skin.

The USDA recommends that 10 to 30 percent of your calories should consist of protein, which amounts to about 56 grams for men and 46 grams for women per day.

Advertisement

Japanese sweet potatoes contain only an insignificant amount of ‌fat‌ and ‌no cholesterol‌. Of course, if you eat your baked potato with butter or sour cream, you will increase the fat content. Try using herbs or spices and a dollop of yogurt to add flavor instead.

Carbs in Sweet Potato for Energy

About 95 percent of the ‌calories‌ in Japanese sweet potatoes come primarily from healthy complex ‌carbohydrates‌. Carbs are important for the production of energy needed for metabolic and physical processes. Carbs help fuel your brain, nervous system, cells and heart.

Advertisement

Advertisement

The USDA recommends that your intake of carbs be 45 to 65 percent of your daily caloric intake. Eating a Japanese sweet potato provides 63 grams or about 20 percent of your daily value.

Beneficial Fiber Content

One Japanese sweet potato offers 4.6 grams of ‌dietary fiber‌, which is the front-runner for keeping ‌your digestive system‌ healthy. Fiber is the part of food your body cannot digest. By absorbing water and adding bulk to increase the size and soften your stool, fiber helps ‌prevent constipation, hemorrhoids,irritable bowel syndrome, diverticulitis‌ and other gastrointestinal disorders.

Advertisement

A high-fiber diet may also be beneficial in reducing the risk of heart disease, obesity and diabetes, says the Mayo Clinic. In addition, conclusions from a 2019 study published in the International Journal of Food Sciences and Nutrition, found fiber in the diet reduced the incidence of ‌colorectal cancer,‌ perhaps from its role in increasing the weight of the stool.

USDA Dietary Guidelines say you should consume between 22.4 and 33.6 grams of fiber daily, depending on your gender and age.

Advertisement

High Content of Healthy Vitamins

Japanese sweet potatoes contain ‌most of the B vitamins‌ that your body needs for energy production and to maintain the proper functioning of your brain and nervous system. Each 200-gram medium potato contains the following B vitamins:

Advertisement

Sweet potatoes help your ‌immune system‌ with their ‌antioxidant capacity‌. Each Japanese sweet potato contains two potent antioxidants that neutralize potentially damaging oxidizing agents in your body and help reduce disease. These are:

Advertisement

Good Source of Essential Minerals

Japanese sweet potatoes are rich in healthy minerals, especially potassium, copper and manganese. The amounts, per potato, are as follows:

Minerals for Cardiovascular Health

Some important nutrients in Japanese sweet potato ‌benefit your heart‌ and may help to reduce your risk of cardiovascular disease. The National Institutes of Health suggests that eating a vegetarian diet high in ‌calcium, magnesium, potassium and fiber, and low in fat,‌ such as Japanese sweet potatoes, may result in ‌lower blood pressure.

Potassium to Protect Your Heart

The ‌potassium‌ content in Japanese sweet potato helps to maintain the fluid and electrolyte balance and cell integrity in your body. Potassium is also needed for the development and maintenance of your ‌nervous system and muscles,‌ including your heart.

By regulating the relaxation of the walls of your blood vessels, potassium helps to lower or maintain your ‌blood pressure‌. Harvard Health Publishing says potassium manages the conduction and transmission of electrical signals in your nervous system, which protects against ‌irregular heartbeat.

Calcium to Maintain Cholesterol

Calcium‌ in Japanese sweet potato is another mineral that helps reduce heart disease by decreasing the absorption of fat and lowering cholesterol levels. A deficiency of calcium may cause abnormal heart rhythms, warns the National Institutes of Health.

Advertisement

Magnesium to Help Blood Pressure

Magnesium‌ in Japanese sweet potato helps regulate blood pressure and blood sugar as well as maintain muscle and nerve function. Your blood vessels need magnesium to relax and to ‌transport calcium and potassium‌. The combination of the three minerals contributes to lessening your chance of developing ‌hypertension.

Improves Your Mood

Eating a sweet potato might help you chase away the blues. One of the important amino acids that make up the protein in Japanese sweet potatoes is a compound called ‌tryptophan‌. Japanese sweet potato contains 30 milligrams of tryptophan.

Tryptophan is the precursor of both serotonin and melatonin. Serotonin is a brain neurotransmitter that ‌regulates mood, sleep, appetite and pain‌. You will often find serotonin included as an ingredient in antidepressants. Melatonin in sweet potatoes has been shown to ‌promote sleep‌ and is used in sleep-aid medications.

A 2016 study examined the association of various levels of tryptophan on emotion and cognitive reaction. Findings, published in Nutrients, showed that low levels of serotonin in the brain are linked to impaired memory and ‌depressed mood.

Maintains Healthy Eyes

Japanese sweet potatoes, like all sweet potatoes, are a good source of ‌beta carotene‌ that your body converts to ‌vitamin A‌. Vitamin A is known to help ‌prevent dry eyes‌ and ‌night blindness‌. Vitamin A also helps reduce the risk of eye infections.

Sweet potatoes have a high content of ‌zeaxanthin along with its isomer ‌lutein‌. These fat-soluble antioxidant carotenoids. located in the retina of your eye, have been shown to prevent or delay the progression of chronic eye diseases such as age related ‌macular degeneration‌ and ‌cataracts‌, according to American Optometric Association.

Advertisement

Vitamin E‌ in Japanese sweet potatoes is also good for the health of your eyes and may reduce the ‌risk of cataracts‌, according to a meta-analysis, published in Public Health Nutrition in 2015.

Low on Glycemic Index

Choosing ‌low-glycemic foods‌ such as Japanese sweet potatoes, may help prevent obesity and chronic disease. The glycemic index (GI) rates how carbohydrate-based food raises blood glucose levels. Foods with a low-GI value (under 55) are slowly digested and absorbed, causing a slower and smaller rise in blood sugar levels.

Blood sugar spikes can cause your blood vessels to harden and narrow, which can lead to damage to your heart. Controlling blood glucose can help prevent and delay the onset of complications, including heart disease, stroke and damage to your nerves and kidneys, advises the American Diabetes Association.

GI Depends on Preparation Methods

The glycemic index of sweet potato depends on the cooking method. The more cooking and processing the potato goes through, the higher the glycemic index. The GI of a peeled sweet potato, ‌boiled‌, is low at 46. But a ‌baked‌ sweet potato has a GI of 94.

This is because, when subjected to the high heat of baking or frying, starches break down into sugars instead of remaining in a more complex form.

When you boil potatoes the temperature cannot go above the boiling point of water or 212 F. Baking is typically done at 350 F, which breaks down the starches more completely, making them easier to digest.

Good Food for People With Diabetes

Foods low on the GI index, such as boiled sweet potatoes, have a place in a healthy diet for people with diabetes. This is evidenced in a 2018 systematic review that analyzed the effect of glycemic diets in patients with Type 2 diabetes.

The findings, published in Nutrients, reported that low-GI diets are more effective in controlling fasting blood glucose levels compared with a higher-GI diet for people with diabetes.

Helps With Weight Loss

In addition to being ‌fat-free with a low GI rating,‌ the high content of ‌dietary fiber‌ in Japanese sweet potatoes may help you ‌stay on your weight-loss plan‌. Fiber is filling, without adding significant calories. This feeling of fullness is ‌satiating‌ and may help you control your intake of food and prevent overeating.

With the ‌high-carb content‌ of Japanese sweet potatoes you might think they would cause you to gain weight. However, a 2018 meta-analyses of clinical trials showed diets containing foods ‌high in carbohydrates and fiber, but with a low glycemic index, and low in fat‌ are associated with weight loss and a decrease in body composition.

In the trial, people with overweight were given a plant-based high-carb, low-fat, low GI diet. Results, published in the journal Nutrients, found the study group had overall loss of body weight and body fat after 16 weeks. In addition, there was a decrease in insulin resistance. This effect was without adding any exercise.
references

How to Get Buttercream Frosting Stiff

The right consistency of buttercream frosting depends on numerous factors.
Image Credit: letterberry/iStock/GettyImages

There are few indulgences as satisfying as a slice of cake or a holiday cookie covered in buttercream frosting. If you're trying to make stiff buttercream icing for piping roses, ruffles or other shapes, here's a stiff buttercream recipe along with some tips that can help.

Advertisement

Read more: 13 Healthy Baking Tips That Will Transform Your Food

Stiff Buttercream Recipe

The American Egg Board (AEB) lists a recipe for buttercream frosting. For this stiff buttercream recipe, you will need:

  • 1 pound or 4 cups of powdered sugar, sifted
  • 5 tablespoons of water
  • 1/2 stick or 1/4 cup of butter at room temperature
  • 1 egg yolk
  • 1 teaspoon of vanilla extract

Advertisement

Follow these steps to make stiff buttercream icing for piping roses or other shapes:

  • Cook the egg yolk with some sugar: Put 3 tablespoons of the powdered sugar, 2 tablespoons of the water and the egg yolk in a saucepan and stir until smooth. Cook the mixture over medium heat. Stir it constantly, until it starts to bubble.
  • Let it cool: Take the pan off the heat and let it rest for at least 15 minutes. The mixture should cool down to room temperature so that it doesn't melt the butter when you add it in, because that will soften the frosting.
  • Beat the frosting: Beat the butter using the beater's high speed setting until it is smooth. Add 2 tablespoons of water, 1 cup of the powdered sugar and the sugar and egg yolk mixture. Gradually add the rest of the powdered sugar. If required, you can add 1 teaspoon of water at a time to adjust the consistency. Once the frosting reaches a consistency that is thick enough to spread, add the vanilla and beat it until it is smooth.
  • Add colors and flavors (optional): The AEB says you can flavor the buttercream frosting with extracts or lemon or orange zest, or add food dyes to the frosting to give it color.

Advertisement

According to the USDA, a 2-tablespoon serving of buttercream frosting provides 140 calories, 19 grams of carbs, 7 grams of fat and no protein. Given that it has a lot of sugar and is very calorie-dense, it is best enjoyed occasionally, in limited quantities. If you're willing to experiment with a healthier alternative to buttercream frosting, try our Low-Sugar Sweet Potato Chocolate Frosting.

Read more: No Bake Vanilla Protein Cake

Advertisement

Advertisement

Adjusting the Buttercream Frosting’s Consistency

Getting the consistency of frosting right is tricky. On the one hand, you need stiff buttercream icing for piping roses, ruffles or other shapes; if the icing is too soft, it won't hold its shape and the ruffles and flowers will either droop or melt and slide right off the cake. On the other hand, if the icing is too stiff, it will be difficult to pipe and the edges of the ruffles and roses will start to crack.

Advertisement

According to the James Beard Foundation, you may not need to use all the sugar specified in a recipe; in the last stages of beating the frosting, you should add sugar and water gradually, adjusting them until you reach the desired consistency. Adding sugar makes the frosting stiffer whereas adding water softens it. You can test the frosting and adjust it by adding more sugar or water as required.

However, be careful not to beat the frosting too much. This could cause air bubbles to form in the frosting and when they burst they could make your flowers and ruffles look uneven.

Advertisement

Be warned though, sometimes even if you do everything right, hot or humid weather could sabotage your frosting, causing it to be softer than you would like.

Read more: This Low-Sugar Chocolate Frosting Requires Only TWO Ingredients

Advertisement

Advertisement

references

How to Cook Dried Noodles for Chow Mein

Authentic chow mein is a fairly simple dish made of noodles, a good protein source — such as thinly sliced fish, chicken, pork or beef — and a sauce to pull it all together. Here's how to prepare dried chow mein noodles two different ways: boiling and steaming.

Boiling Dried Noodles for Chow Mein

Things You'll Need

  • Large pot

  • Salt

  • Dried chow mein noodles

  • Wooden spoon or chopsticks

  • Colander

  • Canola or vegetable oil

Step 1

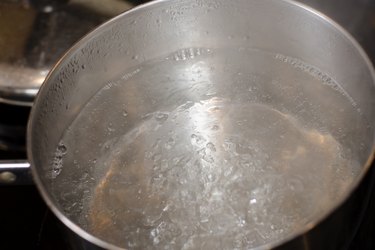
Bring a large pot of salted water to a rolling boil.

Advertisement

Step 2

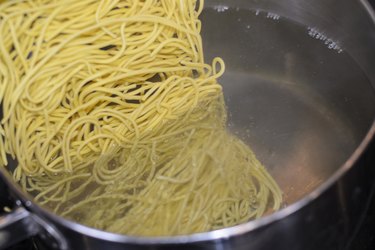
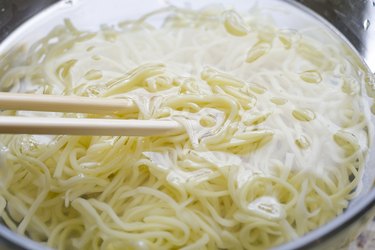
Add dried chow mein noodles and stir them carefully to separate them.

Advertisement

Step 3

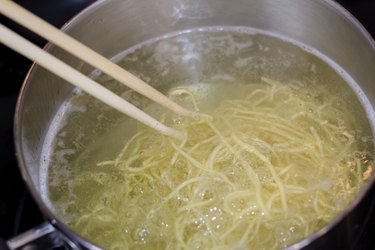
Boil the noodles for 2 to 4 minutes, or whatever the dried noodle manufacturer's instructions recommend.

Advertisement

Warning

Do not overcook dried chow mein noodles or they will fall apart.

Step 4

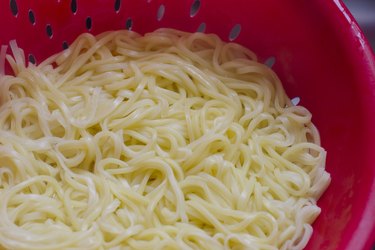
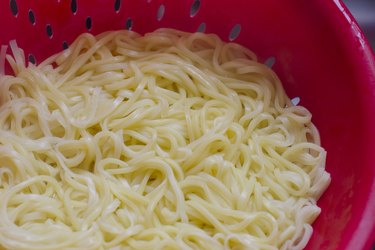
Stir the noodles again to separate them and drain them in a colander. Toss the noodles with oil to keep them from sticking together.

Advertisement

Steaming Dried Noodles for Chow Mein

Things You'll Need

  • Large pot

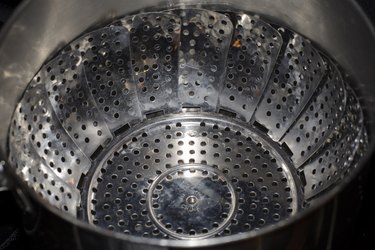
  • Steamer basket

  • Nonstick cooking spray

  • Colander

  • Wooden spoon or chopsticks

  • Canola or vegetable oil

Step 1

Spray a steamer basket with a light coating of nonstick cooking spray. Place the oiled steamer basket in a large pot.

Advertisement

Advertisement

Step 2

Add enough water to the pot to fill the space below the bottom of the pot and the bottom of the steamer basket.

Advertisement

Step 3

Bring the water to a boil.

Step 4

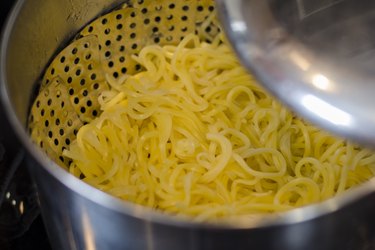
Rinse the noodles in cool water and place the softened noodles in the steamer basket. Cover the pot and steam the noodles for 2 to 3 minutes.

Advertisement

Step 5

Drain the noodles without turning the heat off under the pot and the steamer basket.

Advertisement

Step 6

Rinse the noodles in hot water to remove the starch. Return them to the steamer basket. Steam them for another 2 to 3 minutes. Turn the noodles out into a bowl and splash them with a bit of vegetable or canola oil.

Warning

Do not overcook dried chow mein noodles or they will fall apart.

Advertisement

Advertisement

references

Nutritional Content of Pears vs. Apples

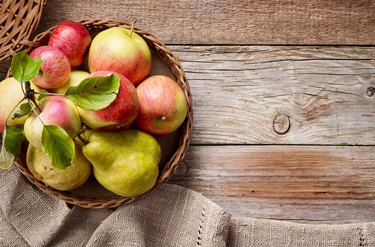
Apples and pears are popular fruits.
Image Credit: Magone/iStock/GettyImages

Fruits are one of the most popularly consumed types of foods in America. Although the benefits of antioxidant-rich fruits like berries are well known, commonly consumed fruits, like the pear, apple and banana, have many nutritional benefits as well. The Dietary Guidelines for Americans recommends consuming fruits on a daily basis as these foods are good sources of various vitamins, minerals and antioxidants.

Advertisement

Read more: 19 High-Fiber Foods — Some May Surprise You!

The Nutritional Value of Apples

There are a variety of different apples produced around the world. Although you're probably most familiar with popular types of apples like Red Delicious, Golden Delicious, Granny Smith and Fuji, most people have tried a variety of other types of apples including Honeycrisp, Macoun, Cortland, Cripps Pink and Gala apples depending on where you live.

Advertisement

The average Red Delicious apple can range in size from 158 to 260 grams, while the average Granny Smith apple ranges from 144 to 206 grams. According to the USDA, a typical 200-gram apple is usually around 117 calories, with around 0.4 grams of fat, 0.75 grams of protein and about 28 grams of carbohydrates. Around 10 grams of these carbohydrates are sugars. In one 200-gram Granny Smith apple, you can find:

  • 5.6 grams of fiber
  • 6 percent of the daily value (DV) for potassium
  • 6 percent of the DV for vitamin A
  • 6 percent of the DV for vitamin K
  • 6 percent of the DV for copper

Advertisement

Apples also contain small amounts (between 1 and 4 percent) of most other essential vitamins and minerals, including vitamin A, B-complex vitamins, phosphorus, iron and magnesium. Although there are various types of apples, their nutritional differences are minimal. For instance, the nutritional values for Granny Smith and Red Delicious only differ by a single percent at most.

The Nutritional Value of Pears

Like apples, pears come in a variety of different types. They are roughly the same size as apples, with an average pear ranging between 140 and 230 grams. Pears come in a range of varieties, just like apples.

Advertisement

Just as you wouldn't say a Red Delicious is similar in flavor or texture to a Granny Smith, you wouldn't compare your average pear to an Asian pear. According to the USDA, in 200 grams of your average pear, you'd find 114 calories, 0.2 grams of fat, 0.8 grams of protein and about 30 grams of carbohydrates. More than half of this (about 20 grams) are sugars. In a 200-gram pear, you would find:

Advertisement

  • 6.2 grams of fiber
  • 18 percent of the DV for copper
  • 10 percent of the DV for vitamin C
  • 8 percent of the DV for vitamin K

Advertisement

Pears also contain a small amount (between 1 and 4 percent) of a variety of other nutrients, including calcium, iron, potassium, magnesium, phosphorus, manganese, B-complex vitamins, vitamin E.

Unlike apples, differences between pears can be much more extreme. Asian pears have fewer calories than your average pear, with 84 calories per 200-gram pear. While Asian pears have around the same amount of fat and protein, they have just 21.4 grams of carbohydrates per 200-gram pear. This amount contains more fiber (7.2 grams) and less sugar (14.2 grams) compared to your average pear. A 200-gram-sized Asian pear has:

Advertisement

  • 6 percent of the DV for potassium
  • 12 percent of the DV for copper
  • 6 percent of the DV for manganese
  • 8 percent of the DV for vitamin C
  • 8 percent of the DV for vitamin K

Asian pears also contain small amounts (between 1 and 4 percent) of other nutrients, including magnesium, phosphorus, B-complex vitamins and vitamin E.

The Nutritional Value of Bananas

Bananas have the most calories and macronutrients compared to apples and pears. According to the USDA, there are 178 calories in a 200-gram banana, with 0.6 grams of fat, 2.2 grams of protein and 45.6 grams of carbohydrates. From these carbohydrates, 14.4 grams are sugars and 5.2 grams come from fiber. In 200 grams of banana, you would find:

Advertisement

  • 16 percent of the DV for potassium,
  • 12 percent of the DV for magnesium
  • 18 percent of the DV for copper
  • 24 percent of the DV for manganese
  • 20 percent of the DV for vitamin C
  • 6 percent of the DV for thiamin (vitamin B1)
  • 12 percent of the DV for riboflavin (vitamin B2)
  • 8 percent of the DV for niacin (vitamin B3)
  • 14 percent of the DV for vitamin B5
  • 44 percent of the DV for vitamin B6
  • 10 percent of the DV for folate (vitamin B9)

Advertisement

Bananas also contain small amounts (between 1 and 4 percent) of other nutrients, including vitamin E, vitamin A, selenium, zinc, phosphorus and iron. Compared to pears and apples, bananas have the most vitamin and minerals.

Advertisement

According to a May 2014 study in the Nutrition Journal, bananas also have more antioxidants compared to apples and pears, making the nutritional benefits of eating bananas quite obvious. However, another May 2014 study in the Journal of Agricultural and Food Chemistry disagreed, showing that apples had more antioxidants than bananas, but that bananas had more than pears.

You should also be aware that bananas tend to be smaller in size compared to apples and pears. Since an average banana ranges between 81 and 152 grams, you'd probably have to consume two small-to-medium sized bananas in order to obtain this amount of nutrients.

Read more: 10 Tricks to Save Money and Waste Less of Your Fresh Fruits and Veggies

Consuming Pears, Apples and Bananas

Regardless of your choice of fruit, all of them are considered to be healthy. According to the Dietary Guidelines for Americans, most people don't consume enough fruits. However, consumption of plant-based foods, like vegetables and fruits, can help reduce your risk of chronic diseases and certain types of cancer.

The Dietary Guidelines recommends consuming about 2 cups of fruit a day. A cup of these fruits is equivalent to about:

  • 150 grams of sliced banana
  • 140 grams of sliced pear
  • 109 grams of sliced apple

This essentially means a large banana and half an apple or pear could easily allow you to meet your daily recommended fruit consumption. Juices, smoothies, canned and dried fruits can all contribute to your daily fruit consumption, too. However, whole, fresh fruits are considered to be the healthiest as they are rich in fiber and lack any added sugars. According to a May 2014 in the Nutrition Journal, whole fruits may also contain more antioxidants than cooked or preserved fruits.

Advertisement

Advertisement

references

How to NuWave Steaks

The NuWave Oven offers a fast and convenient cooking approach, similar to a microwave, but delivering better and healthier results.
Image Credit: molishka1988/iStock/GettyImages

The NuWave Oven offers a fast and convenient cooking approach, similar to a microwave, but delivering better and healthier results. When using a NuWave, steak is penetrated with a specific kind of heat, ensuring that the inside is fully cooked without burning the outside.

Advertisement

What Is a NuWave?

The NuWave is an infrared oven that uses three different systems simultaneously: infrared, which penetrates food, conduction — like a conventional oven, and convection, which circulates hot air around the food. There are some unique benefits to a NuWave, which go beyond those associated with a microwave or conventional oven. You can crisp the crust on your leftover pizza, boil an egg in four minutes or cook a frozen rib roast under two hours.

Advertisement

This cooking device doesn't require the same preheating cycle that a traditional oven does, which means you can prepare your food up to 70 percent faster. As a result, you're also using up to 75 percent less energy.

The NuWave also has a triple cooking feature, allowing you to prepare multiple foods at the same time. The oven is relatively easier to clean compared to tradition ovens, but you have to clean it more often — ideally, after every use.

Advertisement

Read more: How to Cook Steak on a Baking Sheet

Prioritize Food Safety

Whether it be on a grill, in an oven or in a NuWave, it's important to prioritize food safety when handling and cooking meat. Although steak is safer to eat in its raw form than chicken, it's still not 100 percent safe.

Advertisement

According to the Cleveland Clinic, meat can contain harmful bacteria, such as E. coli or salmonella, which may cause food poisoning. There are minimum temperature requirements based on what type of meat you cook:

  • Ground beef must be heated at a temperature of 160 degrees Fahrenheit. Remember, you cannot serve any ground meat medium-rare because the grinding process allows germs and bacteria to easily penetrate the meat.
  • Steaks, roasts and pork should be heated to 145 F. People often enjoy their steaks at different temperatures, such as medium-rare or well done. You have a bit more flexibility with the internal temperature of steaks than you do with ground beef, but for safest consumption, the internal temperature should reach 145 F.
  • Poultry must be heated to 165 F. There are really no exceptions here as undercooked chicken can cause severe food poisoning.

Advertisement

The Centers for Disease Control and Prevention (CDC) states that food poisoning may range from mild to severe, depending on what germs or bacteria you ingested. Symptoms may include upset stomach, nausea, vomiting, diarrhea and fever.

Advertisement

Read more: How to Cook a Tender Steak on the Stove

How to Cook a NuWave Steak

There are many different ways to cook steak, even in a NuWave. For a tasty dish, try our Skirt Steak with the Best Chimichurri Sauce Ever recipe, which has only 502 calories and a whopping 32 grams of protein per serving.

Advertisement

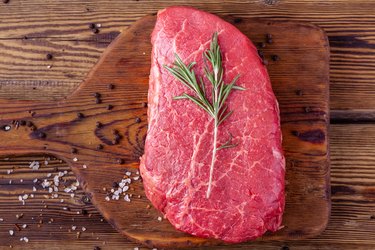
For an easy meal, remove the meat from its packaging and pat it dry with paper towels. Rub the exterior with olive or vegetable oil, salt, pepper and your favorite steak seasoning.

Unlike grills, you have to clean the NuWave cooking rack every time you use it. Insert the cooking rack in your NuWave oven and place the steaks side-by-side on the rack, making sure they don't touch each other. Close the oven by placing the NuWave dome cover over it, turning it clockwise until it locks, and then locking the handles on both sides.

Advertisement

Set the power level to high and cook the meat for five to six minutes on each side. Depending on how you like your meat, you may want to cook it for a bit longer.

Although some people may say they can tell when their meat is done just by looking at it, you can never be sure without using a meat thermometer. The USDA states that there is actually a difference between your meat being "done" and being "safe." Meat is only safe when it has been cooked to a high enough temperature to kill off the remaining bacteria.

Advertisement

Remember to test it with a thermometer to make sure it has reached the correct internal temperature — in this case, that should be at least 145 F. Next, remove the steak from the oven, place it on a platter, cover it for five minutes and enjoy!

Advertisement

Advertisement

references

How to Meal Prep a Week’s Worth of Filling Breakfasts With Zero Added Sugar

Livestrong.com may earn compensation through affiliate links in this story. Learn more about our affiliate and product review process here.
Rather than falling prey to sugary yogurts and pastries, try your hand at these zero-added-sugar breakfasts.
Image Credit: NataBene/iStock/GettyImages

Our Breakfast Meal Prep series streamlines mornings by giving you the shopping lists and recipes you need to prep easy, nutritious breakfasts for the whole week.

We eat a lot of sugar. And many times, it's likely unknowingly.

Advertisement

Some of the top sources of added sugar in our diet are sweetened yogurt, breakfast bars, flavored instant oatmeal, and sugary pastries and cereals, according to the Harvard T.H. Chan School of Public Health.

What do all of these have in common? They're breakfast foods.

Get this: The average American eats 88 grams, or 22 teaspoons, of added sugars every day (and that amounts to an extra 350 calories per day!).

Advertisement

But while we likely don't take in those 88 grams all at breakfast, these highly processed sweetened breakfast foods certainly provide ample opportunity.

Don't resort to or settle for these foods because you're running late or didn't prepare in advance. By meal prepping, you take the guesswork and, well, most of the work out of making breakfast.

Advertisement

Try these three low-sugar breakfast recipes to get started — you only need eight ingredients to make all three! The recipes have 0 grams of added sugar and less than 25 grams of total sugar per serving.

Related Reading

What You'll Need

This week, you'll be making Zucchini Fritters With Egg, Cinnamon-Apple Chia Bowl With Walnuts and Apple Zucchini Chia Pancakes.

Advertisement

Grocery List

These low-sugar breakfasts will last you the whole week and all you need are eight ingredients (and a few more common staples, such as oil, you probably already have at home) to make all three recipes.

Either buy these online or shop for them at your local grocery store. Click here for a printer-friendly version of this week's grocery list!

Advertisement

Advertisement

Meal Prep Containers

Here are some of our go-to meal prep containers that are great for packing these meals properly.

Advertisement

  • Pyrex Simply Store 3-cup Rectangular Glass Food ($11.13, Amazon.com)
  • OXO 2-cup Smart Seal Glass Round Container ($8.99, OXO.com)

Recipes

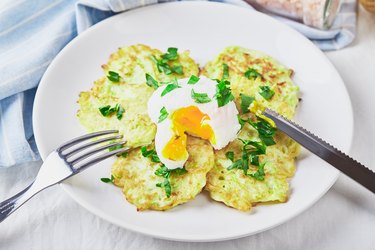
1. Zucchini Fritters With Egg

Eggs and almond flour are the main sources of protein in this dish.
Image Credit: Irrin0215/iStock/GettyImages

Fritters are typically deep-fried and drenched in oils that are less than good-for-you. Here, we just pan-fry them so you get the flavor without all of the extra fat.

Advertisement

We kept the sugar count low by using almond flour compared to a typical flour. Each serving has about 5 grams of natural sugar and 0 grams of added sugar.

Recipes yields 3 servings for 3 days of the week

  • Prep: 20 minutes
  • Cook: 14 minutes
  • Total: 35 minutes

Advertisement

Ingredients

  • 4 cups shredded zucchini (about 5 medium zucchini)
  • 2 scallions, finely chopped
  • 5 eggs, divided
  • 1/2 teaspoons oregano
  • ½ teaspoon garlic powder
  • ¼ teaspoon salt
  • ¼ teaspoon ground black pepper
  • ¼ cup almond flour
  • 1 ½ tablespoons olive oil

Instructions

Advertisement

  1. Place shredded zucchini in a bowl and sprinkle with salt. Combine and let set for 5 to 10 minutes. This allows the water to be drawn out from the zucchini.
  2. Next, place the zucchini in a nut milk bag or paper towel and squeeze out the liquid.
  3. In another bowl, combine the scallions, two eggs, seasonings and flour. Mix until well-combined. Add the zucchini to the bowl once ready, and combine.
  4. Place a large saucepan over medium-high heat and coat with 1 ½ tablespoon olive oil. Once the oil is hot, add the fritters. Flatten the fritters with the back of the spatula so they're as thick as a pancake. Flip once the edges start to brown, about 4 minutes. Flatten again and let cook for another 3 to 4 minutes.
  5. When ready to eat, cook the remaining 3 eggs as desired. Set aside. Microwave the fritters for 1:30 to 2:30 minutes. Add egg on top of bowl.

Tip

This recipe makes three servings, so go ahead and store the fritters in your airtight meal prep container for two to three days in the fridge — or up to three months in the freezer.

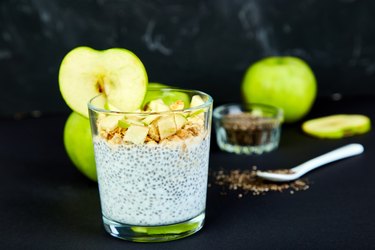
2. Cinnamon-Apple Chia Bowl With Walnuts

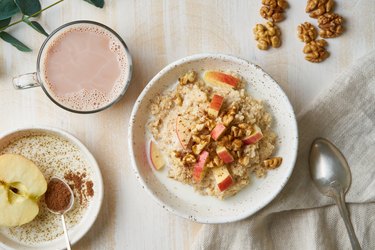
You'll get a good dose of protein from this meal thanks to the milk, walnuts and chia seeds.
Image Credit: bondarillia/iStock/GettyImages

Oftentimes, when fruit is added to your oatmeal or chia bowl, it comes with brown sugar, or in some cases, a sugary syrup.

In this recipe, we used cinnamon, which provides some sweetnees without any added sugar. Each serving has 22 grams of natural sugar (coming from the apple and dairy milk) and 0 grams of added sugar.

Pro tip: To cut down on sugar even more, opt for an unsweetened dairy-free milk alternative for this recipe.

You'll love the texture of the pudding the chia seeds and milk after they've soaked for hours.

Recipe yields 2 servings for 2 days of the week

Advertisement

  • Prep: 5 minutes
  • Bake: 0 minutes
  • Total: 8 hours

Ingredients

  • 1/2 cup chia seeds
  • 1/4 teaspoon cinnamon
  • 2 cups + 2 tablespoons milk or unsweetened dairy alternative (soy or pea milk)
  • 1/4 cup chopped walnuts
  • 1 apple

Instructions

  1. In a bowl, combine the chia seeds, cinnamon and milk. Mix well until all clumps disappear.
  2. Place in the fridge overnight.
  3. Before eating, finely chop half of an apple and add it to the chia bowl. Sprinkle with more cinnamon as desired.

Since this recipe yields two servings, you can dole out half for breakfast and save the other serving in a meal prep container for another day. It can keep in the fridge for about 5 days.

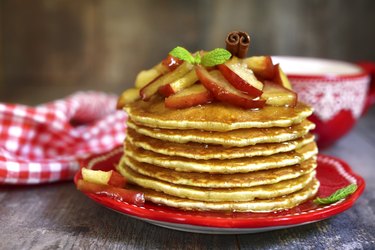
Apple Zucchini Chia Pancakes

This recipe sneaks in mild-tasting zucchinis so you can start your day with some good-for-you veggies.
Image Credit: Lilechka75/iStock/GettyImages

By adding zucchini to the base and opting for almond flour, we're keeping the total amount of sugar much lower than you'd find with traditional pancakes.

Each serving clocks in under 20 grams of natural sugar and zero added sugar — and if you opt for unsweetened dairy-free milk, you'll further cut down that sugar count.

Chia seeds, eggs, milk and almond flour help to balance this dish out by providing a healthy dose of protein.

Recipe yields 2 servings for 2 days of the week

  • Prep: 15 minutes
  • Bake: 20 minutes
  • Total: 35 minutes

Advertisement

Ingredients

  • ½ apple, peeled and shredded
  • 3/4 cup shredded zucchini (about 1/2 medium zucchini)
  • ½ cup milk or plant-based milk alternative
  • 1 cup + 2 tablespoons almond flour
  • 2 tablespoons olive oil
  • 1 egg
  • ¼ teaspoon vanilla extract
  • 2 tablespoons chia seeds
  • ½ teaspoon baking soda
  • ¼ teaspoon cinnamon

Topping

  • 1 apple, peeled and shredded
  • ½ tablespoon chia seeds
  • 1/4 teaspoon cinnamon

Instructions

  1. Shred apple and zucchini and add to a bowl.

  2. Add milk, olive oil, eggs and vanilla to a bowl and stir. Once it's well-combined, slowly add flour, chia seeds, baking soda and cinnamon and mix until lumps are removed.

  3. Heat griddle over medium-high heat and spray with non-stick spray or coat well with olive oil.

  4. Once the griddle is hot, add the batter in small portions, about the size of the palm of your hand. Once the edges begin to bubble, about 5 minutes, flip the pancake. Let cook for another 3 to 5 minutes.

  5. In a small saucepan over medium heat, add shredded apples, chia seeds and cinnamon. Stir until the apples soften and the sauce thickens. Add a tablespoon or two of water if needed.

Tip

Store your pancakes in a meal prep container for two to three days in the fridge or up to three months in the freezer.

You'll want to store the apple chia sauce separately to keep the pancakes from getting mushy.

Click below to pin and save these recipes for later.

Image Credit: LIVESTRONG.com Creative

Advertisement

Advertisement

references